Mirepoix

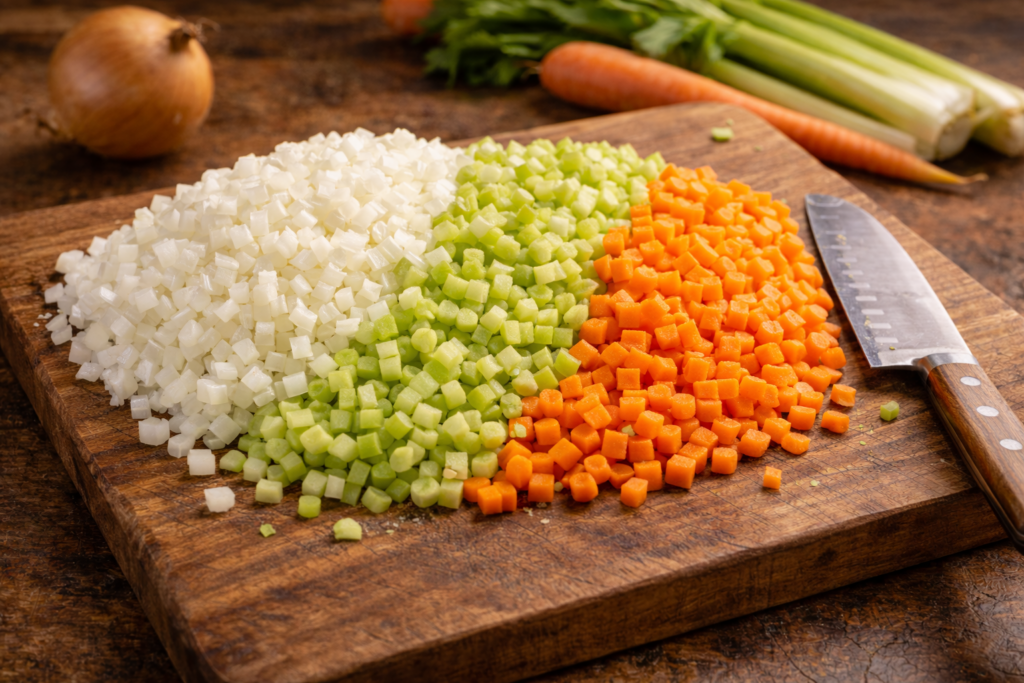
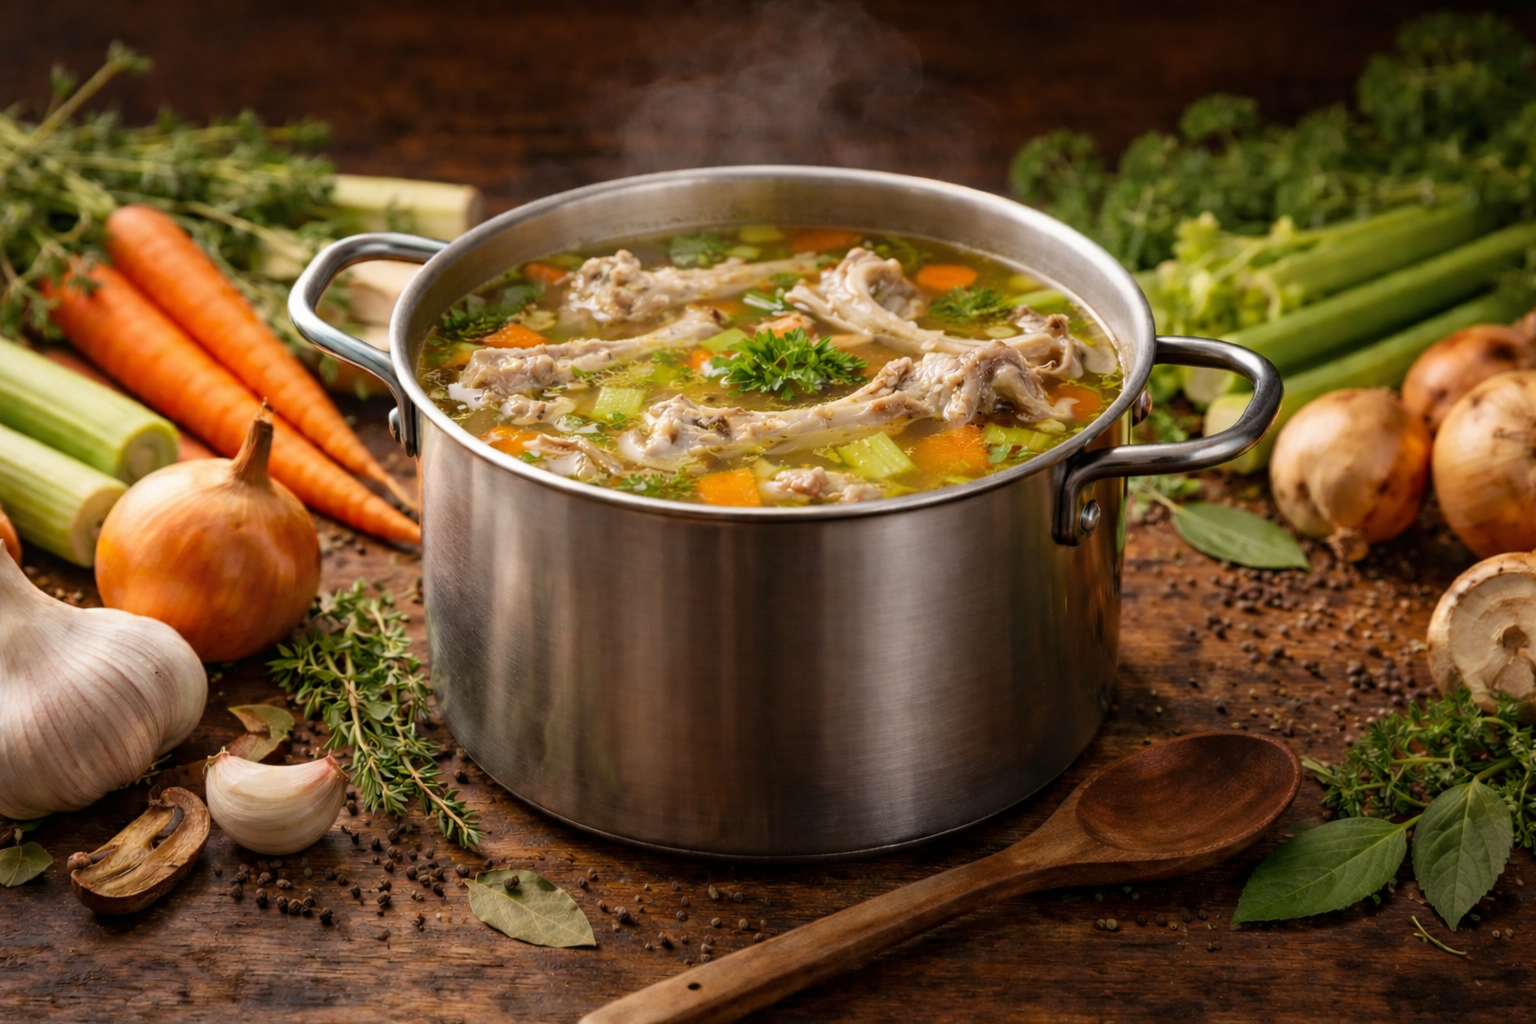
Mirepoix is the quiet starting point behind countless dishes—onion, carrot, and celery cooked low and slow to build depth from the ground up. It’s less about the ingredients themselves and more about how they’re handled, setting the tone for everything that follows.

Mirepoix

What It Is and Where It Comes From

Pronounced meer-PWAH, mirepoix is the classic French combination of onion, carrot, and celery—traditionally in a 2:1:1 ratio—used as the starting point for everything from soups and stocks to braises and sauces. The name traces back to Charles Pierre Gaston François de Lévis, the Duc de Mirepoix—whose chef de cuisine is credited with popularizing the aromatic base in 18th-century France by naming it in honor of his patron.

At its core, mirepoix is about building flavor early, before anything else has a chance to define the dish. The vegetables themselves are simple, but once they’re cut and gently cooked, they begin to shift—softening, sweetening, and losing their edges. By the time you move on to the next step, they’re no longer three separate ingredients. They’ve become a base. You’ll see versions of this idea across cuisines—different vegetables, different fats, different directions—but the role is always the same: establish balance from the start so everything that follows has somewhere to land.

How to Prepare It

Mirepoix doesn’t require perfect knife work, but it does benefit from consistency. The size of the cut should reflect how it’s being used. Larger pieces make sense in stocks or broths where everything will be strained out later. Smaller dice work better when the mirepoix stays in the dish, softening into sauces, stews, or braises.

Once it hits the pan, the focus shifts to heat and timing. Mirepoix is cooked gently—low to medium-low, usually in butter or a neutral oil, depending on the direction of the dish—butter for richness and roundness, oil when you want a cleaner base or higher heat tolerance. The vegetables are given time to release moisture and soften without taking on color. The goal isn’t browning. It’s that point where the onion turns translucent, the carrot loses its firmness, and the celery settles into the background.

Push the heat too hard, and that shift never quite happens. The vegetables cook, but they don’t relax, and the flavor stays a step short of where it should be. Once you move past that gentle phase and introduce color, you’re no longer building a mirepoix—you’re moving into something deeper, closer to a roasted or fond-driven base. Given a little time, though, everything evens out and the base starts to feel cohesive.

Why It Matters

Mirepoix doesn’t stand out, but it sets the tone for everything that follows. It’s the first point where separate ingredients begin to behave like a single thing—where sweetness, aromatics, and structure start to settle into place instead of competing for space. Given the time it needs, it softens the edges before they ever reach the rest of the dish. The onion loses its sharpness, the carrot rounds things out, the celery brings just enough lift to keep it from feeling heavy. By the time liquid is added or heat is increased, that balance is already in motion.

It also carries forward in ways that aren’t always obvious. A well-built mirepoix doesn’t just sit at the bottom of the pan—it moves through the entire dish, shaping how flavors layer, how aromas open up, and how everything finishes on the palate. When it’s right, you don’t notice it. You just notice that the dish feels complete.

Mirepoix

Pronounced meer-PWAH, mirepoix is the classic French combination of onion, carrot, and celery—traditionally in a 2:1:1 ratio—used as the starting point for everything from soups and stocks to braises and sauces.
Print Pin Rate
Category: HARVEST
Cuisine: French
Course: Cooking Base
Keyword: Carrot, Celery, Onion
Prep: 15 minutes
Cook: 10 minutes
Total: 25 minutes
Servings: 4 servings
Calories: 100kcal
Author: TastyDaddy

Ingredients

Instructions

Washing & Prepping Vegetables

  • It is very important to thoroughly wash and dry 2 medium yellow onion, 4 stalks celery, and 3 large carrots before starting to cut.
  • Peel washed onion and remove tough outer layers of onions. Remove both root and leaf ends of washed celery stalks. Trim top of carrots. If carrots still appear a bit dirty after washing, you can give them a quick peel; be sure to rewash them after peeling.
  • TIP: If onion peels, celery trimmings, and carrot tops are completely dirt-free, save them in your freezer scrap bag to use in stocks and broths.
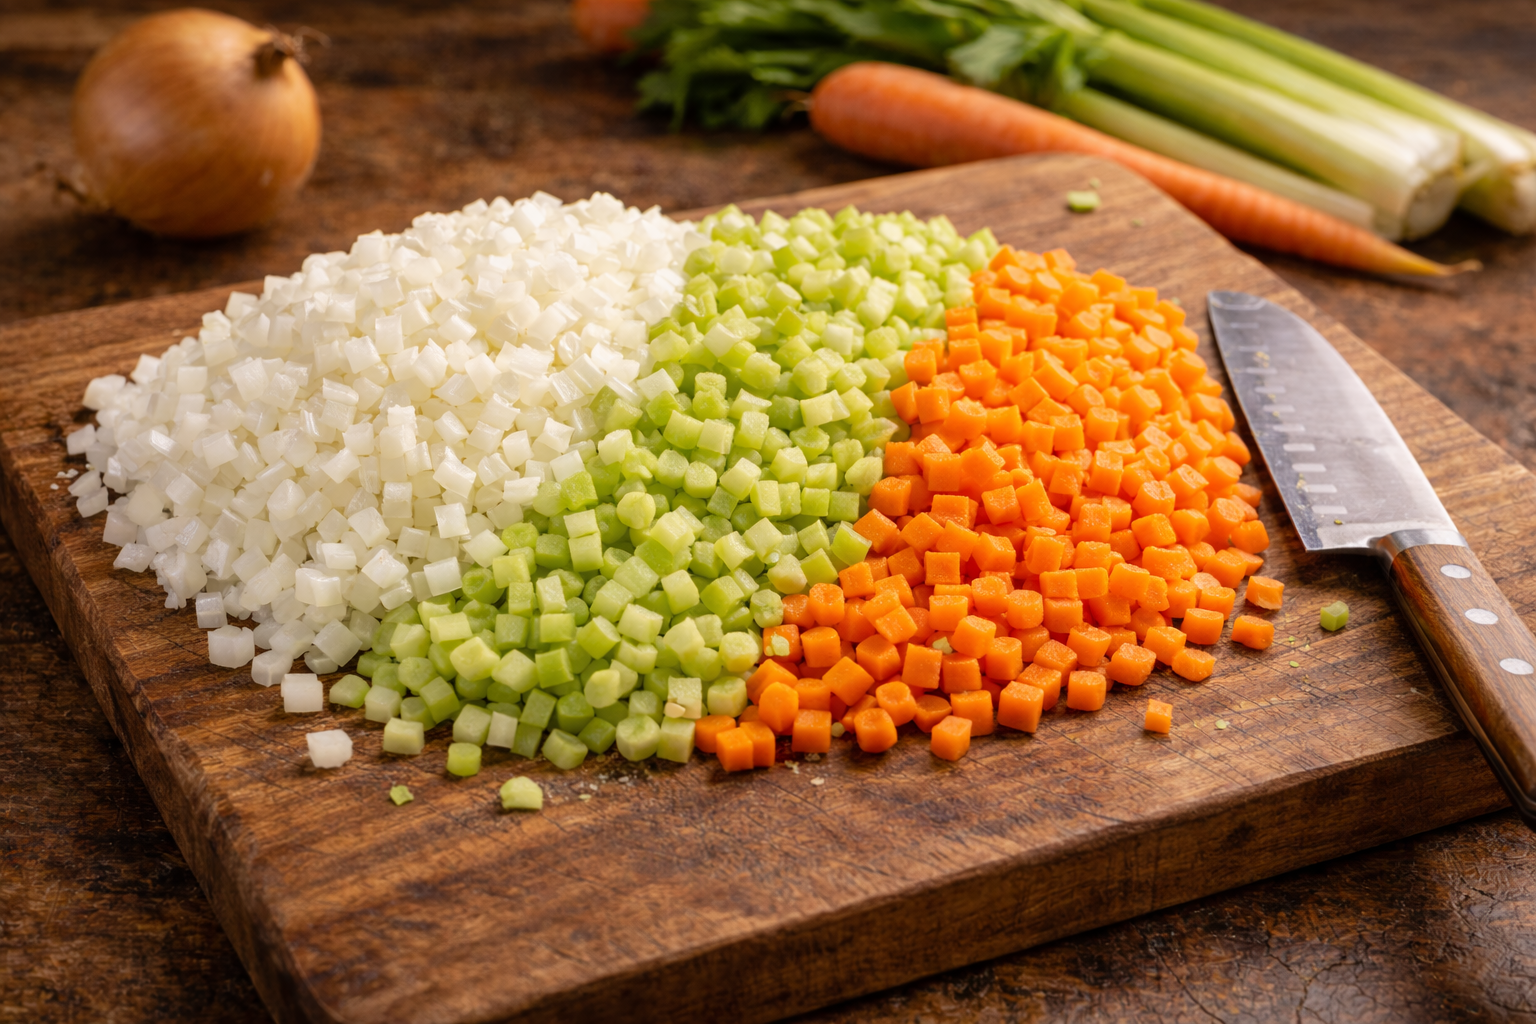
Chopping Vegetables

  • With your butcher block and chef knife, cut onion, celery, and carrot according to the type of recipe you'll be using the mirepoix in:
    • Sauce or stir fry = small dice (⅛ - ¼ inch pieces)
    • Stews and soups = medium dice (½ inch pieces)
    • Stocks and broths = large dice (1 - 2 inch pieces)

Cooking

  • Melt the butter in a medium or large skillet or pot over medium heat. Add the onions, celery, and carrots, tossing to coat them evenly. Cook, stirring often, until the vegetables are tender and the onions turn soft and translucent, about 10 minutes.

Nutrition

Calories: 100kcal | Carbohydrates: 12g | Protein: 1g | Fat: 6g | Saturated Fat: 4g | Polyunsaturated Fat: 0.3g | Monounsaturated Fat: 1g | Trans Fat: 0.2g | Cholesterol: 15mg | Sodium: 116mg | Potassium: 359mg | Fiber: 3g | Sugar: 5g | Vitamin A: 9377IU | Vitamin C: 8mg | Calcium: 48mg | Iron: 0.4mg

Hand Cut Pommes Frites

Classic hand-cut pommes frites made using the traditional double-fry method with a twist: a gentle vinegar blanch at a low temperature, an initial fry, a rest in the refrigerator, and a final fry. The technique produces fries that are beautifully crisp on the outside and a soft, fluffy inside.

Hand Cut Pommes Frites

Belgian by origin. Classic by design.

Despite the name, French fries don’t originate in France. They trace back to Belgium, where potatoes were fried in fat as early as the late 1600s. The name likely came later, popularized by English speakers who associated the technique with French culinary terminology.

Whatever you call them, great fries aren’t accidental. The difference between limp and exceptional comes down to technique—how the potatoes are cut, treated, and cooked from start to finish. This method leans into those details to create fries that are crisp on the outside and soft, almost pillowy, on the inside.

Why the potato matters.

Not all potatoes behave the same when fried. For fries, a high-starch potato is the goal. Starchier varieties break down just enough during cooking to create that fluffy interior, while also allowing the exterior to crisp properly in hot oil.

Lower-starch potatoes tend to hold their structure too well, resulting in a firmer, less airy center and a less defined crust. Starting with the right potato sets the foundation for everything that follows.

The importance of blanching.

Handled carefully, this step sets up both the texture and the finish. Just like the Golden Girls wouldn’t have worked without Blanche, your fries won’t be as golden without this step. Instead of relying on a long soak alone, the potatoes are blanched in water with a small amount of vinegar. This step does more than just par-cook the fries—it actively improves their structure and color.

The vinegar introduces a gentle acidity that helps the exterior of the potatoes hold together, preventing them from breaking down or turning mushy during frying. At the same time, the hot water draws out excess surface sugars, which reduces premature browning in the oil and allows the fries to develop a more even, golden color later on.

Drying and the first fry.

After blanching, the potatoes are dried thoroughly before hitting the oil. Removing surface moisture is critical—any remaining water interferes with frying and prevents the exterior from setting properly.

The first fry is quick and intentional. It cooks the potatoes through without adding color, creating the soft interior that defines a great fry. At this stage, the fries are pale and delicate, but structurally prepared for what comes next.

Why the chill and second fry matter.

Once the first fry is complete, the fries are chilled before going back into the oil. This pause allows the interior to firm up slightly and the exterior to dry out further, which is essential for achieving that final crisp texture.

The second fry is where everything comes together. The hotter oil finishes the exterior, creating a golden, crisp shell while the inside remains tender. This two-step frying method is standard in professional kitchens for a reason—it consistently delivers fries with contrast, structure, and balance.

Salt is added only after this final fry, ensuring it adheres to the surface without interfering with the oil during cooking.

Simple, but not careless.

Hand-cut fries are a perfect example of how a simple dish can benefit from precision. Each step—cutting, blanching, drying, frying, and resting—builds toward a final result that feels intentional rather than incidental.

What I serve with it.

You’ll find the full method outlined below, from cutting the batons to the double fry that brings everything together. The process takes a little time, but most of it is hands-off, and the payoff is fries that are crisp, golden, and built the way they’re meant to be.

Hand Cut Pommes Frites

Classic hand-cut pommes frites made using the traditional double-fry method with a twist: a gentle vinegar blanch at a low temperature, an initial fry, a rest in the refrigerator, and a final fry. The technique produces fries that are beautifully crisp on the outside and a soft, fluffy inside.
Print Pin
Category: SAVOR
Cuisine: American, Belgian, French
Course: Side Dish
Keyword: French Fries, Potatoes
Prep: 15 minutes
Cook: 25 minutes
Chill Time: 35 minutes
Total: 1 hour 15 minutes
Servings: 4 servings
Calories: 2094kcal
Author: TastyDaddy

Ingredients

Instructions

Wash & Peel

  • Wash and peel potatoes, making sure to re-rinse each potato after peeling, drying each with a paper towel, and setting aside on butcher block for next step.

Cut

  • Using your chef's knife, cut potatoes into ¼" (6mm) batons.
  • Place cut batons into a bowl of lightly-salted water to prevent browning as you cut all the potatoes. Though the cut batons soak here, I veer from the traditional longer soak method and opt for blanching (see below).

Rinse

  • Carefully transfer cut batons into a strainer or colander and rinse thoroughly under running water for about 30 seconds.

Vinegar Blanch

  • Carefully transfer rinsed batons into a 6-quart stockpot and add 1 tbsp salt, 2 quarts water, and 2 tbsp white vinegar to the pot. Bring pot to a boil over high heat, immediately reducing heat to low once it reaches a boil. Cook for 10 minutes, then carefully transfer batons back into colander using a spider strainer or slotted spoon.
  • TIP: DO NOT dump stock pot into colander! Blanching has softened the batons and they will break.

Sheet-Pan Dry

  • Line two baking sheets with paper towels.
  • Carefully spread the batons evenly on lined baking sheets and leave to dry for at least 5 minutes.
  • Carefully lift paper towel with dried batons from baking sheet and place onn counter.
  • Re-line baking sheets with fresh paper towels.

Frying - Round One

  • Heat 1 quart canola (or peanut) oil to 400℉ in wok (or fry pan) over medium-high heat.
  • TIP: After 2-3 minutes of burner being on, place a toothpick in the oil. You know the oil is ready (hot enough) when bubbles form around the toothpick.
  • Using a spiderweb or slotted spoon, lower potato batons in small batches and cook for 1 minute, moving them around once or twice while they cook. Remove from oil and place cooked fries onto freshly-lined baking sheet.
  • TIP: DO NOT salt the fries when they come out of the oil during the first round of frying. Salt breaks down the fat in the oil and also reduces the smoking point, so if you salt them during this round, you will be adding tons of salt to the oil during round two of frying and your fries will not cook properly.
  • Repeat with small batches until all fries are cooked.

Chill

  • Place fries to chill in refrigerator to chill for a minimum of 30 minute
  • TIP: If you have to prep other parts of your meal, this is the perfect time to do it. Save Round Two of frying for the final step in your meal prep so your fries are piping hot when served.

Frying - Round Two

  • Line a large bowl with paper towels.
  • Reheat the canola (or peanut) oil to 400℉ in wok (or fry pan) over medium-high heat.
  • Fry half the fries for 4 minutes, moving them around once or twice, until golden and crispy, transferring cooked fried to the lined bowl.
  • Repeat with second half, then sprinkle with salt (or preferred seasoning). Gently toss to coat the fries with seasoning and serve!

Nutrition

Calories: 2094kcal | Carbohydrates: 0.2g | Protein: 0.02g | Fat: 237g | Saturated Fat: 17g | Polyunsaturated Fat: 66g | Monounsaturated Fat: 150g | Trans Fat: 1g | Sodium: 1744mg | Potassium: 5mg | Fiber: 0.01g | Sugar: 0.01g | Vitamin A: 0.01IU | Vitamin C: 0.1mg | Calcium: 2mg | Iron: 0.03mg

Gruyère Pommes de Terre Au Gratin

Thinly sliced potatoes layered vertically and baked in a rich cream infusion with nutty Gruyère until bubbling and golden. Crisp edges, tender centers, and a deeply savory finish make this French-inspired classic equal parts elegant and indulgent. Structured in presentation, layered in flavor, and unapologetically rich.

Gruyère Pommes de Terre Au Gratin

Structured intentionally.

There’s something about Potatoes Au Gratin that feels timeless. It isn’t flashy. It isn’t complicated. But when done correctly, it commands the table. This version leans into technique and presentation just as much as flavor. Thinly sliced potatoes are arranged vertically—like a ratatouille—allowing the sauce and Gruyère to weave through every layer. The result isn’t just creamy; it’s structured, defined, and intentional.

Why Gruyère matters.

If you’re making a true gratin, the cheese shouldn’t just melt—it should contribute character.

Gruyère is nutty, slightly sweet, and complex without overpowering the dish. It melts seamlessly into the sauce while still browning beautifully on top. Those caramelized ridges are where the depth lives—and Gruyère delivers that every time, especially coupled with Parmesan, like this recipe calls for in addition.

All about the Roux.

This gratin begins with butter and seasoned flour cooked briefly before being whisked with milk or half-and-half. Milk keeps it classic. Half-and-half leans more indulgent. Either way, the roux is what makes the texture intentional.

Starting with a roux gives the sauce body from the beginning. It creates a creamier, thicker consistency that coats each slice evenly and bakes into something structured rather than loose. The result is a gratin that slices cleanly and holds its shape without sacrificing silkiness.

Mandoline or Knife? Both Work.

I recommend using a mandoline because it allows you to set a consistent thickness—and consistency matters in a dish like this. Even slices cook evenly. They absorb the sauce at the same rate. They soften without turning mushy.

But if you’re confident with a chef’s knife, use it. A steady hand and a sharp blade will give you just as beautiful a result. The key is thin, uniform slices—not the tool itself. Technique matters more than equipment.

The Finish.

As it bakes, the sauce tightens and the Gruyère bubbles into golden ridges across the surface. The top should be deeply caramelized— not pale, not scorched—just structured and bubbling. Let it rest before serving. The layers settle. That’s when you know the technique worked.

What I serve with it.

You’ll find the full method outlined below, from preparing the roux to arranging the potatoes for that vertical finish. The process is straightforward—precision matters more than complexity. If you make it, let me know how it holds its structure—and what you paired it with.

Gruyère Pommes de Terre Au Gratin

Thinly sliced potatoes layered vertically and baked in a rich cream infusion with nutty Gruyère until bubbling and golden. Crisp edges, tender centers, and a deeply savory finish make this French-inspired classic equal parts elegant and indulgent. Structured in presentation, layered in flavor, and unapologetically rich.
Print Pin
Category: SAVOR
Cuisine: French
Course: Side Dish
Keyword: Au Gratin, Cheese, Gruyère, Potatoes, Roasted
Prep: 30 minutes
Cook: 1 hour 20 minutes
Resting Time: 10 minutes
Total: 2 hours
Servings: 6 servings
Calories: 352kcal
Author: TastyDaddy

Ingredients

Potatoes

Sauce

Instructions

Potatoes

  • Wash and peel potatoes, making sure to re-rinse each potato after peeling, drying each with a paper towel.
  • Pre-heat oven to 400℉
  • Using a kitchen mandoline, slice each potato into ⅛" or 3mm slices. Once all the potatoes are sliced, use paper towel to soak up excess water from slices, and place in a mixing bowl.
  • Sprinkle 1 tsp salt, ½ tsp pepper, 1 tsp onion powder, ½ tsp thyme onto potato slices and mix in bowl until all the slices are coated with the seasoning blend.

Sauce

  • In a medium sauce pan, melt 4 tbsp butter on medium heat.
  • Once butter is melted, add 4 tbsp flour, ½ tsp garlic powder, ½ tsp paprika and whisk until combined; heat until mixture has a nice golden color.
  • Add 2 cups milk (or half and half) and whisk until the milk, butter, and flour are nice and creamy smooth (no clumps); bring the sauce to a simmer.
  • Constantly stirring, continue to cook for about 10 minutes or until sauce thickens and coats the whisk; remove from heat.
  • Add 1½ cups of the grated Gruyère and ¼ cup of the grated Parmesan, folding it into the sauce until melted and thoroughly incorporated.

Assembly

  • Grease casserole dish and load in potato slices standing vertically in about three rows (much how you would arrange the veggies in a ratatouille); be sure not to pack the slices too tightly, as you want the sauce to be able to work its way between the slices as it cooks.
  • Pour half the sauce over the potatoes, taking a fork to ensure the sauce works its way between the slices; top with remaining sauce, spreading evenly and making sure the potatoes are completely covered.
  • Top with remaining ½ cup Gruyère and ¼ cup Parmesan cheeses, spreading evenly.
  • Cover with lid (or foil if dish doesn't have a lid) and bake for 45 minutes.
  • Uncover and continue baking for another 35 minutes or until the potatoes are tender (when fork is inserted) and the cheese has a golden brown color.
  • Remove from oven and let rest on the counter for about 10 minutes before serving. This gives the sauce time to cool and bind.

Nutrition

Calories: 352kcal | Carbohydrates: 9g | Protein: 20g | Fat: 27g | Saturated Fat: 16g | Polyunsaturated Fat: 1g | Monounsaturated Fat: 8g | Trans Fat: 0.3g | Cholesterol: 84mg | Sodium: 868mg | Potassium: 190mg | Fiber: 0.4g | Sugar: 4g | Vitamin A: 938IU | Vitamin C: 1mg | Calcium: 650mg | Iron: 0.5mg

Chicken Cordon Bleu

Crisp, golden chicken breasts wrapped around savory ham and melted Gruyère, finished with a silky Dijon cream sauce. This classic French-inspired dish delivers elegant comfort with surprisingly straightforward technique.

Chicken Cordon Bleu

A classic done my way.

There’s something timeless about Chicken Cordon Bleu. It feels like the kind of dish you’d order at a white-tablecloth restaurant—elegant, a little indulgent, but still deeply comforting. But like most classics, it benefits from intention.

This version keeps the integrity of the original—tender chicken wrapped around ham and cheese, coated in crisp breadcrumbs—but leans further into its French roots with richer cheese, layered aromatics, and a few herb-forward upgrades that make it feel less cafeteria and more French café.

Why I prefer Gruyère over Swiss.

Traditional Chicken Cordon Bleu is widely associated with French cuisine, thanks to its name and its place in classic French-style cooking, but the dish itself traces back to Switzerland—which is why it’s traditionally made with Swiss cheese. And while there’s certainly nothing wrong with that, I prefer using Gruyère for a few reasons.

Gruyère is still a Swiss cheese, but it brings a nuttier, richer, and slightly more complex flavor to the dish. It melts beautifully without becoming bland, and it has enough character to stand up to the ham and chicken without getting lost. It also happens to be a staple in many French preparations—most famously French Onion Soup—so using it subtly nods to the dish’s French culinary influence while still staying true to its Swiss roots. The result is deeper flavor in every bite—not louder, just more intentional.

Building flavor inside the roll.

I don’t think Cordon Bleu should just be chicken, ham, and cheese rolled together. For me—and with most of my recipes—it should have a bit more dimension. There are so many complimentary ingredients to the classic that give it more flavor and depth, so inside the roll I add:

  • a light smear of Dijon mustard
  • finely-minced garlic
  • sautéed, minced shallot
  • fresh thyme

The garlic and shallot soften and perfume the interior as the chicken cooks, pairing beautifully with the Gruyère. The Dijon adds a subtle savory tang—just enough to cut through the richness—and the thyme reinforces that classic French backbone. None of it overwhelms. It just builds.

Herb-infused breadcrumbs.

The final layer is the crust. I mix minced tarragon and parmesan cheese into the breadcrumb mixture. Tarragon has that subtle anise quality that French cuisine uses so well—especially with poultry and mustard. And you might be wondering why I chose Parmesan instead of Gruyère. The stark contrast of aromatic herbs and extremely sharp cheese mix well with the seasoned breadcrumbs and the entire blend gives the crust more than just crunch; it gives it character. When everything comes together—crisp exterior, aromatic filling, melted Gruyère—it’s balanced, savory, and layered without feeling heavy.

What I typically serve with it.

The full recipe card below walks you step-by-step through the process. If you’ve never made Chicken Cordon Bleu before, don’t let it intimidate you—once you understand the rolling and breading process, it’s far more approachable than it looks.

And if you do make it, let me know how it turns out—especially if you add your own twist.

Chicken Cordon Bleu

Crisp, golden chicken breasts wrapped around savory ham and melted Gruyère, finished with a silky Dijon cream sauce. This classic French-inspired dish delivers elegant comfort with surprisingly straightforward technique.
Print Pin
Category: FEAST
Cuisine: French, Swiss
Course: Main Course
Keyword: Chicken, Gruyère, Ham, Poultry
Prep: 20 minutes
Cook: 30 minutes
Chill Time: 1 hour
Total: 1 hour 50 minutes
Servings: 8 portions
Calories: 755kcal
Author: TastyDaddy

Ingredients

For the Chicken

For the Breading

For the Sauce

Instructions

Preparing the Ingredients

  • Finely grate the 8oz of Gruyère cheese and divide into four equal parts; set aside
  • Seasoning Blend: Mix 1 tsp salt, ½ tsp pepper, and 1 tsp onion powder; set aside.
  • Mince shallot and sauté until caramelized; divide into 4 equal parts.
  • Remove thyme leaves from stems and mince; divide into 4 equal parts.

Chicken Roll Ups

  • Take your Santoku knife and trim each chicken breast; once trimmed, butterfly each lengthwise. One by one, place each breast between two pieces of plastic wrap on a butcher block (or cutting board), and using your meat mallet (smooth side down vs spiky), beat each breast to ¼" thickness, setting each aside once flattened.
  • Wash hands.
  • Sprinkle ¼ of seasoning blend onto each piece of flattened chicken.
  • Once seasoned, squeeze about 1 tsp Dijon mustard on each piece of chicken and spread evenly with butter knife.
  • On each piece of chicken, sprinkle ¼ of minced thyme, ¼ of sautéed shallot, and 1 tsp of minced garlic so that it is evenly covered.
  • Sprinkle 2 oz of Gruyère cheese on each piece of chicken, covering it evenly, then cover with enough ham to cover the cheese.
  • Tightly roll each piece of chicken and cut in half, wrapping each roll-up in plastic wrap (there should be 8 total roll-ups) and place in refrigerator for at least an hour. The roll-ups can be done ahead of time (even overnight); or, if you're crunched for time, you can place in freezer for 25-30 minutes so that they hold their shape during the breading process.
  • NOTE: If you have other sides that need prep before cooking, this is the perfect time to do it while the roll-ups chill.

Dredging & Baking

  • Preheat oven to 400℉ and line a large baking sheet with parchment paper.
  • Mix 1 cup flour, 1 tsp salt, 1 tsp pepper, ½ tsp paprika in first dredging (or shallow) dish.
  • Crack 2 large eggs in second dredging (or shallow) dish and beat with whisk.
  • Mix 2 cups panko crumbs, ½ cup parmesan, 4 tbsp melted butter, and 4 tbsp tarragon in third dredging (or shallow) dish.
  • One by one, remove plastic wrap from each chicken roll-up and coat with flour, egg, and breadcrumb mixture in sequence (use tongs for the breadcrumbs so that you don't coat your fingers), setting each piece aside on a plate (or butcher block) once coated/breaded.
  • In a large skillet, pour ¼ cup of canola oil (or vegetable) and turn on med-high heat.
  • TIP: After 2-3 minutes of burner being on, place a toothpick in the oil. You know the oil is ready (hot enough) when bubbles form around the toothpick.
  • Place chicken breasts in hot oil, 4 at a time, until golden brown on all sides; place browned chicken breasts on parchment-lined baking sheet.
  • Once all pieces are browned, place baking sheet in preheated oven and bake for 30 minutes.

Parmesan Cream Sauce

  • While chicken is baking, melt 4 tbsp butter in sauce pan.
  • Mix ¼ cup flour in melted butter to create a roux (until a toasted brown color).
  • Slowly whisk 2 cups of half and half into roux, followed by 2 tbsp Dijon mustard. Cook, stirring occasionally to prevent burning, until everything is thickened.
  • Stir in ¼ cup parmesan until incorporated and smooth and creamy.

Plating

  • Finish by drizzling sauce over baked chicken breast.

Nutrition

Calories: 755kcal | Carbohydrates: 35g | Protein: 55g | Fat: 43g | Saturated Fat: 20g | Polyunsaturated Fat: 5g | Monounsaturated Fat: 15g | Trans Fat: 1g | Cholesterol: 233mg | Sodium: 1977mg | Potassium: 924mg | Fiber: 3g | Sugar: 6g | Vitamin A: 1381IU | Vitamin C: 10mg | Calcium: 573mg | Iron: 5mg