Soffritto

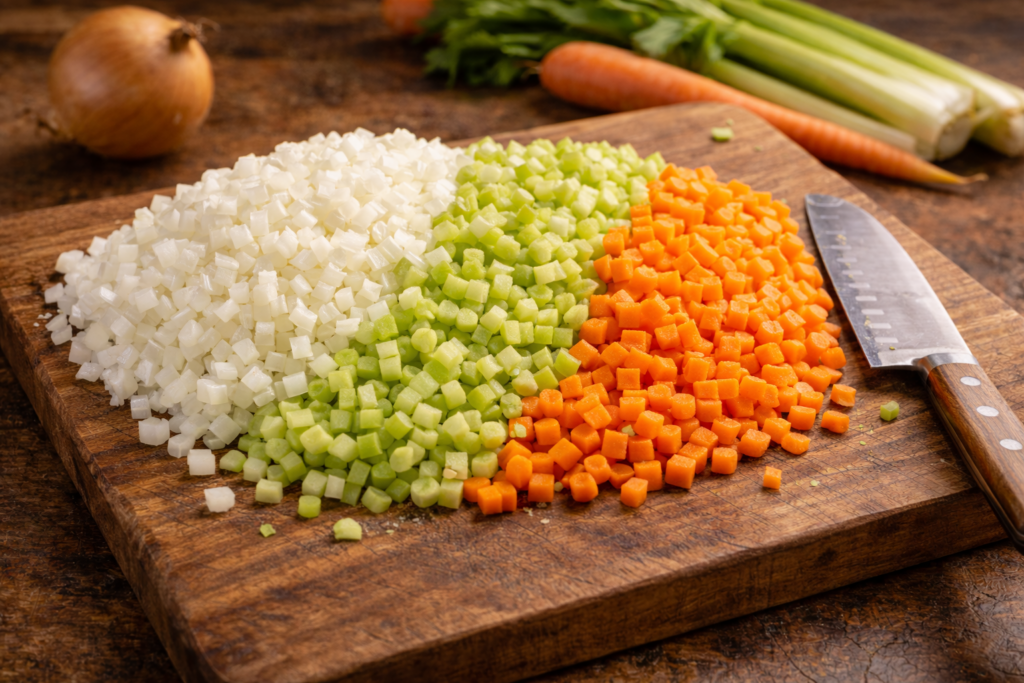
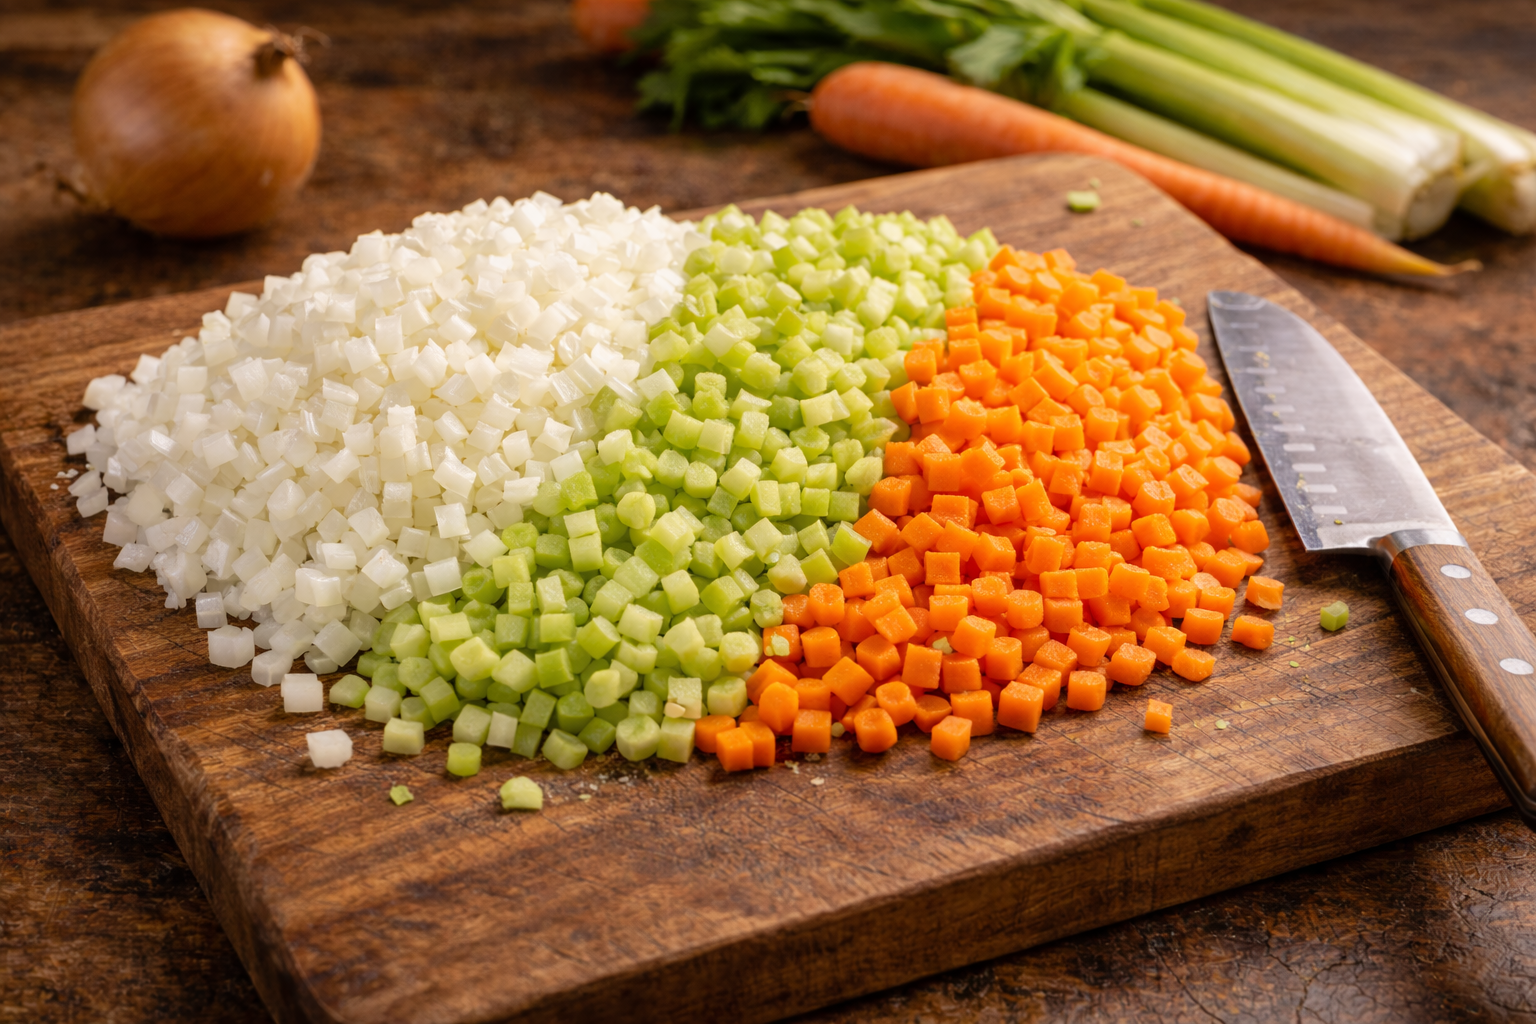
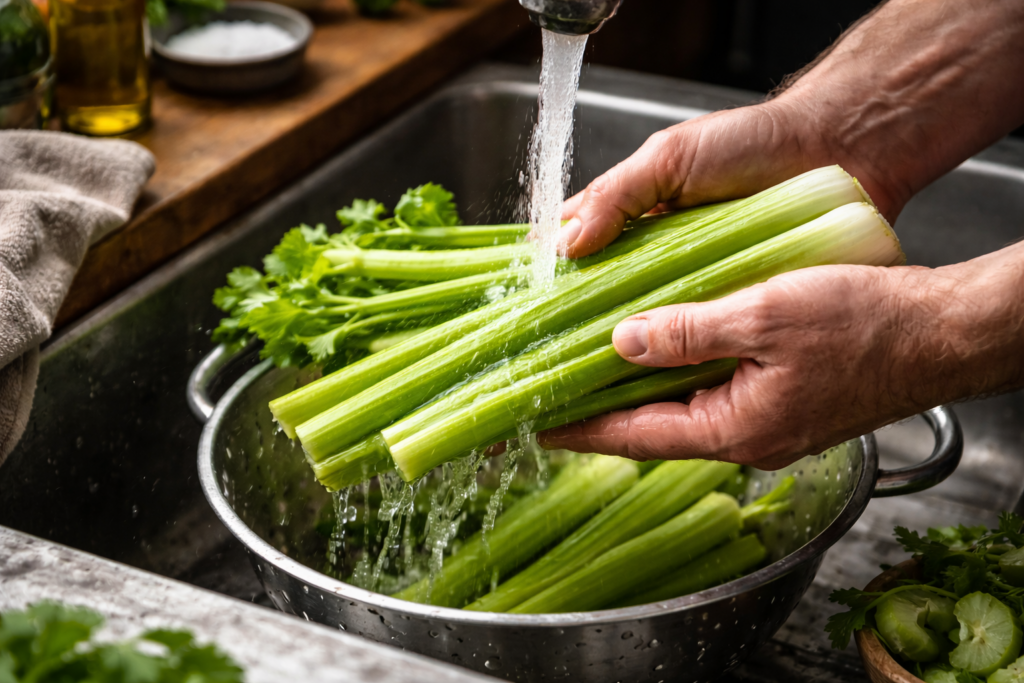
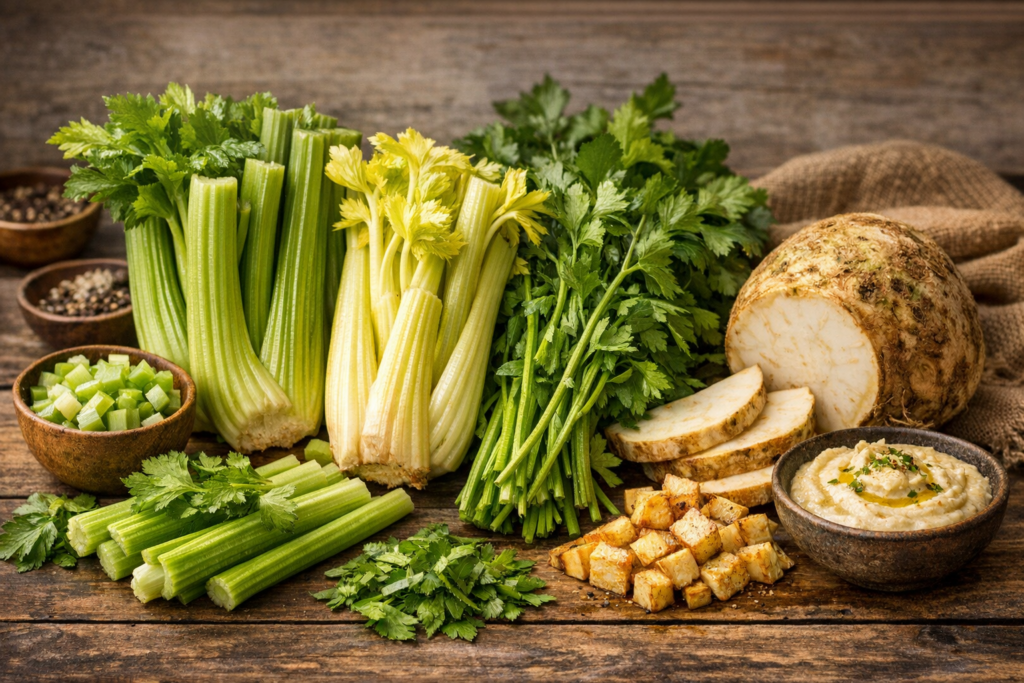
Soffritto is the foundation of Italian cooking, built from finely chopped onion, carrot, and celery gently cooked in olive oil until softened and aromatic. As the vegetables release their moisture and natural sweetness, they come together into a cohesive base that carries flavor through the entire dish. Used in sauces, soups, and braises, soffritto shapes how a dish develops from the start, providing depth and balance without ever drawing attention to itself.

Soffritto

What It Is and Where It Comes From

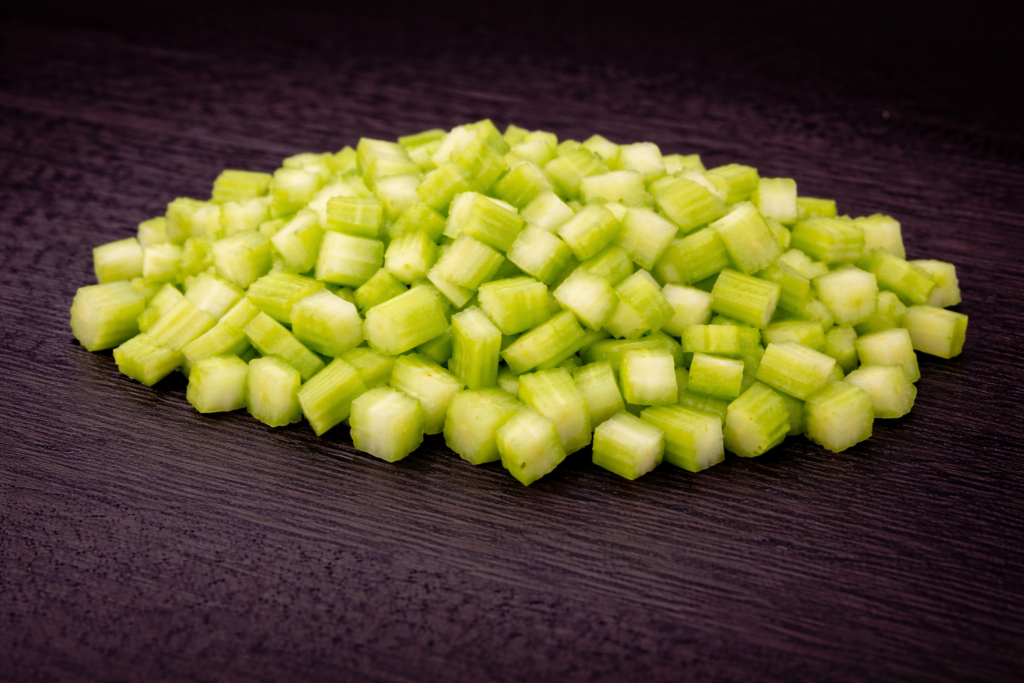
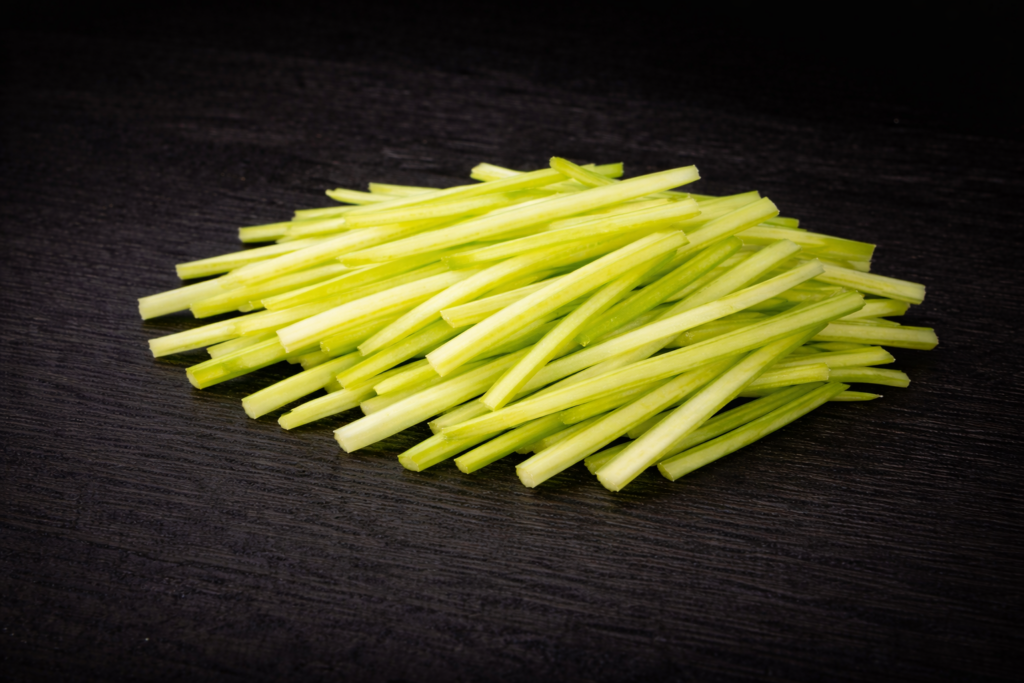
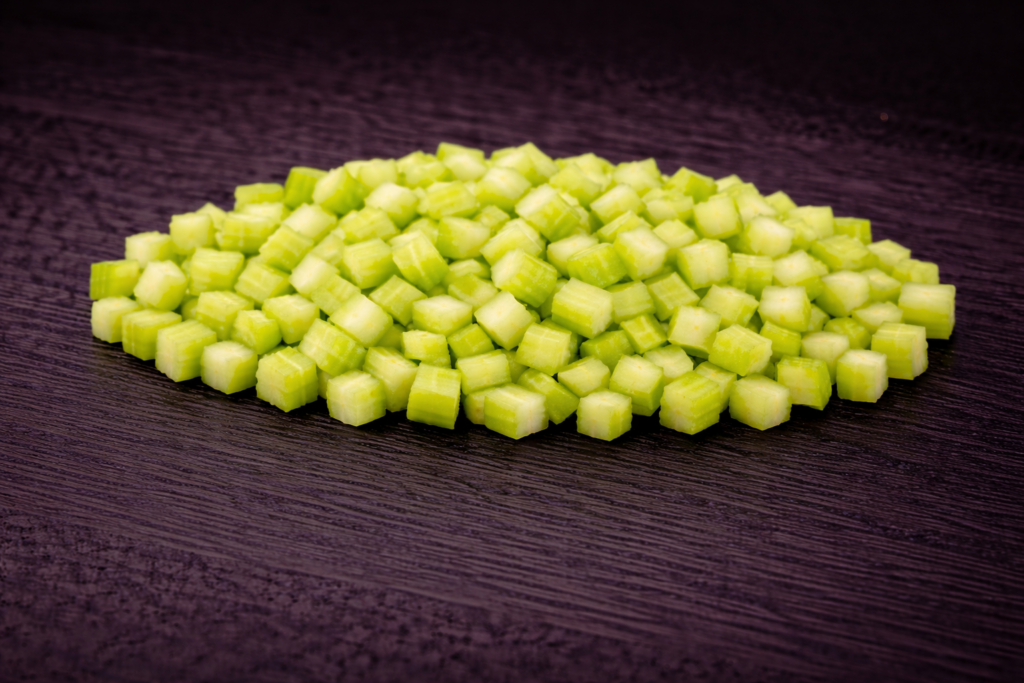
In Italian cooking, the foundation for building flavor begins before anything touches heat, with battuto—a finely chopped mixture of onion, carrot, and celery prepared as the base for what follows. The name comes from battere, meaning “to chop,” and it refers to the preparation itself: a deliberate, uniform cut that determines how the vegetables will cook and integrate. This step sets the structure, ensuring that the ingredients will break down evenly and fully once introduced to the pan.

Once that mixture meets olive oil and heat, it becomes soffritto. The name comes from soffriggere, meaning “to gently fry,” which reflects both the technique and the restraint behind it. This is not a hard sauté or a quick step meant to move things along. It is a controlled process that prepares the base of a dish before anything else is introduced.

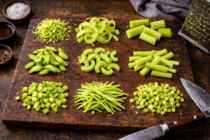
Although the ingredients closely resemble those used in French mirepoix, the approach in Italian cooking leans toward finer cuts and a more deliberate cook. The vegetables are often chopped small enough to break down as they soften, allowing them to integrate fully into the dish rather than remain distinct. By the time the next ingredients are added, the soffritto is no longer a collection of vegetables, but a unified base that supports everything that follows.

How It Works

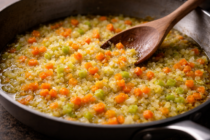
Soffritto develops through time, heat, and restraint. As the vegetables cook in olive oil, they begin to release moisture, softening gradually and losing the sharpness they carry in their raw state. The onion becomes sweeter and more rounded, the carrot deepens that sweetness, and the celery introduces a subtle bitterness that keeps the mixture balanced. The oil acts as both a cooking medium and a carrier, absorbing these changes and distributing them evenly.

The process is defined by what does not happen as much as what does. There is no aggressive browning, no attempt to push the vegetables toward caramelization. Instead, the goal is to bring them to a point where they are fully softened, lightly sweet, and aromatic without taking on color. At that stage, the individual ingredients stop standing apart and begin to function as a cohesive whole, forming a base that can carry the rest of the dish.

How It’s Used

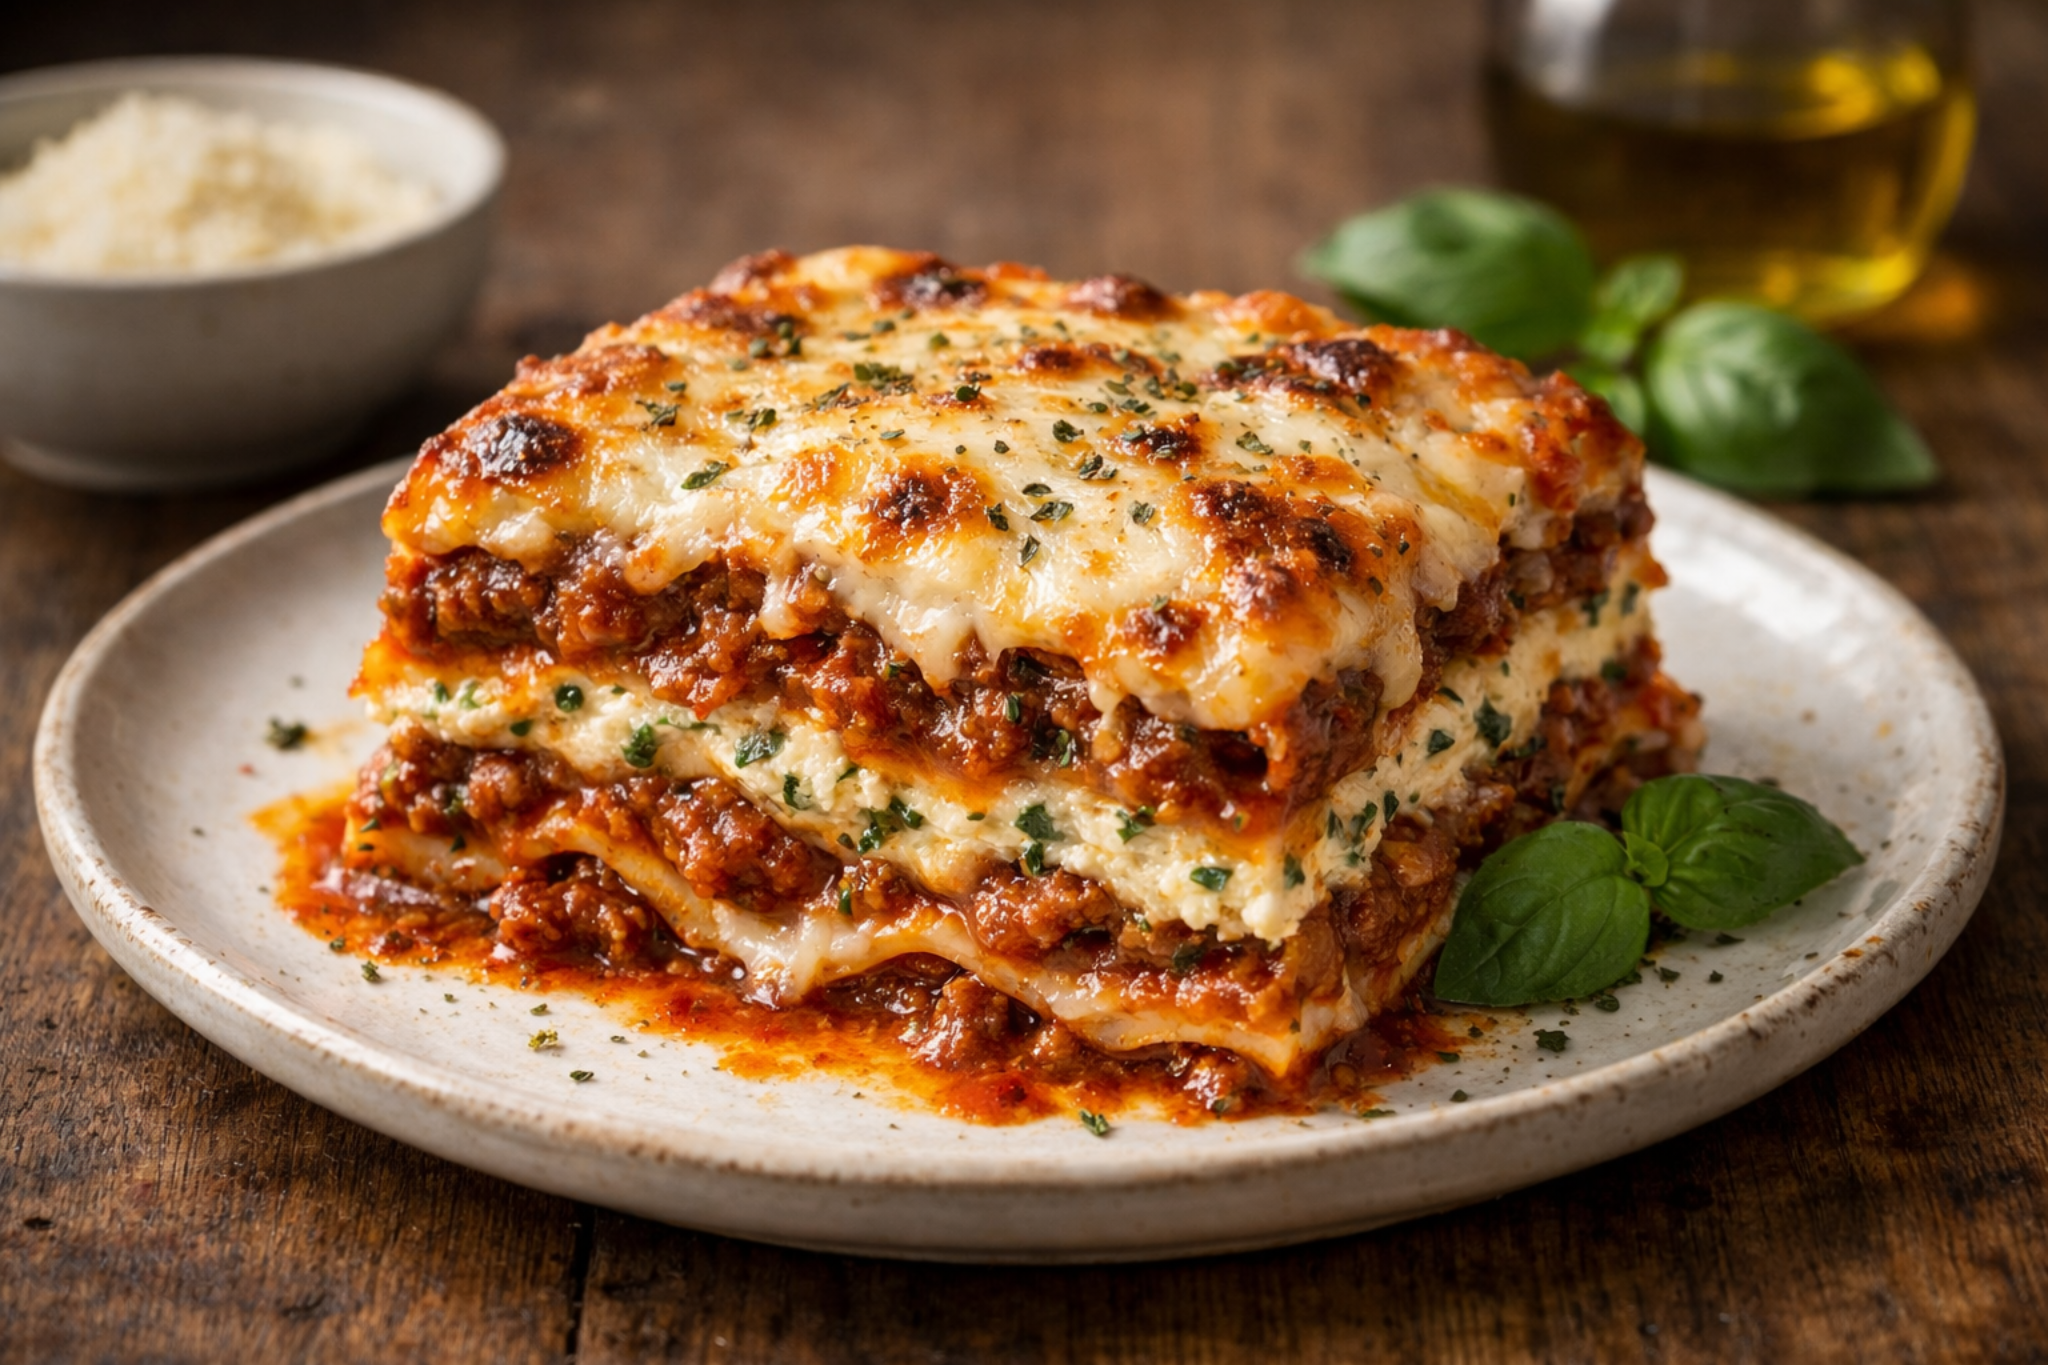
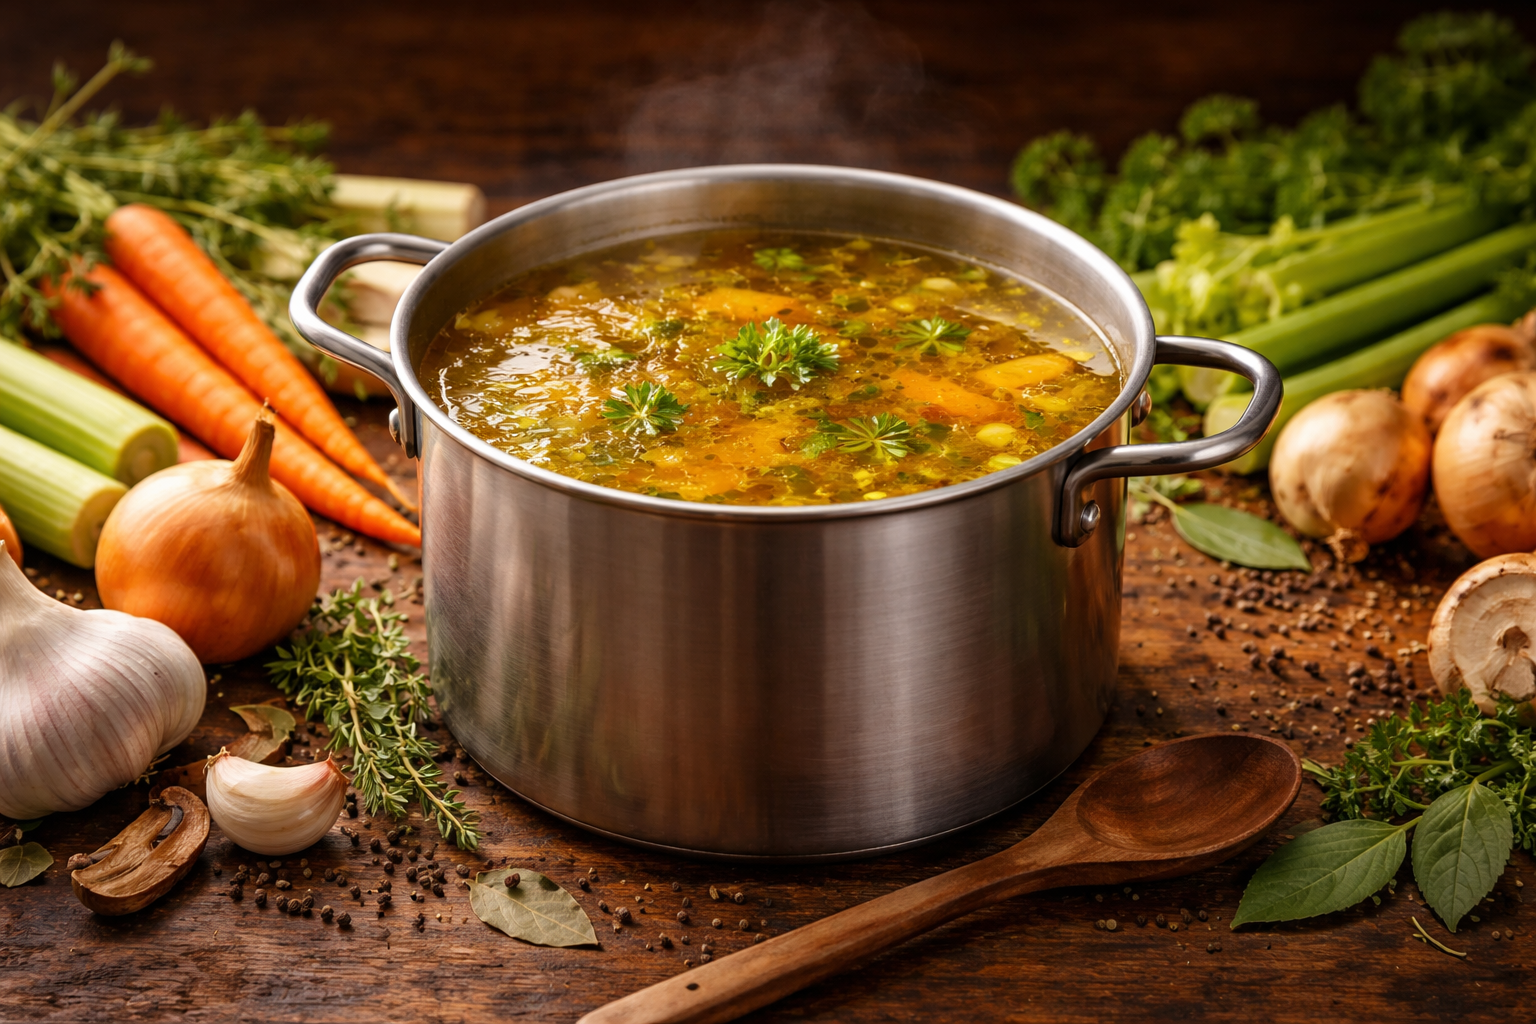
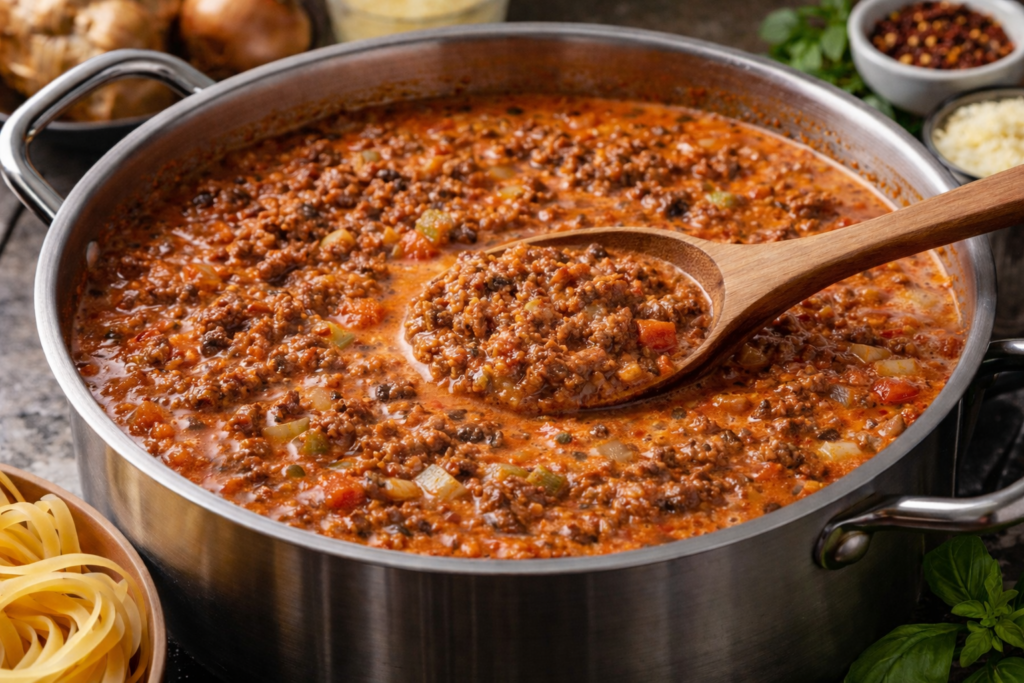
Soffritto is used at the beginning of a dish, but its role extends far beyond that first step. It establishes a base that continues to influence how ingredients interact as the cooking progresses. In ragù, it sets the tone before the meat is introduced, shaping how the fat carries flavor through a long simmer. In soups and stews, it gives structure to the broth, creating a sense of continuity that allows each addition to feel connected rather than separate.

Its impact is most noticeable in what it prevents. Without it, dishes often feel fragmented, with ingredients that sit alongside one another instead of forming a cohesive whole. With it, the transition from one stage of cooking to the next becomes more seamless, and the final result carries a depth that feels built rather than assembled.

How to Work With It

Working with soffritto is less about movement and more about control. The process begins with olive oil over moderate heat, allowing the vegetables to soften gradually rather than sear on contact. A small amount of salt early in the cook helps draw out moisture, encouraging even breakdown and preventing the edges from taking on color too quickly.

From there, the focus shifts to timing and observation. The vegetables should move from firm and opaque to tender and slightly translucent, with a soft sheen from the oil and a fully developed aroma. This stage is easy to rush, but doing so interrupts the transformation that gives soffritto its function. Keeping the heat steady and allowing the mixture to develop fully ensures that the base is balanced before anything else is added.

Variations

While the classic combination of onion, carrot, and celery remains consistent, soffritto is not entirely fixed in its composition. The proportions of each ingredient can shift depending on the dish, allowing for adjustments in sweetness, brightness, and overall balance. A heavier hand with onion or carrot will bring more sweetness, while increasing the celery introduces a slightly more vegetal, structured note.

Additional elements may be included depending on the context. Garlic is sometimes added, though often later in the process to prevent it from becoming too dominant or bitter. In richer dishes, pancetta or other cured meats can be introduced, contributing both fat and a deeper savory quality. Herbs such as parsley may also appear, though typically as a supporting component rather than a defining one.

Texture is another point of variation. A finer cut allows the soffritto to dissolve more completely into the dish, while a slightly larger cut gives it more presence. Both approaches are used, with the choice depending on how integrated the base is meant to be in the final result.

Homemade Chicken Stock

Chicken stock is built on transformation—where structure comes from collagen, not just composition. As bones gently simmer, they release body and depth, giving the liquid a quiet weight that carries flavor rather than just holding it. Aromatics round the edges, but the foundation is what sets it apart: a subtle richness that coats the palate without feeling heavy.

At its best, chicken stock is clear, layered, and cohesive—savory without being overpowering, with a natural balance between warmth, depth, and lift. It works quietly beneath the surface—carrying flavors, bridging ingredients, and giving the dish a sense of cohesion that would otherwise be missing.

Homemade Chicken Stock

A base with weight

Chicken stock is a study in structure and extraction—where bones, connective tissue, and time work together to create depth that water alone can’t carry. As it simmers, collagen breaks down into gelatin, giving the liquid body and a natural richness that lingers without feeling heavy. Aromatics—onion, carrot, celery—round out the profile, adding subtle sweetness and balance, while herbs and peppercorns provide lift. The result isn’t just flavorful—it’s cohesive, with a quiet density that supports everything built on top of it.

Technique shapes the outcome. A slow, steady simmer keeps the stock clear and refined, allowing impurities to rise and be removed without agitation. Too much movement clouds both flavor and appearance; too little attention leaves behind muddled notes. Properly made chicken stock should be clean yet full, with a gentle viscosity that gives it presence without turning it dense or greasy.

Building depth before the simmer

Flavor begins long before the pot fills with water. Roasting bones and aromatics develops a deeper, more layered stock, introducing caramelization and a darker, more complex backbone. Leaving everything raw produces a lighter, more delicate result—cleaner in flavor, more restrained in color. Both approaches have their place. The choice isn’t about right or wrong, but about what you want the stock to carry forward.

Even within the pot, small decisions compound. A splash of acid helps draw out minerals and structure from the bones. The ratio of bones to water determines body. Time allows everything to settle into itself. None of these elements stand out individually, but together they define the final character.

Using what you have with intention

Chicken stock is as much about economy as it is craft. A well-kept freezer becomes part of the process—carcasses from roasted chickens, backs, wings, and necks saved over time, alongside a steady collection of vegetable trimmings. Onion ends and skins, carrot peels, celery tops and leaves, herb stems—each one held aside not as waste, but as future structure.

What matters is how they come together. Bones provide body and depth; vegetables shape and refine the flavor. Balance is what keeps the stock focused. Too many aromatics can blur the foundation, while overly assertive or sweet additions can pull it off center. The goal is restraint—building something cohesive from what you have, rather than everything you have. When approached this way, the stock carries both intention and efficiency, with nothing unnecessary left behind.

For a deeper breakdown of what belongs in that scrap bag—and what doesn’t—the same principles carry over from vegetable broth. Some vegetables build clean sweetness and depth; others introduce bitterness, sulfur, or muddiness that can throw the entire stock off balance. If you want to get more precise about what to save and what to leave out, the vegetable broth guide walks through those decisions in detail. The rules don’t change here—the bones may provide the structure, but the vegetables still determine how refined the final stock feels.

TIP: If it’s going into your scrap bag, it needs to be properly washed—no exceptions. Dirt and grit don’t cook out; they settle in. I thoroughly wash and dry all of my fruits and vegetables, typically when I bring them home from the grocery store. Taking the time to rinse and dry vegetables before trimming ensures that what you’re saving is flavor, not contamination.

Timing is key

When ingredients go into the pot matters just as much as what goes in. Bones and hardy aromatics—onions, carrots, celery—belong at the start, where they have time to release structure and build the foundation. As the stock develops, fat rises, impurities surface, and the liquid begins to take on body. Managing that process—skimming as needed, maintaining a gentle simmer—keeps the flavor clean and the texture refined.

More delicate elements come later. Fresh herbs, garlic, or peppercorns can be added toward the end or steeped off-heat to preserve their character without dulling their edge. The same restraint applies to any additional flavoring—nothing should compete with the base that’s been slowly built. The goal is depth with clarity, not complexity for its own sake.

Straining

Once the stock has finished simmering, the focus shifts to refinement. Remove it from the heat and use a spider or slotted spoon to lift out bones and larger solids, then let the liquid rest undisturbed for at least 10–20 minutes. This step matters. It allows suspended particles to settle, giving you a cleaner, more controlled strain and a clearer final stock.

Pour the stock through a mesh strainer into a clean pot, discarding what’s left behind. For a more polished result, rinse the strainer, line it with dampened cheesecloth, and strain again. Wetting the cloth helps prevent unnecessary absorption and preserves yield. That second pass isn’t always required, but it brings a level of clarity that sets the stock apart—clean, cohesive, and free of distraction.

Storage

Cooling is part of the process, not an afterthought. Let the stock come down slightly at room temperature, then transfer it to the refrigerator to chill fully. As it cools, the gelatin sets and the fat rises, forming a layer that can be removed or reserved depending on how you plan to use it.

Refrigerated, chicken stock will keep for about 4–5 days. For longer storage, freezing offers more flexibility. Portioning into measured amounts—using silicone trays, like Souper Cubes—gives you control over how it’s used later, whether for a full pot of soup or a small addition to finish a sauce. Once frozen solid, transfer to airtight bags for storage. Properly handled, the stock maintains its structure and flavor for several months, ready to be brought back into whatever you’re building next.

Recipes that use this stock

Homemade Chicken Stock

Chicken stock is built on transformation—where structure comes from collagen, not just composition. As bones gently simmer, they release body and depth, giving the liquid a quiet weight that carries flavor rather than just holding it. Aromatics round the edges, but the foundation is what sets it apart: a subtle richness that coats the palate without feeling heavy.
At its best, chicken stock is clear, layered, and cohesive—savory without being overpowering, with a natural balance between warmth, depth, and lift. It doesn’t announce itself. It supports, reinforces, and connects, turning individual components into something that feels complete.
Print Pin Rate
Category: SIMMER
Cuisine: Global
Course: Soup
Keyword: Chicken, Stock, Vegetables
Prep: 20 minutes
Cook: 4 hours 30 minutes
Cooling Time: 20 minutes
Total: 5 hours 10 minutes
Servings: 8 servings
Calories: 63kcal
Author: TastyDaddy

Ingredients

Bones

Vegetables

Seasoning

Liquid

  • 12 cups filtered water

Herbs

Instructions

Roasting

  • Pre-heat oven to 450℉.
  • Place 2 whole chicken carcasses in large roasting pan.
  • TIP: The same approach doesn’t have to stop at chicken. Turkey bones—whether from a full roast or broken-down parts—can be used on their own or combined with chicken to create a more layered poultry stock. Turkey brings a slightly deeper, richer backbone, while chicken keeps the profile balanced and versatile. Treated the same way, the result shifts subtly in character without changing the technique—just a broader expression of the same foundation.
  • Toss 2 medium onions (washed, skins left on, quartered), 3 large carrots (coarsely chopped), 4 stalks celery(coarsely chopped), 2 tops leek (coarsely chopped), 5 whole garlic cloves (smashed) in 2 tbsp olive oil, salt, and pepper and place in roasting pan with the chicken bones.
  • TIP: You can substitute the onion, carrots, and celery for 4 cups of my Mirepoix recipe.
  • Roast for at least 30 minutes.

Simmering

  • Remove roasting pan from oven and transfer roasted vegetables, bones, and pan drippings into an 8-quart stockpot.
  • TIP: If you don’t want to manage the stovetop, a slow cooker offers a more hands-off approach. The steady, low heat naturally maintains the kind of gentle extraction stock benefits from, without the risk of over-agitation. Add everything to the pot, cover with water, and let it run on low for several hours or overnight. You’ll still want to skim early if needed, but beyond that, it largely takes care of itself—producing a stock that’s just as cohesive, with less active attention.
  • Add seasonings (3 whole bay leaves, 2 tsp sea salt, and 1 tbsp peppercorns) and 12 cups filtered water (cold) and slowly bring to a boil over medium-high heat.
  • Reduce heat to low and simmer gently, covered, for 4 hours.
  • Remove from heat and add fresh herbs (¼ cup parsley & ¼ cup thyme) to stockpot.
  • Let the herbs steep while the broth cools for at least 20 minutes, then use a spider strainer ladle (or slotted spoon) to remove the larger solids to a mixing bowl.

Straining

  • Place a mesh strainer over an empty stock pot (large enough to hold the quantity of broth being poured in) and strain and discard what is filtered by the strainer.
  • TIP: If the mesh strainer let through small particles, clean the original (now empty) stockpot and mesh strainer; place clean mesh strainer over the clean stockpot and line with 2-4 layers of dampened cheese cloth (wetting it first will prevent the cloth from absorbing the broth); run the broth through the cheesecloth layers for an additional filtering.

Storing

  • Broth will keep in refrigerator for 4-5 days, or you can freeze the broth and store in the freezer for 3-5 months.
  • SEE NOTES SECTION FOR FREEZER STORAGE TIPS

Notes

NUTRITION NOTE: The nutritional values are for the fresh recipe ingredients listed on the card, but if you are like me, I make my stock using vegetable scraps I keep in the freezer. Six to seven (6-7) loosely-packed cups of scraps will do the trick, so long as the scraps contain the bulk of ingredients listed on the recipe card.
FREEZER STORAGE NOTE: The best way to freeze broth is by utilizing silicone freezer trays, such as Souper Cubes. Make sure broth is completely chilled in the refrigerator before pouring into trays. Freeze broth cubes completely then transfer to airtight freezer bags so that you can free up and reuse the trays for other things.

Nutrition

Calories: 63kcal | Carbohydrates: 8g | Protein: 1g | Fat: 4g | Saturated Fat: 1g | Polyunsaturated Fat: 0.4g | Monounsaturated Fat: 3g | Sodium: 637mg | Potassium: 219mg | Fiber: 2g | Sugar: 3g | Vitamin A: 4860IU | Vitamin C: 9mg | Calcium: 53mg | Iron: 1mg

Mirepoix

Mirepoix is the quiet starting point behind countless dishes—onion, carrot, and celery cooked low and slow to build depth from the ground up. It’s less about the ingredients themselves and more about how they’re handled, setting the tone for everything that follows.

Mirepoix

What It Is and Where It Comes From

Pronounced meer-PWAH, mirepoix is the classic French combination of onion, carrot, and celery—traditionally in a 2:1:1 ratio—used as the starting point for everything from soups and stocks to braises and sauces. The name traces back to Charles Pierre Gaston François de Lévis, the Duc de Mirepoix—whose chef de cuisine is credited with popularizing the aromatic base in 18th-century France by naming it in honor of his patron.

At its core, mirepoix is about building flavor early, before anything else has a chance to define the dish. The vegetables themselves are simple, but once they’re cut and gently cooked, they begin to shift—softening, sweetening, and losing their edges. By the time you move on to the next step, they’re no longer three separate ingredients. They’ve become a base. You’ll see versions of this idea across cuisines—different vegetables, different fats, different directions—but the role is always the same: establish balance from the start so everything that follows has somewhere to land.

How to Prepare It

Mirepoix doesn’t require perfect knife work, but it does benefit from consistency. The size of the cut should reflect how it’s being used. Larger pieces make sense in stocks or broths where everything will be strained out later. Smaller dice work better when the mirepoix stays in the dish, softening into sauces, stews, or braises.

Once it hits the pan, the focus shifts to heat and timing. Mirepoix is cooked gently—low to medium-low, usually in butter or a neutral oil, depending on the direction of the dish—butter for richness and roundness, oil when you want a cleaner base or higher heat tolerance. The vegetables are given time to release moisture and soften without taking on color. The goal isn’t browning. It’s that point where the onion turns translucent, the carrot loses its firmness, and the celery settles into the background.

Push the heat too hard, and that shift never quite happens. The vegetables cook, but they don’t relax, and the flavor stays a step short of where it should be. Once you move past that gentle phase and introduce color, you’re no longer building a mirepoix—you’re moving into something deeper, closer to a roasted or fond-driven base. Given a little time, though, everything evens out and the base starts to feel cohesive.

Why It Matters

Mirepoix doesn’t stand out, but it sets the tone for everything that follows. It’s the first point where separate ingredients begin to behave like a single thing—where sweetness, aromatics, and structure start to settle into place instead of competing for space. Given the time it needs, it softens the edges before they ever reach the rest of the dish. The onion loses its sharpness, the carrot rounds things out, the celery brings just enough lift to keep it from feeling heavy. By the time liquid is added or heat is increased, that balance is already in motion.

It also carries forward in ways that aren’t always obvious. A well-built mirepoix doesn’t just sit at the bottom of the pan—it moves through the entire dish, shaping how flavors layer, how aromas open up, and how everything finishes on the palate. When it’s right, you don’t notice it. You just notice that the dish feels complete.

Mirepoix

Pronounced meer-PWAH, mirepoix is the classic French combination of onion, carrot, and celery—traditionally in a 2:1:1 ratio—used as the starting point for everything from soups and stocks to braises and sauces.
Print Pin Rate
Category: HARVEST
Cuisine: French
Course: Cooking Base
Keyword: Carrot, Celery, Onion
Prep: 15 minutes
Cook: 10 minutes
Total: 25 minutes
Servings: 4 servings
Calories: 100kcal
Author: TastyDaddy

Ingredients

Instructions

Washing & Prepping Vegetables

  • It is very important to thoroughly wash and dry 2 medium yellow onion, 4 stalks celery, and 3 large carrots before starting to cut.
  • Peel washed onion and remove tough outer layers of onions. Remove both root and leaf ends of washed celery stalks. Trim top of carrots. If carrots still appear a bit dirty after washing, you can give them a quick peel; be sure to rewash them after peeling.
  • TIP: If onion peels, celery trimmings, and carrot tops are completely dirt-free, save them in your freezer scrap bag to use in stocks and broths.

Chopping Vegetables

  • With your butcher block and chef knife, cut onion, celery, and carrot according to the type of recipe you'll be using the mirepoix in:
    • Sauce or stir fry = small dice (⅛ - ¼ inch pieces)
    • Stews and soups = medium dice (½ inch pieces)
    • Stocks and broths = large dice (1 - 2 inch pieces)

Cooking

  • Melt the butter in a medium or large skillet or pot over medium heat. Add the onions, celery, and carrots, tossing to coat them evenly. Cook, stirring often, until the vegetables are tender and the onions turn soft and translucent, about 10 minutes.

Nutrition

Calories: 100kcal | Carbohydrates: 12g | Protein: 1g | Fat: 6g | Saturated Fat: 4g | Polyunsaturated Fat: 0.3g | Monounsaturated Fat: 1g | Trans Fat: 0.2g | Cholesterol: 15mg | Sodium: 116mg | Potassium: 359mg | Fiber: 3g | Sugar: 5g | Vitamin A: 9377IU | Vitamin C: 8mg | Calcium: 48mg | Iron: 0.4mg

Nine Notable Cuts

Knife work defines how celery shows up in a dish. Each cut—whether sliced, diced, shaved, or left larger—changes its texture, how it cooks, and how present it feels on the plate. Some cuts allow it to blend in and support, while others keep it crisp and intentional. Understanding these variations gives you control over how celery behaves, turning it from a background ingredient into something precise and deliberate.

Nine Notable Cuts

The Shape of Things

Celery holds its structure as it cooks, which makes the cut more than just a prep step—it’s a decision about how the ingredient will behave. Size and shape determine how much bite it keeps, how quickly it softens, and whether it sits in the background or stays clearly present in the dish.

Think of these cuts as a progression rather than a set of separate techniques. You’re starting with a whole stalk and choosing how far to break it down. Each step shifts celery’s role—from something structured and distinct to something more integrated and subtle—giving you control over both texture and how it carries through the final dish.

Start with Clean, Trimmed Stalks

Before anything else, wash the celery thoroughly. It grows low to the ground, and grit has a way of working its way deep into the base and between the ribs. Rinse under cold running water, taking the time to separate the stalks and run water through each one. If you skip this step—or rush it—you’re not just affecting the final dish, you’re carrying that grit into anything the celery touches, including your scrap bin.

Trim off the root end and the tops, but don’t discard them. The base, leaves, and any excess trimmings are ideal for vegetable broth or stock. Because those scraps are often saved and built up over time, washing matters just as much here as it does for what you’re cooking in the moment. Clean scraps make clean stock. Keep a container in the freezer and add to it as you go, knowing everything going in is already properly rinsed. From here, you’re working with clean stalks and usable trimmings—nothing wasted, nothing carried forward that shouldn’t be.

Grated

Run the full stalk across a grater, pressing the cut face of the rib (the half-moon side) against the surface—not the length of the stalk. Working from that short side breaks the celery down into fine, compact shreds rather than long strands, giving you a tighter, more consistent texture. At that point, celery loses most of its structure. Instead of distinct pieces, you’re left with a light, moist grate that disperses easily and releases its flavor quickly. It doesn’t read as “celery” in a structural sense—it becomes part of the background.

This is useful when you want the flavor and freshness without the bite. Grated celery works well in dressings, relishes, slaws, and finely textured salads, or anywhere you’re building layers without introducing noticeable pieces. It can also be folded into sauces or spreads where you want subtle lift and moisture rather than structure.

Ribbons / Curls

Run a vegetable peeler along the length of the stalk, shaving it into long, thin ribbons. Working lengthwise keeps the fibers intact, giving you flexible strips that curl naturally and hold a bit of shape. This cut keeps more structure than grating but feels lighter than sliced pieces. The ribbons bend and layer rather than sit rigidly, adding texture without weight. They stay crisp, but in a more delicate, almost airy way. Ribbons work well in salads, garnishes, and lighter preparations where you want celery to feel fresh and present without dominating the bite. They also take on dressings easily, coating evenly without pooling. If you want shorter ribbons, cut the stalks in half before peeling.

Thirds (3–4" Sections)

This is the form you’ll reach for when celery is meant to hold its shape and act as a vessel or a base. Classic examples lean into that structure—crudité platters, stuffed applications, or something like Ants on a Log, where the celery isn’t just part of the dish, it is the platform. The length gives you something to build on, while the natural curve of the stalk creates space for fillings or spreads.

Start by cutting the stalk into 3–4 inch segments. This is the foundation for everything that follows. On its own, this cut keeps celery fully intact—long, structured, and clearly present. It’s less about breaking the ingredient down and more about preserving it. It’s also useful in braises or longer cooks where you want larger pieces that can be removed later or left intact for texture. At this stage, you’re not shaping celery—you’re deciding to keep it whole and let everything else build around it.

Bias Cut

Starting from the thirds, hold the pieces steady and angle your knife as you slice across them, creating elongated, diagonal pieces. This increases the surface area of each cut without reducing thickness, giving you more contact with heat while still keeping a bit of structure. The result feels more intentional than a straight slice. You get cleaner lines, more visual movement, and a shape that softens at the edges while still holding in the center. It cooks evenly, with just enough bite left to keep it from disappearing. Bias cuts work well in stir-fries, sautés, and more composed dishes where shape and texture both matter.

Half-Moons (Standard Slice)

This is the standard cut of celery—and the one you’ll use most often. At this point, you’re no longer working with length, but with thickness. Thinner slices soften quickly and fold into the dish, while thicker ones keep a bit of structure and stay more noticeable.

Like the Bias Cut, this cut also starts from the Thirds; instead,  slice the thirds straight across into ⅛”–¼” pieces, letting the natural curve of the celery form those familiar half-moons. Lining the pieces up before cutting keeps the slices consistent and speeds up the process, especially when working through multiple stalks. Because everything is uniform, the pieces cook evenly and distribute without effort. It’s a straightforward cut that doesn’t ask much from you but gives you a lot of flexibility in return—equally at home in soups, sautés, and just about anything that starts with a pan and builds from there.

Batons

Batons are the next natural step from Thirds lengthwise—those same 3–4 inch sections split into halves along the ribs. You’re working with the structure of the celery, not against it, which keeps the pieces clean and intact. This cut reduces the scale without losing the crisp bite. It stays structured and present, just more controlled, making it easier to work into dishes where full sections would feel too large. Use batons when you want celery to remain defined but refined—clean, uniform, and intentional, whether in crudité, stir-fries, or anywhere texture still matters. If you want a shorter length for your dish, line batons up and cut in half across the width.

Rough Chop

Starting from batons, cut across the width in quick, uneven passes to break them down into smaller pieces. This is a looser, more practical cut—less about precision and more about reducing size. The pieces won’t be uniform, and that’s the point. Some will soften quickly, others will hold a bit longer, creating a mix of textures as they cook.

Use a rough chop when you’re building a base or cooking for time—soups, stews, stocks, and long-simmered dishes where everything eventually comes together. It’s fast, efficient, and does exactly what it needs to without slowing you down.

Julienne

Starting from batons, split them lengthwise again to form thin, matchstick-sized pieces. This continues the same progression—working along the ribs to reduce width while keeping the structure intact. The result is lighter and more refined. Julienned celery moves through a dish rather than sitting on top of it, distributing evenly while still offering a clean, crisp bite. Because the pieces are thinner, they soften more quickly, but they don’t disappear—you still get texture, just on a smaller scale. Use this cut when you want celery to integrate more seamlessly without losing its presence—slaws, quick sautés, stir-fries, or as a finishing element where structure matters, but subtlety matters more. If you want a shorter length for your dish, line matchsticks up and cut in half across the width.

Diced

Starting from julienne, cut across the matchsticks to create small, uniform pieces. This is the next step in the progression—taking those fine strips and turning them into consistent, evenly sized cuts. Diced celery distributes cleanly and cooks evenly, giving you a balanced texture throughout the dish. The smaller size softens more quickly, allowing the flavor to integrate without standing out as a distinct element.

Use this cut when you want celery to be present but not prominent—sauces, fillings, and composed dishes where consistency matters and everything should come together as one.

Celery

Celery is defined by what it contributes without overwhelming the dish. Crisp and bright when raw, soft and integrated when cooked, it shifts easily between roles depending on how it’s used. Its subtle bitterness, high water content, and aromatic character give it a unique ability to add structure, freshness, and balance while remaining understated. Whether used as a base, a finishing element, or in more concentrated forms like leaves or seeds, celery brings clarity and control to the overall flavor.

Celery

These Ribs Have Backbone

Celery is rarely the reason you notice a dish—but it’s often the reason it works. It shows up early, cooks down quietly, and supports everything around it without asking for attention. Like onions, it’s foundational. The difference is that celery doesn’t bring sweetness or depth—it brings structure, freshness, and balance. If your food ever feels heavy, flat, or one-note, celery is often the missing piece.

What Celery Actually Brings

Celery is mostly water, but what it contributes goes beyond that. It contains vitamin K, vitamin C, potassium, and small amounts of folate, along with antioxidant compounds like flavonoids. Like onions, nothing here is overwhelming on its own—but celery shows up often enough that it contributes steadily. What matters more is how it behaves. Celery has a clean, slightly bitter, vegetal profile with a subtle aromatic quality. It doesn’t dominate—it lifts. It keeps richer ingredients from feeling heavy and helps bridge flavors that would otherwise sit apart.

Types of Celery — And When to Use Them

Most recipes assume standard celery, but there are a few variations worth understanding once you start paying attention to how it behaves.

  • Pascal (Standard) Celery: This is what you’ll find in most grocery stores. Crisp, high in water, and mild with a slight bitterness, it works across the board—raw, cooked, or as part of a base. If a recipe just says “celery,” this is what it means.
  • Golden Celery: Paler, more tender, and less fibrous, golden celery has a milder, slightly sweeter flavor. It’s better suited for raw use or lighter cooking where you want the freshness without as much bite or stringiness.
  • Chinese (Leaf) Celery: Thinner, more aromatic, and much more assertive. This is celery that doesn’t sit quietly in the background. It’s used more like an herb in stir-fries, soups, and finishing applications where you want that flavor to stand out.
  • Celeriac (Celery Root): Same plant, different role. The root is dense, earthy, and more substantial, with a deeper, nuttier version of celery’s flavor. It’s suited for roasting, purées, soups, and salads where celery becomes the body of the dish rather than the support.
  • Celery Leaves: Often overlooked, but they shouldn’t be. The leaves carry a more concentrated, slightly bitter, herbaceous celery flavor. Use them like a soft herb—garnish, finish, or fold into salads for a fresh top note.
  • Celery Seeds: Celery seeds are small, potent, and intensely aromatic, carrying a concentrated version of celery’s flavor with a slightly bitter, earthy edge. A little goes a long way. They’re most often used in spice blends, pickling, and dishes where you want celery’s presence without the texture or water content. You’ll find them in coleslaw, potato salad, brines, and cured or preserved foods. They don’t soften or mellow the way fresh celery does—they stay sharp and direct, which makes them useful when you need that flavor to cut through richer or heavier components.

Raw vs. Cooked: A Shift in Role

Raw celery is crisp, bright, and slightly sharp. It adds crunch, freshness, and a clean bite—often used in salads, relishes, or as a finishing element. Cook it, and it changes completely. Heat softens the fibers, reduces the sharpness, and rounds out its bitterness. It becomes quieter, more integrated, and more supportive. It doesn’t disappear—it just stops standing apart. That shift is what makes celery so effective as a base ingredient.

How It Builds Flavor

Celery doesn’t build depth the way onions do. It builds balance. When it’s cooked gently, celery softens and settles into the background, contributing a subtle bitterness and a clean, aromatic note that shapes how the rest of the dish comes across. It acts more like a stabilizer than a driver—guiding the overall profile without calling attention to itself.

That role is most clearly defined in mirepoix, where celery sits alongside onions and carrots as part of a deliberate structure rather than an interchangeable mix. Each ingredient has a purpose, and celery’s is restraint. It keeps the base from drifting too far in any one direction, maintaining clarity and cohesion as the dish develops. Used this way, celery isn’t just present—it’s active, quietly controlling how everything else lands.

Global Foundations

Almost every cuisine has its own way of working celery into a dish.

  • French and Cajun cooking builds flavor with mirepoix—a mix of onions, carrots, and celery.
  • Italian cooking uses a similar base called soffritto, often cooked gently in olive oil to form the foundation of sauces and braises.
  • Spanish and Latin cuisines build with sofrito, where celery is sometimes included or layered in depending on the region, supporting longer-cooked dishes and stews.
  • British and Eastern European cuisines rely on celery in soups, broths, and stews, where it supports long-simmered dishes without standing out.
  • Chinese cooking uses Chinese celery in stir-fries, where it’s cut into short lengths and cooked quickly, staying crisp and aromatic rather than melting into the base.
  • Southeast Asian cooking occasionally uses celery and celery leaves in soups, broths, and herb-driven dishes, adding a fresh, slightly bitter lift at the finish.
  • Middle Eastern and Mediterranean cooking use celery and celeriac in salads, braises, and slow-cooked dishes—celery for structure, celeriac for a deeper, more substantial presence.
  • Classical European cooking (especially French) also leans on celeriac in purées, soups, and remoulade, where celery shifts from background to body.
  • Midwestern American cooking often uses celery seed rather than fresh celery—most notably in coleslaw, potato salad, and as part of the defining flavor of a Chicago-style hot dog. It delivers a concentrated celery note without adding texture or moisture.
  • Soups, stocks, and broths across cuisines use celery as a structural element, helping define the overall flavor without dominating it.

Different ingredients, different techniques—but the same idea: celery is there to keep everything in balance.

Digestibility & Practical Use

Celery’s high water content makes it light, but its fibrous structure can make it tough if not handled properly. Raw celery can be stringy and harder to chew or digest for some, especially the outer stalks. Cooking softens those fibers and makes it easier to integrate into a dish. Inner stalks tend to be more tender and better suited for raw use, while outer stalks benefit from longer cooking. Like onions, technique determines outcome.

Final Thoughts

Celery isn’t there to impress—it’s there to stabilize. It gives you a way to control direction without adding weight. When a dish starts leaning too far—too sweet, too rich, too soft—celery is one of the few ingredients that can pull it back without introducing something new or completely disruptive to the flavor. It doesn’t compete. It corrects.

That makes it one of the most useful tools you have when building flavor from the ground up. It lets you layer ingredients more aggressively because there’s something in place to keep them from collapsing into each other. It creates separation where things might otherwise blur, keeping a dish defined instead of muddled.

Used intentionally, celery also gives you flexibility. You can push richness further, lean into sweetness more confidently, or build longer, slower flavors without losing clarity along the way. It’s not just balancing what’s there—it’s giving you room to go further without losing control.

Read my post on the different ways to prep celery.

Recipes Featuring Celery

American Chop Suey

American Chop Suey is a one-pot classic built on simplicity done well—elbow macaroni folded into a savory tomato and beef sauce with softened onions, peppers, celery, and garlic. It’s hearty without being heavy, balancing acidity from the tomatoes with the richness of the meat, while a touch of Velveeta melts in to give the sauce a smoother, more cohesive finish.

The result is a dish that eats like comfort but holds its structure—sauce clinging to every curve of pasta, each bite consistent from start to finish. Depending on where you are, you might hear it called American Goulash, Johnny Marzetti, or something similar, but the foundation stays the same: familiar, unfussy, and built to satisfy.

American Chop Suey

A Regional Classic

American Chop Suey is one of those dishes where the name carries more history than the plate suggests. The term chop suey comes out of Chinese American cooking in the late 19th and early 20th centuries—often used to describe a mixed dish built from whatever ingredients were on hand. As it gained popularity in cities like New York and San Francisco, the name began to drift beyond its original context. Home cooks adopted it more loosely, applying it to one-pot meals that followed the same idea: combine what you have, cook it together, and make it feed a table.

Over time—especially in the Northeast—that concept took on a different identity, shaped by Italian-American kitchens and American home cooking. The ingredients shifted to tomato, pasta, and ground meat, but the underlying idea stayed the same. What remained wasn’t the cuisine—it was the structure: a cohesive, mixed dish built from simple components and made to satisfy.

How It Changes by Region

Because the dish was never standardized, it evolved differently depending on where it landed:

  • American Chop Suey (New England): Tomato-forward, often a bit looser, closer to a saucy pasta.
  • American Goulash (Midwest): Thicker, more concentrated, sometimes heavier on seasoning.
  • Beefaroni (Italian-American, general NE United States): A simpler, more streamlined stovetop version—ground beef and pasta in a smoother tomato sauce, typically with fewer vegetables and a more uniform consistency, reflecting Italian-American red sauce influence.
  • Johnny Marzetti (Ohio Valley): Often baked, occasionally layered, and more likely to incorporate cheese from the start.
  • Slumgullion (Upper Midwest and Western US): A more rustic, frontier-style version—often simpler, looser, and highly adaptable, sometimes stretching ingredients further with extra liquid or fewer aromatics.

Same foundation—different expressions shaped by local kitchens.

Building This Version

This version leans into control—treating each component with intention so the final dish holds together instead of blending into something indistinct. The base starts with onion and green bell pepper—standard aromatics for this dish. Celery isn’t traditional, but it’s part of how I grew up eating it. It adds a subtle vegetal depth and texture that carries through the sauce. In our kitchen, it was always around—either from the store in the off-season or pulled straight from the garden—so it became part of the build.

Garlic follows, just enough to bloom. Then the meat. Ground beef forms the base, but Italian sausage—sweet, mild, or hot—can be added depending on how you want to shape the flavor. Sweet or mild sausage rounds things out and leans more classic. Hot sausage adds heat and a sharper edge that cuts through the richness.

The Sauce: Flexible by Design

The sauce is layered to control both texture and balance:

  • Diced tomatoes for structure
  • Tomato soup for body and built-in richness
  • Passata for smoothness
  • Tomato paste for depth
  • Beef stock to add liquid for the final pasta cook and to bring it all together

There’s room to move here. A can of diced tomatoes with green chilis adds a subtle heat and brightness. Fresh garden tomatoes—when available—bring a cleaner, more natural acidity and a lighter texture that shifts the entire feel of the dish. I grew up seeing a spoonful of sugar added to cut through the sharpness of stewed tomatoes.

Instead, this version balances that same idea at the source—using a combination of passata and tomato soup. The soup leans slightly sweeter and richer, which softens the acidity and creates a smoother, more velvety base—especially once everything comes together with the cheese.

Why the Pasta Is Soaked, Not Boiled

Traditionally, this dish is made with elbow macaroni—and it works. But for leftovers, it tends to soften too much. Cavatappi or mini penne hold their shape better, giving the dish more structure even after it’s been refrigerated and reheated. My family would probably give me a strange look with this step, but instead of cooking the pasta separately (like I’d learned), I now soak my pasta in hot water and finish cooking it directly in the sauce later.

That shift does two things:

  • The pasta absorbs the flavor of the sauce as it finishes cooking.
  • The reserved soaking water introduces starch that helps bind everything together. It’s not optional, regardless of cooking before or soaking—it’s what tightens the sauce so it clings to the pasta instead of sitting around it.

The Velveeta Adjustment

Cheese isn’t part of the traditional New England version I grew up with, but during my time in Michigan, it was a common addition—usually shredded and mixed in or layered through. The problem was consistency. Shredded cheese tends to go stringy, and once it cools, it can separate or settle, leaving the bottom of the pot coated in congealed cheese.

Velveeta solves that. It melts cleanly into the sauce, creating a smooth, cohesive finish without turning the dish into something heavy or overly cheesy. Combined with the slightly sweeter, more rounded tomato soup base, it creates a texture that feels unified from edge to edge without separation.

Final Thoughts

American Chop Suey was never meant to be exact. It’s a dish shaped by what’s available, what’s familiar, and what works. The name comes from one place, the ingredients from another, and the method from somewhere in between. Handled with intention, it becomes something structured—balanced, consistent, and built to hold together from the first bite to the last.

You’ll find the full method outlined below, step by step—but the key is in how each stage builds on the last. From properly softening the aromatics, to layering the sauce, to finishing the pasta directly in the pot, each move is designed to control texture and consistency rather than leaving it to chance.

American Chop Suey

American Chop Suey is a one-pot classic built on simplicity done well—elbow macaroni folded into a savory tomato and beef sauce with softened onions, peppers, celery, and garlic. It’s hearty without being heavy, balancing acidity from the tomatoes with the richness of the meat, while a touch of Velveeta melts in to give the sauce a smoother, more cohesive finish.
The result is a dish that eats like comfort but holds its structure—sauce clinging to every curve of pasta, each bite consistent from start to finish. Depending on where you are, you might hear it called American Goulash, Johnny Marzetti, or something similar, but the foundation stays the same: familiar, unfussy, and built to satisfy.
Print Pin
Category: FEAST
Cuisine: American, Italian-American, Midwest, New England, Southern
Course: Main Course
Keyword: Comfort, Ground Beef, Macaroni, Tomato
Prep: 15 minutes
Cook: 25 minutes
Resting Time: 10 minutes
Total: 50 minutes
Servings: 8 servings
Calories: 629kcal
Author: TastyDaddy

Ingredients

Instructions

Wash the Vegetables

  • Thoroughly wash and dry green pepper, celery, onion, garlic, and parsley.

Soak the Pasta

  • Instead of cooking the pasta (as most recipes call for), I soak my pasta in hot water for about 20 minutes—while I prepare the rest of the ingredients—and finish cooking it in the sauce later.
  • The traditional recipe calls for elbow macaroni, but you can use other tubular pasta. I like to use cavatappi or mini penne (because they hold up better for leftovers).

Cut the Vegetables

  • With the butcher block and chef's knife, dice 1 large yellow onion and set aside in prep bowl.
  • Chop 2 stalks celery and set aside in prep bowl.
  • Dice 1 whole green bell pepper and set aside in prep bowl.
  • Mince 2 cloves garlic and set aside in prep bowl.
  • Trim stems off parsley and coarsely chop leaves, enough to fill ¼ cup.

Cook Vegetables

  • Heat Dutch oven over medium high heat and melt 2 tbsp butter.
  • Add diced onion, diced green pepper, and chopped celery to Dutch oven and cook until tender.
  • Add minced garlic to Dutch oven and brown for 1-2 minutes.
  • Remove cooked vegetables from pan and set aside in mixing bowl.

Brown Meat

  • Add 1 lb ground beef to Dutch oven and season with 1 tbsp Kosher salt, ½ tsp black pepper, 1 tsp dried oregano, 1 tsp dried basil, 1 tsp onion powder, 1 tsp paprika, and 1 tsp celery seed directly in pan.
  • If you'd like to make the dish a bit more hearty, add the optional 1 lb ground sausage.
  • Once meat is browned, drain excess fat.
  • Return meat to pan and add 1 tbsp Worcestershire sauce, stirring to combine.

The Sauce

  • Return veggies back to pan.
  • Empty 14 oz diced tomatoes (undrained) to pan; stir to combine
  • If you would like to add a little kick to the dish, substitute the plain diced tomatoes with a can mixed with green chilis instead.
  • Add 10.75 oz tomato soup, 10 oz passata (or tomato sauce), 6 oz tomato paste, and 2-3 cups beef stock; stir to combine and bring to a boil.

Add Pasta

  • While sauce is heating to a boil, reserve 1 cup of pasta soaking water; set aside.
  • Strain pasta with colander.
  • Once pot has started to boil, add pre-soaked pasta and reserved pasta water to pot and stir to combine.
  • Cover with lid and let pasta simmer for 5-7 minutes (or until desired tenderness).

Cheese

  • While pasta is cooking, cut 12 oz Velveeta cheese into cubes (so that it will melt easier).
  • Once pasta has finished cooking, add Velveeta cheese cubes to pot and stir until combined.

Serve

  • Garnish each serving with grated parmesan cheese and freshly-chopped parsley.

Nutrition

Calories: 629kcal | Carbohydrates: 45g | Protein: 35g | Fat: 35g | Saturated Fat: 14g | Polyunsaturated Fat: 3g | Monounsaturated Fat: 13g | Trans Fat: 1g | Cholesterol: 106mg | Sodium: 2453mg | Potassium: 1398mg | Fiber: 4g | Sugar: 15g | Vitamin A: 1594IU | Vitamin C: 23mg | Calcium: 334mg | Iron: 5mg

Lasagna Bolognese with Ricotta

Pasta, herbed ricotta, ragù alla bolognese, and melted cheeses layered with enough control to keep each component defined. The focus is on how everything comes together in the dish, so the final slice holds its structure from edge to center without collapsing or blending into one.

Lasagna Bolognese with Ricotta

Layered with intention.

This is where Daddy’s Ragù alla Bolognese moves into a full build—pasta, herbed ricotta, and melted cheeses layered with enough control to keep each component defined. The focus is on how everything comes together in the dish, so the final slice holds its structure from edge to center without collapsing or blending into one.

Start with the ragù.

This lasagna is built around my ragù, so it’s best to make that ahead of time. Let it cool slightly before assembling—warm enough to work with, but not hot. That gives you better control when layering and keeps the ricotta from breaking down as you build. It also gives the sauce time to settle, which helps it hold its place between layers instead of spreading too thin. Think of the lasagna as an extension of the ragù, not a separate recipe. The sauce is doing most of the work—you’re just giving it structure.

Breaking the build into parts.

Start by mixing the ricotta fully—egg, cheese, and herbs integrated so it spreads evenly without clumping. From there, divide it into three equal portions. Do the same with your shredded cheese. It’s a small step, but it keeps the layers consistent and prevents you from overloading one section while leaving another thin.

Once everything is portioned, the assembly becomes controlled instead of guesswork. Each layer has a clear role, and the final result reflects that. What makes this come together cleanly is treating each component as its own step.

Layering with structure.

The order matters. A thin layer of ragù goes down first to anchor the noodles. From there, the pattern builds—noodles, ricotta, cheese, then a heavier layer of sauce. That sequence repeats, giving you a balance of creaminess, melt, and depth in every bite.

The final layers shift slightly to finish clean:

  • noodles
  • herb ricotta cheese mixture
  • a layer of sauce
  • shredded cheese
  • and a final layer of cheese with a light dusting of oregano

That top layer sets the tone—golden, structured, and just enough texture to contrast what’s underneath.

Why this works.

This lasagna comes together cleanly because each component is built and layered with intention. As it bakes, everything settles into place. The sauce thickens slightly, the cheese melts and integrates, and the layers hold without blending into each other.

The ragù provides depth and structure, the ricotta—set with egg and fresh herbs—spreads evenly and holds its place, and the cheese layers bind everything without overwhelming the dish. Dividing the ricotta and cheese ahead of time keeps each layer consistent, so nothing feels heavy in one section or thin in another.

When it’s rested and cut, the slice should hold clean lines—defined layers, balanced proportions, and a structure that carries from the first cut to the plate.

You’ll find the full method outlined below. The ingredients are familiar, but the structure is what makes this version work—built step by step so the final dish feels as intentional as the sauce it’s based on.

Lasagna Bolognese with Ricotta

Lasagna Bolognese is a layered build that turns a slow-cooked ragù into something structured and complete—pasta, herbed ricotta, and melted cheeses stacked with intention so each layer holds its place. It’s rich without being heavy, balanced between meat, creaminess, and acidity, and built to let the ragù carry the dish from the first bite to the last.
Print Pin
Category: FEAST
Cuisine: Italian
Course: Main Course
Keyword: Bolognese, Lasagna, Ricotta
Prep: 40 minutes
Cook: 50 minutes
Resting Time: 20 minutes
Total: 1 hour 50 minutes
Servings: 8 servings
Calories: 451kcal
Author: TastyDaddy

Ingredients

Lasagna Noodles

Ricotta Mixture

Cheese Mixture

Topping

Instructions

Pre-heat

  • Pre-heat oven to 375℉

Cook & Cool the Noodles

  • Bring a large pot of salted water to a boil. Cook 15 whole lasagna noodles until just shy of al dente—they'll finish cooking while the lasagna bakes in oven.
  • Drain and rinse lightly with cool water to stop the cooking. Dry and lay noodles flat on a sheet tray or parchment so they don’t stick. Let cool completely in fridge.

Prepare the Ricotta Mixture

  • Add the following to the mixing bowl:
    • 15 oz ricotta cheese
    • 1 large egg
    • ¼ cup parmesan cheese
    • 2 tsp onion powder
    • ½ tsp Kosher salt
    • ¼ tsp black pepper
  • Wash and dry basil, parsley, and thyme.
  • Chop all herbs and place in the mixing bowl with the other ingredients.
  • Combine all ingredients until thoroughly integrated.
  • Separate into 3 equal portions.

Divide the Shredded Cheese

  • Separate the 6 cups mozzarella cheese(shredded) and 1½ cups parmesan cheese (shredded) into 3 equal parts (2 cups of mozzarella + ½ cup of parmesan) so you have even amounts for each layer.

Assemble the Lasagna

  • Spread a thin layer of Daddy's Ragù alla Bolognese (about 1 cup) into the bottom of a deep 9x13 baking dish.
  • Use a slotted spoon when measuring out sauce to remove almost all of the liquid, making your sauce layers more concentrated. Excess liquid will cause the lasagna to become watery/runny. You can even strain with cheese cloth, if needed.
  • Add a layer of lasagna noodles, followed by ⅓ of the Ricotta mixture, followed by 2 cups Daddy's Ragù alla Bolognese, followed by ⅓ of shredded cheese.
  • Repeat layer sequence two more times.
  • On final shredded cheese layer, top with 1 tsp Kosher salt and ½ tsp dried oregano.

Baking

  • Cover 9x13 dish with tented aluminum foil and bake at 375℉ for 30 minutes.
  • Remove foil after 30 minutes and bake an additional 15-20 minutes until golden and bubbling.

Resting

  • Let rest for 15–20 minutes before cutting. This allows the layers to set and hold their structure.

Notes

NUTRITION NOTE: Because the internal nutrition calculator uses an API program to pull the nutrition information, it did not pull the nutritional information for the ragù. For correct nutritional calculations, you must add the nutritional information for 7 servings of Daddy's Ragù alla Bolognese to 8 servings of the amounts listed above and divide the total by 8 servings to get the TRUE nutritional information per serving—I've done the math for you below:
  • Calories: 849.125 kcal
  • Carbohydrates: 21g
  • Protein: 53.25g
  • Fat: 60g
  • Saturated Fat: 29.5g
  • Polyunsaturated Fat: 3.625g
  • Monounsaturated Fat: 21.25g
  • Trans Fat: 0.878g
  • Cholesterol: 210.75g
  • Sodium: 2081.125mg
  • Potassium: 1095.125mg
  • Fiber: 4g
  • Sugar: 8g
  • Vitamin A: 5857.25 IU
  • Vitamin C: 18.875mg
  • Calcium: 904.75mg
  • Iron: 4.5mg

Nutrition

Calories: 451kcal | Carbohydrates: 7g | Protein: 34g | Fat: 32g | Saturated Fat: 19g | Polyunsaturated Fat: 1g | Monounsaturated Fat: 9g | Trans Fat: 0.003g | Cholesterol: 132mg | Sodium: 1368mg | Potassium: 179mg | Fiber: 0.5g | Sugar: 1g | Vitamin A: 1232IU | Vitamin C: 4mg | Calcium: 812mg | Iron: 1mg

Daddy’s Ragù alla Bolognese

This version of ragù leans into tradition but makes a few deliberate shifts—ground sausage in place of pancetta, mushrooms for added depth, and a controlled, staged build that keeps each element defined before it comes together.

It’s rich, meaty, and structured, with just enough cream at the end to round everything out without softening the identity of the sauce.

Daddy’s Ragù alla Bolognese

Slow-built, deeply layered.

This is a ragù that leans into tradition but doesn’t stay rigid to it—ground sausage in place of pancetta, and a staged build that keeps each element defined before it comes together. The mushrooms in this version are optional, but I like to include them for the added layer of umami and depth they bring to the sauce. It’s rich, meaty, and structured, finished with just enough cream to round it out without softening its identity.

Where it comes from.

This is a recipe that sits somewhere between memory and refinement. The foundation came from my mother—simple, comforting, and built with intention. I remember standing at the counter helping where I could, washing vegetables, cutting onions and carrots, and being handed the spoon every so often to stir the pot. It wasn’t rushed. The sauce would sit and develop, filling the house slowly, becoming part of the rhythm of the day as much as the meal itself.

Later, when I was in college, that foundation picked up a few new layers. A close Italian-American friend introduced me to his grandmother, who had her own way of doing things—small adjustments that made a difference. One of the simplest was adding just a pinch of sugar to the tomatoes to soften their acidity. Not enough to sweeten the sauce, just enough to round it out. It’s a detail I still come back to when the tomatoes need it.

Over time, those influences came together. What I’ve kept is the patience and intention behind the original—nothing rushed, nothing overloaded—just a process that builds gradually so each component has its place. What’s changed is how deliberately I approach each step now, paying closer attention to how everything comes together in the end. It’s still rooted in where it started. It’s just been shaped along the way.

Building it in stages.

What makes this ragù work isn’t just the ingredient list—it’s the sequencing. Each component is cooked separately at first, allowing it to develop its own flavor before being combined. The sausage renders fat and builds the base. The mushrooms deepen the savory profile. The soffritto softens and sweetens. The beef is seasoned and browned on its own, giving it structure before it ever hits the sauce. Nothing is rushed into the pot all at once. Everything is given space to develop, then brought together once it’s ready.

Why the adjustments work.

A few small shifts change the character of the sauce without pulling it away from its roots. Using sweet Italian sausage instead of pancetta keeps the pork element but adds more body and seasoning. The mushrooms—optional, but worth it—reinforce that depth, giving the sauce a more rounded, savory backbone without changing its identity.

From there, the adjustments are more subtle, but just as important. Garlic isn’t traditional in a classic ragù, but used sparingly, it adds a layer of aroma that supports the soffritto without taking over. Anchovy paste works the same way—completely disappearing into the sauce while adding a quiet, underlying umami that deepens everything around it.

Seasoning the beef directly in the pan builds flavor early, giving the meat its own structure before it’s incorporated into the sauce. The wine deglaze then pulls everything together, lifting the fond and setting a clean, cohesive base before the rest of the ingredients come in. None of these changes are meant to redefine the dish. They’re there to refine it—small adjustments that build a little more depth, a little more structure, and a little more control into the final result.

Letting it come together.

Once everything is in the pot, the work slows down. The simmer is where the sauce becomes cohesive—where the fat, liquid, and solids integrate into something that feels unified rather than layered. It thickens gradually, deepens in flavor, and settles into a texture that holds together without feeling heavy. There’s no shortcut here. Time is what turns the individual components into a proper ragù.

What I typically serve it with.

This is a sauce that benefits from the right pairing. It works best with wider, textured pasta or tubes—tagliatelle or pappardelle or penne rigate—where the sauce has something to cling to. It also holds up well in layered dishes like lasagna, where that depth carries through multiple components.

On its own, this lives in the Simmer category—a standalone sauce built slowly and intentionally. But I classify it as a Main Course beccause in practice, it’s meant to become one. Once it’s paired with pasta or layered into a dish, it shifts from component to centerpiece. However it’s served, the goal is the same: let the sauce lead.

Recipes that use this sauce.

You’ll find the full method outlined below. The ingredients are straightforward, but the structure is what makes it work—each step building toward a sauce that feels composed from start to finish.

And if you do make it, let me know how it turns out—and what you pair it with.

Daddy's Ragù alla Bolognese

Daddy’s Ragù alla Bolognese is a deeply layered, slow-built sauce rooted in tradition but shaped by experience. It takes the foundation I learned from my mother and refines it with a few intentional tweaks—drawing from time spent close to Italian-American kitchens—resulting in something richer, meatier, and more personal without losing its sense of origin.
Print Pin
Category: SIMMER
Cuisine: Italian
Course: Main Course
Keyword: Bolognese, Pasta, Ragù, Sauce
Prep: 30 minutes
Cook: 45 minutes
Simmer Time: 2 hours
Total: 3 hours 15 minutes
Servings: 8 servings
Calories: 455kcal
Author: TastyDaddy

Ingredients

Spices & Seasonings

Meat

Optional

Soffritto

Sauce

Instructions

Wash & Prep the Vegetables

  • Peel (make sure to remove the tough outer layer), wash, and dry 1 med yellow onion; using your chef knife, dice the onion; set aside in small bowl.
  • Wash, trim and dry the celery stalks; chop until you have 1½ cups celery; set aside in a small bowl.
  • Wash, trim, and peel carrots; give them a final rinse and dry them; dice until you have 1½ cups carrots; set aside in a small bowl.
  • Wash, dry, and trim the ends off 2 whole plum tomatoes; remove seeds and dice; set aside in small bowl.
  • Wash and dry 4 whole basil leaves; stack leaves and roll tightly; take your chef knife and cut into ribbons (chiffonade); set aside.
  • If including, thoroughly wash and dry portobello mushrooms; mince until you have enough to fill 2 cups.

Brown the Sausage

  • In a large Dutch oven over medium heat, cook 1 lb sweet Italian sausage until browned and lightly caramelized. Remove with a slotted spoon and transfer to a large bowl, leaving the rendered fat in the pot.

Cook the Mushrooms (optional)

  • If using mushrooms, add them to the sausage fat and cook until their moisture has released and reduced, and they begin to brown.
    Transfer to the bowl with the sausage.

Build the Soffritto

  • Add onion, celery, and carrots to the pot. Cook over medium heat until softened and lightly golden, about 8–10 minutes.
    Transfer to the bowl with the sausage and mushrooms.

Brown & Season the Beef

  • Add 1 lb ground beef to the pot. As it begins to cook, season directly in the pan with:
    • ½ tsp Kosher salt
    • ¼ tsp black pepper
    • ⅛ tsp crushed red pepper flakes
    • ½ tsp onion powder
    • 1 dash nutmeg
    Break the meat apart and allow it to brown, developing color rather than steaming.
    Transfer to the bowl with the sausage, vegetables, and mushrooms.Drain excess fat, leaving about 1 tablespoon in the pot.

Infuse the Stock

  • In a small saucepan, bring the 1 cup beef stock to a light simmer with 2 sprigs fresh thyme leaves (placed inside a spice infuser ball). Remove from heat and let steep while continuing the recipe.

Build the Base & Deglaze

  • Add 1 tbsp garlic (minced) to the remaining fat and cook over medium-low heat until fragrant, about 30–60 seconds.
    Stir in 1 tbsp anchovy paste until dissolved.
    Add 1 cup Sauvignon Blanc and deglaze the pan, scraping up any fond from the bottom. Let the wine reduce by about half.

Simmer the Sauce

  • Return all reserved ingredients (sausage, mushrooms, vegetables, beef) to the Dutch oven and stir to combine.
  • Remove thyme from beef stock.
  • Add the following to the Dutch oven:
    • 24 oz passata
    • 1 tbsp tomato paste
    • diced tomatoes
    • infused beef stock
    • 2 whole bay leaves
    Stir to combine and bring to a gentle simmer.
  • Reduce heat to low and simmer uncovered for at least 2 hours, stirring occasionally. The sauce should gradually thicken and develop a cohesive texture.

Finish

  • Once the sauce has finished simmering, remove bay leaves. Stir in ½ cup half and half until fully incorporated, then add basil.

Nutrition

Calories: 455kcal | Carbohydrates: 16g | Protein: 22g | Fat: 32g | Saturated Fat: 12g | Polyunsaturated Fat: 3g | Monounsaturated Fat: 14g | Trans Fat: 1g | Cholesterol: 90mg | Sodium: 815mg | Potassium: 1047mg | Fiber: 4g | Sugar: 8g | Vitamin A: 5286IU | Vitamin C: 17mg | Calcium: 106mg | Iron: 4mg

Homemade Vegetable Broth

Vegetable broth is a study in extraction and balance—built not on bones or fat, but on the precise layering of aromatics, water content, and time. At its best, it delivers a clean, structured flavor profile with natural sweetness, vegetal depth, and a subtle umami backbone.

Homemade Vegetable Broth

A base that's not so basic

Vegetable broth is a study in extraction and balance—built not on bones or fat, but on the precise layering of aromatics, water content, and time. At its best, it delivers a clean, structured flavor profile: natural sweetness from alliums and carrots, vegetal depth from celery and leeks, and a subtle umami backbone often coaxed from mushrooms, tomato, or seaweed. The goal isn’t intensity for its own sake, but clarity—each component contributing without muddying the whole.

Technique matters. A gentle, controlled simmer preserves brightness and prevents bitterness, while careful ingredient selection avoids overly sulfuric or tannic notes (looking at you, overcooked brassicas). Properly made vegetable broth should taste full yet transparent, with a light body that supports rather than dominates.

Building flavor before the simmer

Building flavor starts before the water ever hits the pot. Taking the time to sweat or lightly roast your mirepoix—onions, carrots, celery—coaxes out their natural sugars and deepens the overall profile of the broth. Sautéing keeps things clean and controlled, enhancing sweetness without introducing bitterness, while roasting adds a more caramelized, slightly darker complexity. Neither is required, but both shift the final result from simply “vegetal” to intentionally layered.

The freezer scrap advantage

Vegetable broth is as much about resourcefulness as it is technique. A well-managed freezer scrap bag can produce a broth just as nuanced as one made from pristine ingredients. Onion skins, carrot peels, celery ends and interior leaves, leek or fennel tops, mushroom stems, herb stems—these aren’t scraps, they’re concentrated flavor.

Not all scraps are equal—and that’s where the nuance comes in. Onion skins deepen color and add subtle sweetness. Mushroom stems bring body and umami. Leek tops contribute a softer, greener allium note, while carrot peels reinforce sweetness. Even small additions can shift the profile. The goal isn’t to throw everything in—it’s to build something intentional from what you already have. The key is curation. Avoid anything overly bitter or sulfuric: brassicas like broccoli, cauliflower, and cabbage can quickly dominate; starchy vegetables like potatoes will cloud both texture and flavor; and overly sweet scraps, like large amounts of bell pepper, can throw off balance.

See my post on choosing the right ingredients…

TIP: If it’s going into your scrap bag, it needs to be properly washed—no exceptions. Dirt and grit don’t cook out; they settle in. I thoroughly wash and dry all of my fruits and vegetables, typically when I bring them home from the grocery store. Taking the time to rinse and dry vegetables before trimming ensures that what you’re saving is flavor, not contamination.

Timing is key

When ingredients go into the pot matters just as much as what goes in. Hardy aromatics—onions, carrots, celery—can simmer from the start, building the foundation. More delicate elements should be added later to preserve their integrity.

Fresh herbs and tender scraps like parsley stems or thyme are best added in the last 5-10 minutes or steeped in the broth as it cools. The same goes for umami boosters like nori or kombu: powerful in small amounts, but easily overwhelming if left too long. Think of them as accents, not the base.

Straining

Once your broth has finished simmering, the final step is refinement. Remove it from heat and use a spider strainer ladle (or slotted spoon) to lift out the larger solids, allowing the liquid to settle for at least 10 minutes before straining. This initial rest helps separate suspended particles and makes for a cleaner pass through your strainer.

Set a mesh strainer over a clean stockpot and pour the broth through, discarding what’s filtered out. Set filtered broth aside and wash both the mesh strainer and the stockpot you initially used for simmering the broth. Line the clean strainer with dampened cheesecloth and strain broth again into clean stockpot. Wetting the cloth beforehand is key—it prevents absorption and preserves your yield. This second pass isn’t always necessary, but it’s the difference between a good broth and one with professional-level clarity.

Storage

From there, cooling becomes just as important as cooking. Let the broth cool slightly at room temperature, then transfer to the refrigerator to chill completely. This not only preserves freshness but also stabilizes the flavor.

In the refrigerator, vegetable broth will keep for about 4–5 days. For longer storage, freezing is the better option—and where a little foresight pays off. Portioning matters. Silicone freezer trays (like Souper Cubes) allow you to freeze broth in consistent, usable amounts. Always chill the broth fully before portioning, then freeze until solid and transfer the cubes to airtight freezer bags. This frees up your trays and gives you a ready supply of broth that can be used exactly as needed—whether that’s a full quart for soup or a small cube to build a pan sauce. Well-stored, frozen broth will hold its integrity for 3–5 months without sacrificing clarity or balance.

Recipes that use this broth

Homemade Vegetable Broth

Vegetable broth is a study in extraction and balance—built not on bones or fat, but on the precise layering of aromatics, water content, and time. At its best, it delivers a clean, structured flavor profile with natural sweetness, vegetal depth, and a subtle umami backbone.
Print Pin
Category: SIMMER
Cuisine: Global
Course: Soup
Keyword: Broth, Vegetables
Prep: 15 minutes
Cook: 1 hour
Cooling Time: 10 minutes
Total: 1 hour 30 minutes
Servings: 8 servings
Calories: 65kcal
Author: TastyDaddy

Ingredients

Vegetables

Seasoning

Liquid

  • 12 cups filtered water

Herbs

Instructions

  • Heat 2 tbsp olive oil in stockpot.
  • Add 2 medium onions, 3 large carrots, 4 stalks celery, 2 tops leek (or fennel), and 5 cloves garlic to stockpot and lightly sauté.
  • TIP: You can substitute the onion, carrots, and celery for 4 cups of my Mirepoix recipe.
  • Once ingredient are slightly tender, add seasonings (bay leaves, salt, and peppercorns) and 12 cups of filtered cold water and slowly bring to a boil over medium-high heat.
  • Reduce heat to low and simmer gently, covered, for 1 hour.
  • Remove from heat and add fresh herbs (parsley & thyme) to stockpot.
  • Let the herbs steep while the broth cools for at least 10 minutes, then use a spider strainer ladle (or slotted spoon) to remove the larger solids to a mixing bowl.
  • Place a mesh strainer over an empty stock pot (large enough to hold the quantity of broth being poured in) and strain and discard what is filtered by the strainer.
  • TIP: If the mesh strainer let through small particles, clean the original (now empty) stockpot and mesh strainer; place clean mesh strainer over the clean stockpot and line with 2-4 layers of dampened cheese cloth (wetting it first will prevent the cloth from absorbing the broth); run the broth through the cheesecloth layers for an additional filtering.
  • Broth will keep in refrigerator for 4-5 days, or you can freeze the broth and store in the freezer for 3-5 months.
  • SEE NOTES SECTION FOR FREEZER STORAGE TIPS

Notes

NUTRITION NOTE: The nutritional values are for the fresh recipe ingredients listed on the card, but if you are like me, I make my vegetable broth using vegetable scraps I keep in the freezer. Six to seven (6-7) loosely-packed cups of scraps will do the trick, so long as the scraps contain the bulk of ingredients listed on the recipe card.
FREEZER STORAGE NOTE: The best way to freeze broth is by utilizing silicone freezer trays, such as Souper Cubes. Make sure broth is completely chilled in the refrigerator before pouring into trays. Freeze broth cubes completely then transfer to airtight freezer bags so that you can free up and reuse the trays for other things.

Nutrition

Calories: 65kcal | Carbohydrates: 8g | Protein: 1g | Fat: 4g | Saturated Fat: 1g | Polyunsaturated Fat: 0.5g | Monounsaturated Fat: 3g | Sodium: 637mg | Potassium: 224mg | Fiber: 2g | Sugar: 3g | Vitamin A: 4860IU | Vitamin C: 10mg | Calcium: 55mg | Iron: 1mg