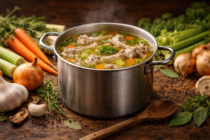
Chicken stock is built on transformation—where structure comes from collagen, not just composition. As bones gently simmer, they release body and depth, giving the liquid a quiet weight that carries flavor rather than just holding it. Aromatics round the edges, but the foundation is what sets it apart: a subtle richness that coats the palate without feeling heavy.
At its best, chicken stock is clear, layered, and cohesive—savory without being overpowering, with a natural balance between warmth, depth, and lift. It works quietly beneath the surface—carrying flavors, bridging ingredients, and giving the dish a sense of cohesion that would otherwise be missing.
Chicken stock is a study in structure and extraction—where bones, connective tissue, and time work together to create depth that water alone can’t carry. As it simmers, collagen breaks down into gelatin, giving the liquid body and a natural richness that lingers without feeling heavy. Aromatics—onion, carrot, celery—round out the profile, adding subtle sweetness and balance, while herbs and peppercorns provide lift. The result isn’t just flavorful—it’s cohesive, with a quiet density that supports everything built on top of it.
Technique shapes the outcome. A slow, steady simmer keeps the stock clear and refined, allowing impurities to rise and be removed without agitation. Too much movement clouds both flavor and appearance; too little attention leaves behind muddled notes. Properly made chicken stock should be clean yet full, with a gentle viscosity that gives it presence without turning it dense or greasy.
Building depth before the simmer
Flavor begins long before the pot fills with water. Roasting bones and aromatics develops a deeper, more layered stock, introducing caramelization and a darker, more complex backbone. Leaving everything raw produces a lighter, more delicate result—cleaner in flavor, more restrained in color. Both approaches have their place. The choice isn’t about right or wrong, but about what you want the stock to carry forward.
Even within the pot, small decisions compound. A splash of acid helps draw out minerals and structure from the bones. The ratio of bones to water determines body. Time allows everything to settle into itself. None of these elements stand out individually, but together they define the final character.
Using what you have with intention
Chicken stock is as much about economy as it is craft. A well-kept freezer becomes part of the process—carcasses from roasted chickens, backs, wings, and necks saved over time, alongside a steady collection of vegetable trimmings. Onion ends and skins, carrot peels, celery tops and leaves, herb stems—each one held aside not as waste, but as future structure.
What matters is how they come together. Bones provide body and depth; vegetables shape and refine the flavor. Balance is what keeps the stock focused. Too many aromatics can blur the foundation, while overly assertive or sweet additions can pull it off center. The goal is restraint—building something cohesive from what you have, rather than everything you have. When approached this way, the stock carries both intention and efficiency, with nothing unnecessary left behind.
For a deeper breakdown of what belongs in that scrap bag—and what doesn’t—the same principles carry over from vegetable broth. Some vegetables build clean sweetness and depth; others introduce bitterness, sulfur, or muddiness that can throw the entire stock off balance. If you want to get more precise about what to save and what to leave out, the vegetable broth guide walks through those decisions in detail. The rules don’t change here—the bones may provide the structure, but the vegetables still determine how refined the final stock feels.
TIP: If it’s going into your scrap bag, it needs to be properly washed—no exceptions. Dirt and grit don’t cook out; they settle in. I thoroughly wash and dry all of my fruits and vegetables, typically when I bring them home from the grocery store. Taking the time to rinse and dry vegetables before trimming ensures that what you’re saving is flavor, not contamination.
Timing is key
When ingredients go into the pot matters just as much as what goes in. Bones and hardy aromatics—onions, carrots, celery—belong at the start, where they have time to release structure and build the foundation. As the stock develops, fat rises, impurities surface, and the liquid begins to take on body. Managing that process—skimming as needed, maintaining a gentle simmer—keeps the flavor clean and the texture refined.
More delicate elements come later. Fresh herbs, garlic, or peppercorns can be added toward the end or steeped off-heat to preserve their character without dulling their edge. The same restraint applies to any additional flavoring—nothing should compete with the base that’s been slowly built. The goal is depth with clarity, not complexity for its own sake.
Straining
Once the stock has finished simmering, the focus shifts to refinement. Remove it from the heat and use a spider or slotted spoon to lift out bones and larger solids, then let the liquid rest undisturbed for at least 10–20 minutes. This step matters. It allows suspended particles to settle, giving you a cleaner, more controlled strain and a clearer final stock.
Pour the stock through a mesh strainer into a clean pot, discarding what’s left behind. For a more polished result, rinse the strainer, line it with dampened cheesecloth, and strain again. Wetting the cloth helps prevent unnecessary absorption and preserves yield. That second pass isn’t always required, but it brings a level of clarity that sets the stock apart—clean, cohesive, and free of distraction.
Storage
Cooling is part of the process, not an afterthought. Let the stock come down slightly at room temperature, then transfer it to the refrigerator to chill fully. As it cools, the gelatin sets and the fat rises, forming a layer that can be removed or reserved depending on how you plan to use it.
Refrigerated, chicken stock will keep for about 4–5 days. For longer storage, freezing offers more flexibility. Portioning into measured amounts—using silicone trays, like Souper Cubes—gives you control over how it’s used later, whether for a full pot of soup or a small addition to finish a sauce. Once frozen solid, transfer to airtight bags for storage. Properly handled, the stock maintains its structure and flavor for several months, ready to be brought back into whatever you’re building next.
Recipes that use this stock
Homemade Chicken Stock
Chicken stock is built on transformation—where structure comes from collagen, not just composition. As bones gently simmer, they release body and depth, giving the liquid a quiet weight that carries flavor rather than just holding it. Aromatics round the edges, but the foundation is what sets it apart: a subtle richness that coats the palate without feeling heavy.At its best, chicken stock is clear, layered, and cohesive—savory without being overpowering, with a natural balance between warmth, depth, and lift. It doesn’t announce itself. It supports, reinforces, and connects, turning individual components into something that feels complete.
Place 2 whole chicken carcasses in large roasting pan.
TIP: The same approach doesn’t have to stop at chicken. Turkey bones—whether from a full roast or broken-down parts—can be used on their own or combined with chicken to create a more layered poultry stock. Turkey brings a slightly deeper, richer backbone, while chicken keeps the profile balanced and versatile. Treated the same way, the result shifts subtly in character without changing the technique—just a broader expression of the same foundation.
Toss 2 medium onions (washed, skins left on, quartered), 3 large carrots (coarsely chopped), 4 stalks celery(coarsely chopped), 2 tops leek (coarsely chopped), 5 whole garlic cloves (smashed) in 2 tbsp olive oil, salt, and pepper and place in roasting pan with the chicken bones.
TIP: You can substitute the onion, carrots, and celery for 4 cups of my Mirepoix recipe.
Roast for at least 30 minutes.
Simmering
Remove roasting pan from oven and transfer roasted vegetables, bones, and pan drippings into an 8-quart stockpot.
TIP: If you don’t want to manage the stovetop, a slow cooker offers a more hands-off approach. The steady, low heat naturally maintains the kind of gentle extraction stock benefits from, without the risk of over-agitation. Add everything to the pot, cover with water, and let it run on low for several hours or overnight. You’ll still want to skim early if needed, but beyond that, it largely takes care of itself—producing a stock that’s just as cohesive, with less active attention.
Add seasonings (3 whole bay leaves, 2 tsp sea salt, and 1 tbsp peppercorns) and 12 cups filtered water (cold) and slowly bring to a boil over medium-high heat.
Reduce heat to low and simmer gently, covered, for 4 hours.
Remove from heat and add fresh herbs (¼ cup parsley & ¼ cup thyme) to stockpot.
Let the herbs steep while the broth cools for at least 20 minutes, then use a spider strainer ladle (or slotted spoon) to remove the larger solids to a mixing bowl.
Straining
Place a mesh strainer over an empty stock pot (large enough to hold the quantity of broth being poured in) and strain and discard what is filtered by the strainer.
TIP: If the mesh strainer let through small particles, clean the original (now empty) stockpot and mesh strainer; place clean mesh strainer over the clean stockpot and line with 2-4 layers of dampened cheese cloth (wetting it first will prevent the cloth from absorbing the broth); run the broth through the cheesecloth layers for an additional filtering.
Storing
Broth will keep in refrigerator for 4-5 days, or you can freeze the broth and store in the freezer for 3-5 months.
SEE NOTES SECTION FOR FREEZER STORAGE TIPS
Notes
NUTRITION NOTE: The nutritional values are for the fresh recipe ingredients listed on the card, but if you are like me, I make my stock using vegetable scraps I keep in the freezer. Six to seven (6-7) loosely-packed cups of scraps will do the trick, so long as the scraps contain the bulk of ingredients listed on the recipe card.FREEZER STORAGE NOTE: The best way to freeze broth is by utilizing silicone freezer trays, such as Souper Cubes. Make sure broth is completely chilled in the refrigerator before pouring into trays. Freeze broth cubes completely then transfer to airtight freezer bags so that you can free up and reuse the trays for other things.
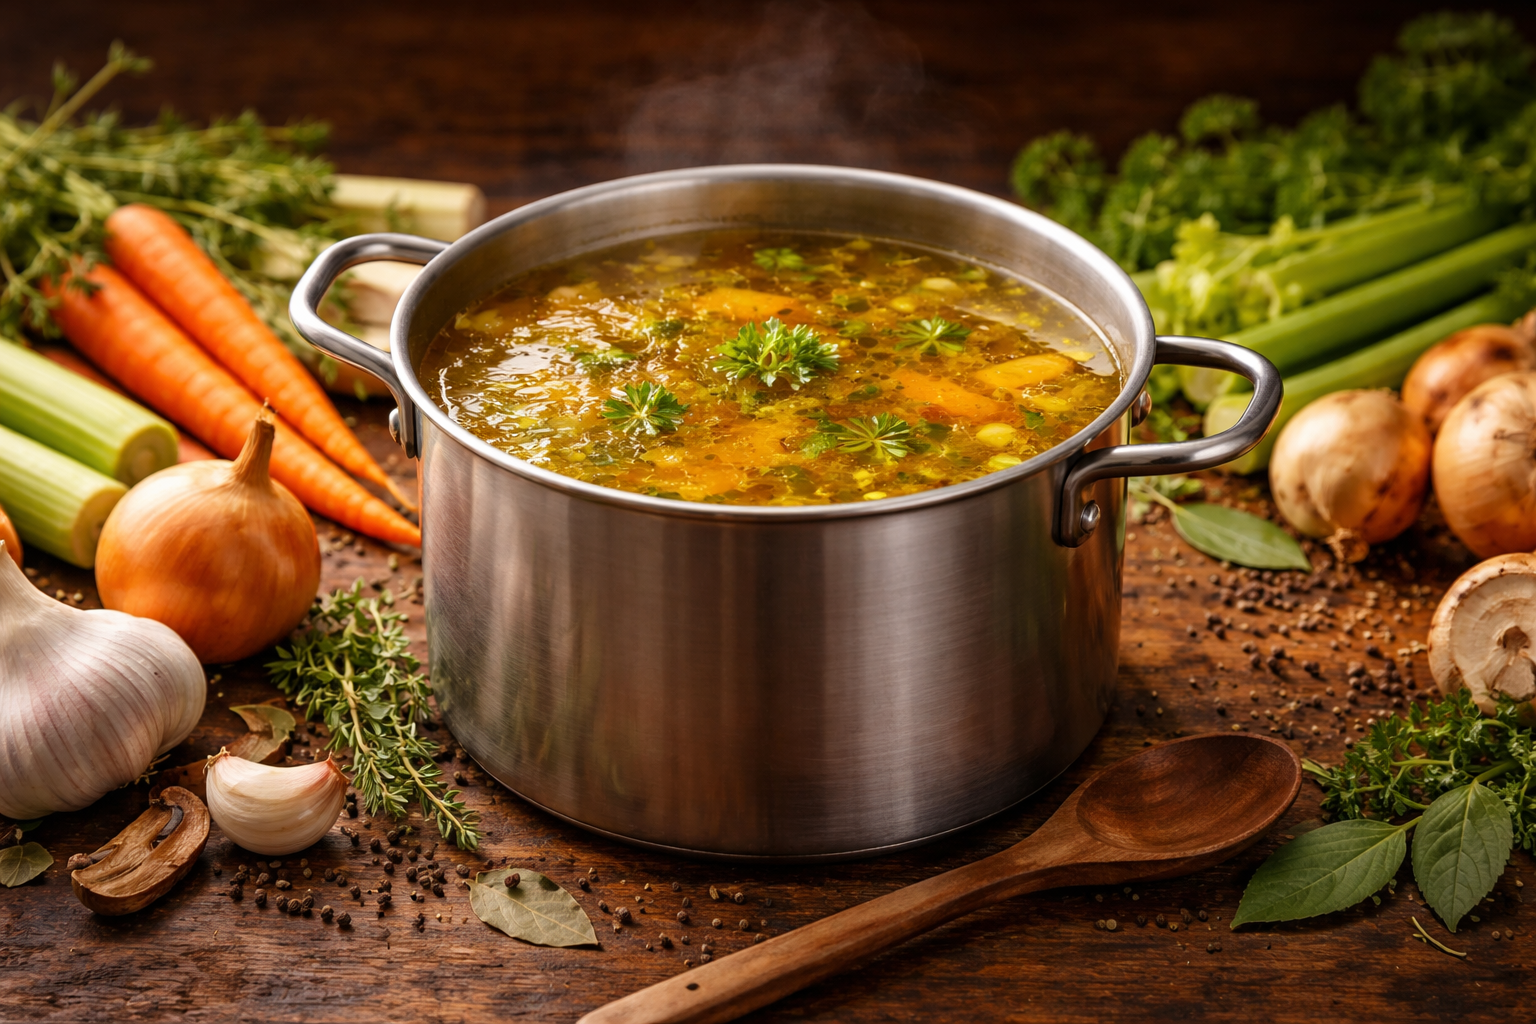
Vegetable broth is a study in extraction and balance—built not on bones or fat, but on the precise layering of aromatics, water content, and time. At its best, it delivers a clean, structured flavor profile with natural sweetness, vegetal depth, and a subtle umami backbone.
Vegetable broth is a study in extraction and balance—built not on bones or fat, but on the precise layering of aromatics, water content, and time. At its best, it delivers a clean, structured flavor profile: natural sweetness from alliums and carrots, vegetal depth from celery and leeks, and a subtle umami backbone often coaxed from mushrooms, tomato, or seaweed. The goal isn’t intensity for its own sake, but clarity—each component contributing without muddying the whole.
Technique matters. A gentle, controlled simmer preserves brightness and prevents bitterness, while careful ingredient selection avoids overly sulfuric or tannic notes (looking at you, overcooked brassicas). Properly made vegetable broth should taste full yet transparent, with a light body that supports rather than dominates.
Building flavor before the simmer
Building flavor starts before the water ever hits the pot. Taking the time to sweat or lightly roast your mirepoix—onions, carrots, celery—coaxes out their natural sugars and deepens the overall profile of the broth. Sautéing keeps things clean and controlled, enhancing sweetness without introducing bitterness, while roasting adds a more caramelized, slightly darker complexity. Neither is required, but both shift the final result from simply “vegetal” to intentionally layered.
The freezer scrap advantage
Vegetable broth is as much about resourcefulness as it is technique. A well-managed freezer scrap bag can produce a broth just as nuanced as one made from pristine ingredients. Onion skins, carrot peels, celery ends and interior leaves, leek or fennel tops, mushroom stems, herb stems—these aren’t scraps, they’re concentrated flavor.
Not all scraps are equal—and that’s where the nuance comes in. Onion skins deepen color and add subtle sweetness. Mushroom stems bring body and umami. Leek tops contribute a softer, greener allium note, while carrot peels reinforce sweetness. Even small additions can shift the profile. The goal isn’t to throw everything in—it’s to build something intentional from what you already have. The key is curation. Avoid anything overly bitter or sulfuric: brassicas like broccoli, cauliflower, and cabbage can quickly dominate; starchy vegetables like potatoes will cloud both texture and flavor; and overly sweet scraps, like large amounts of bell pepper, can throw off balance.
TIP: If it’s going into your scrap bag, it needs to be properly washed—no exceptions. Dirt and grit don’t cook out; they settle in. I thoroughly wash and dry all of my fruits and vegetables, typically when I bring them home from the grocery store. Taking the time to rinse and dry vegetables before trimming ensures that what you’re saving is flavor, not contamination.
Timing is key
When ingredients go into the pot matters just as much as what goes in. Hardy aromatics—onions, carrots, celery—can simmer from the start, building the foundation. More delicate elements should be added later to preserve their integrity.
Fresh herbs and tender scraps like parsley stems or thyme are best added in the last 5-10 minutes or steeped in the broth as it cools. The same goes for umami boosters like nori or kombu: powerful in small amounts, but easily overwhelming if left too long. Think of them as accents, not the base.
Straining
Once your broth has finished simmering, the final step is refinement. Remove it from heat and use a spider strainer ladle (or slotted spoon) to lift out the larger solids, allowing the liquid to settle for at least 10 minutes before straining. This initial rest helps separate suspended particles and makes for a cleaner pass through your strainer.
Set a mesh strainer over a clean stockpot and pour the broth through, discarding what’s filtered out. Set filtered broth aside and wash both the mesh strainer and the stockpot you initially used for simmering the broth. Line the clean strainer with dampened cheesecloth and strain broth again into clean stockpot. Wetting the cloth beforehand is key—it prevents absorption and preserves your yield. This second pass isn’t always necessary, but it’s the difference between a good broth and one with professional-level clarity.
Storage
From there, cooling becomes just as important as cooking. Let the broth cool slightly at room temperature, then transfer to the refrigerator to chill completely. This not only preserves freshness but also stabilizes the flavor.
In the refrigerator, vegetable broth will keep for about 4–5 days. For longer storage, freezing is the better option—and where a little foresight pays off. Portioning matters. Silicone freezer trays (like Souper Cubes) allow you to freeze broth in consistent, usable amounts. Always chill the broth fully before portioning, then freeze until solid and transfer the cubes to airtight freezer bags. This frees up your trays and gives you a ready supply of broth that can be used exactly as needed—whether that’s a full quart for soup or a small cube to build a pan sauce. Well-stored, frozen broth will hold its integrity for 3–5 months without sacrificing clarity or balance.
Recipes that use this broth
Homemade Vegetable Broth
Vegetable broth is a study in extraction and balance—built not on bones or fat, but on the precise layering of aromatics, water content, and time. At its best, it delivers a clean, structured flavor profile with natural sweetness, vegetal depth, and a subtle umami backbone.
Add 2 medium onions, 3 large carrots, 4 stalks celery, 2 tops leek (or fennel), and 5 cloves garlic to stockpot and lightly sauté.
TIP: You can substitute the onion, carrots, and celery for 4 cups of my Mirepoix recipe.
Once ingredient are slightly tender, add seasonings (bay leaves, salt, and peppercorns) and 12 cups of filtered cold water and slowly bring to a boil over medium-high heat.
Reduce heat to low and simmer gently, covered, for 1 hour.
Remove from heat and add fresh herbs (parsley & thyme) to stockpot.
Let the herbs steep while the broth cools for at least 10 minutes, then use a spider strainer ladle (or slotted spoon) to remove the larger solids to a mixing bowl.
Place a mesh strainer over an empty stock pot (large enough to hold the quantity of broth being poured in) and strain and discard what is filtered by the strainer.
TIP: If the mesh strainer let through small particles, clean the original (now empty) stockpot and mesh strainer; place clean mesh strainer over the clean stockpot and line with 2-4 layers of dampened cheese cloth (wetting it first will prevent the cloth from absorbing the broth); run the broth through the cheesecloth layers for an additional filtering.
Broth will keep in refrigerator for 4-5 days, or you can freeze the broth and store in the freezer for 3-5 months.
SEE NOTES SECTION FOR FREEZER STORAGE TIPS
Notes
NUTRITION NOTE: The nutritional values are for the fresh recipe ingredients listed on the card, but if you are like me, I make my vegetable broth using vegetable scraps I keep in the freezer. Six to seven (6-7) loosely-packed cups of scraps will do the trick, so long as the scraps contain the bulk of ingredients listed on the recipe card.FREEZER STORAGE NOTE: The best way to freeze broth is by utilizing silicone freezer trays, such as Souper Cubes. Make sure broth is completely chilled in the refrigerator before pouring into trays. Freeze broth cubes completely then transfer to airtight freezer bags so that you can free up and reuse the trays for other things.
Vegetable broth isn’t about throwing everything into a pot and hoping for the best—it’s about understanding how vegetables behave over time, heat, and extraction. Some build clean, layered flavor. Others muddy it, overpower it, or break it entirely.
Building the Perfect Vegetable Broth
The Foundation: What Always Works
At the core of a well-balanced vegetable broth is a familiar structure—aromatics that build sweetness, depth, and body without overwhelming the final result. Onions, carrots, and celery form the backbone for a reason. They create balance: sweetness, earthiness, and a subtle bitterness that keeps everything in check. Leeks, shallots, and garlic expand on that foundation, adding softer, more nuanced allium notes.
From there, mushrooms introduce umami and body, while tomatoes (used with restraint) can add brightness and depth. These are your anchors—the ingredients that define the broth without competing for attention.
The Supporting Cast: Use with Intention
Some vegetables work—but only when used in moderation. Leafy greens, herbs, and softer vegetables should be treated as accents, not structure. Spinach, parsley stems, zucchini, green beans—these can round out the broth, adding subtle vegetal notes and a bit of freshness, but they lack the backbone needed to carry a stock on their own. Left unchecked, they begin to collapse into the background, creating a flavor that feels less defined—more “green” than structured.
Bell peppers are a perfect example of this balance. In small amounts, they contribute a gentle sweetness and a hint of brightness. But their flavor is distinct and persistent, and once it takes hold, it doesn’t let go. The result is a broth that tastes less like a foundation and more like a finished dish—something that limits its versatility rather than enhancing it.
Herbs follow the same logic. Parsley stems, thyme, and even softer herb scraps can bring lift and aromatic clarity, especially when added toward the end of cooking. But they’re not meant to steep indefinitely. Given too much time or quantity, they shift from enhancing to defining, and once herbs start leading the profile, everything else becomes secondary.
Even vegetables with higher water content—like zucchini or certain squash—can dilute more than they contribute if overused, softening the overall impact of the broth rather than building it. They have a place, but it’s a supporting one. This is where restraint becomes a technique. The goal isn’t to eliminate these ingredients—it’s to understand their role. Used thoughtfully, they add dimension and nuance. Used excessively, they blur the lines you’ve worked to build.
The Problem Vegetables: What to Avoid
Not everything belongs in a stockpot—and most mistakes come from ignoring that. It comes down to behavior in the pot. Some vegetables break down too aggressively, some release off-notes, others overwhelm. A good broth relies on control—steady extraction, clean flavor, and restraint. Then there are ingredients that push too hard. Turnips, strong bitter greens, excessive peppers—these don’t sit in the background, they take over the front. A broth should stay neutral and flexible; once a single ingredient dominates, its usefulness narrows fast.
Cruciferous vegetables—broccoli, cabbage, cauliflower, Brussels sprouts—don’t hold up to a long extraction. Given time and heat, they release sulfur compounds that turn harsh, bitter, and slightly metallic. What works in a quick cook becomes aggressive in a simmer, and once that edge shows up, it only intensifies. Starchy vegetables like potatoes and large amounts of squash create a different problem. They absorb flavor while releasing starch into the liquid, leaving the broth cloudy and dulled. Instead of building structure, they soften it—flattening the profile and muddying the finish.
The Scrap Bag: What Earns Its Place
Scraps are where vegetable broth becomes both practical and personal—but not all scraps are equal. The ones worth saving are the ones that still carry structure and flavor. What you’re collecting isn’t waste—it’s concentration. These are the parts that often hold just as much flavor as what made it onto the plate, sometimes more. Over time, a well-managed scrap bag becomes layered by default, giving you a broader, more developed base without having to reach for fresh ingredients every time.
That said, intention still applies. A scrap bag isn’t a catch-all—it’s a curated extension of your kitchen. The same rules still matter: balance, proportion, and restraint. Too many sweet scraps will flatten the broth. Too many green elements will muddy it. What goes in should still reflect the kind of broth you want to end up with. Onion skins bring color and a subtle depth that reads more complex than their simplicity suggests. Carrot peels and ends reinforce sweetness without overpowering. Celery leaves and root ends maintain that familiar aromatic backbone, while mushroom stems contribute body and umami that help round everything out. Leek tops offer a softer, greener allium note—less sharp than onion, but just as important in building balance.
And above all, it has to be clean. Scraps should come from vegetables that were properly washed before trimming—no dirt, no grit, no exceptions. That isn’t something you can fix later. Whatever goes into the bag is exactly what ends up in the pot, and from there, into everything you build from it. If you don’t want the flavor in your broth, leave it out of the bag.
Ingredient Check
Curious about how an ingredient would impact the flavor profile of a broth? Select from the list below to see my notes on each.
A problem was detected in the following Form. Submitting it could result in errors. Please contact the site administrator.
Conclusion
A good vegetable broth isn’t built on variety—it’s built on restraint. The goal isn’t to load the pot with everything available, but to build something clear, balanced, and intentional. Complexity doesn’t come from quantity; it comes from how well each ingredient is chosen and how it behaves over time. Every ingredient should earn its place. If it doesn’t contribute structure, depth, or clarity, it doesn’t belong in the pot. That mindset shifts broth from something passive into something deliberate—less about using what you have, and more about deciding what actually serves the end result.
It helps to think of vegetable broth less like a fixed recipe and more like a framework you refine over time. You start with a foundation, build with intention, and adjust as needed. That might mean pulling back on certain elements, holding others until later, or leaving something out entirely. Balance is what defines the final result. Too many sweet vegetables and the broth turns flat, almost syrupy in character. Too many greens and it leans muddy, losing definition. Too many strong or assertive elements and the entire profile tips into bitterness or imbalance. None of these happen all at once—they creep in gradually, which is why control matters from the start.
In the end, the difference between a broth that supports a dish and one that competes with it comes down to editing. Not what you add—but what you choose to leave out.
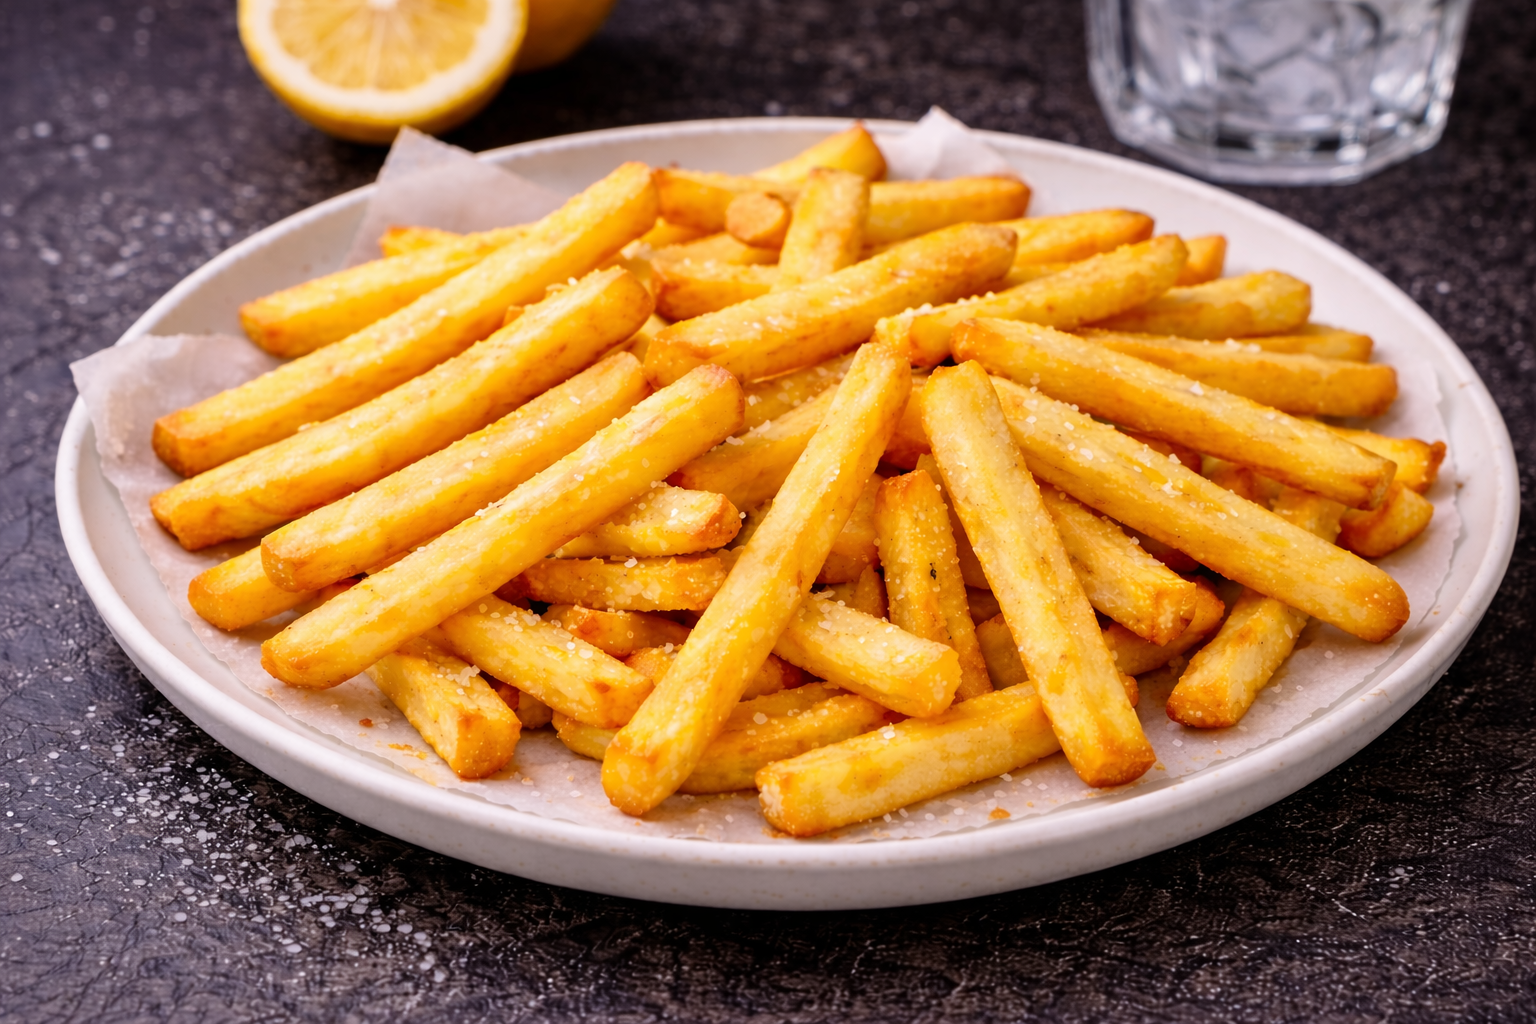
Classic hand-cut pommes frites made using the traditional double-fry method with a twist: a gentle vinegar blanch at a low temperature, an initial fry, a rest in the refrigerator, and a final fry. The technique produces fries that are beautifully crisp on the outside and a soft, fluffy inside.
Despite the name, French fries don’t originate in France. They trace back to Belgium, where potatoes were fried in fat as early as the late 1600s. The name likely came later, popularized by English speakers who associated the technique with French culinary terminology.
Whatever you call them, great fries aren’t accidental. The difference between limp and exceptional comes down to technique—how the potatoes are cut, treated, and cooked from start to finish. This method leans into those details to create fries that are crisp on the outside and soft, almost pillowy, on the inside.
Why the potato matters.
Not all potatoes behave the same when fried. For fries, a high-starch potato is the goal. Starchier varieties break down just enough during cooking to create that fluffy interior, while also allowing the exterior to crisp properly in hot oil.
Lower-starch potatoes tend to hold their structure too well, resulting in a firmer, less airy center and a less defined crust. Starting with the right potato sets the foundation for everything that follows.
The importance of blanching.
Handled carefully, this step sets up both the texture and the finish. Just like the Golden Girls wouldn’t have worked without Blanche, your fries won’t be as golden without this step. Instead of relying on a long soak alone, the potatoes are blanched in water with a small amount of vinegar. This step does more than just par-cook the fries—it actively improves their structure and color.
The vinegar introduces a gentle acidity that helps the exterior of the potatoes hold together, preventing them from breaking down or turning mushy during frying. At the same time, the hot water draws out excess surface sugars, which reduces premature browning in the oil and allows the fries to develop a more even, golden color later on.
Drying and the first fry.
After blanching, the potatoes are dried thoroughly before hitting the oil. Removing surface moisture is critical—any remaining water interferes with frying and prevents the exterior from setting properly.
The first fry is quick and intentional. It cooks the potatoes through without adding color, creating the soft interior that defines a great fry. At this stage, the fries are pale and delicate, but structurally prepared for what comes next.
Why the chill and second fry matter.
Once the first fry is complete, the fries are chilled before going back into the oil. This pause allows the interior to firm up slightly and the exterior to dry out further, which is essential for achieving that final crisp texture.
The second fry is where everything comes together. The hotter oil finishes the exterior, creating a golden, crisp shell while the inside remains tender. This two-step frying method is standard in professional kitchens for a reason—it consistently delivers fries with contrast, structure, and balance.
Salt is added only after this final fry, ensuring it adheres to the surface without interfering with the oil during cooking.
Simple, but not careless.
Hand-cut fries are a perfect example of how a simple dish can benefit from precision. Each step—cutting, blanching, drying, frying, and resting—builds toward a final result that feels intentional rather than incidental.
You’ll find the full method outlined below, from cutting the batons to the double fry that brings everything together. The process takes a little time, but most of it is hands-off, and the payoff is fries that are crisp, golden, and built the way they’re meant to be.
Hand Cut Pommes Frites
Classic hand-cut pommes frites made using the traditional double-fry method with a twist: a gentle vinegar blanch at a low temperature, an initial fry, a rest in the refrigerator, and a final fry. The technique produces fries that are beautifully crisp on the outside and a soft, fluffy inside.
Wash and peel potatoes, making sure to re-rinse each potato after peeling, drying each with a paper towel, and setting aside on butcher block for next step.
Cut
Using your chef's knife, cut potatoes into ¼"(6mm) batons.
Place cut batons into a bowl of lightly-salted water to prevent browning as you cut all the potatoes. Though the cut batons soak here, I veer from the traditional longer soak method and opt for blanching (see below).
Rinse
Carefully transfer cut batons into a strainer or colander and rinse thoroughly under running water for about 30 seconds.
Vinegar Blanch
Carefully transfer rinsed batons into a 6-quart stockpot and add 1 tbsp salt, 2 quarts water, and 2 tbsp white vinegar to the pot. Bring pot to a boil over high heat, immediately reducing heat to low once it reaches a boil. Cook for 10 minutes, then carefully transfer batons back into colander using a spider strainer or slotted spoon.
TIP: DO NOTdump stock pot into colander! Blanching has softened the batons and they will break.
Sheet-Pan Dry
Line two baking sheets with paper towels.
Carefully spread the batons evenly on lined baking sheets and leave to dry for at least 5 minutes.
Carefully lift paper towel with dried batons from baking sheet and place onn counter.
Re-line baking sheets with fresh paper towels.
Frying - Round One
Heat 1 quart canola (or peanut) oil to 400℉ in wok (or fry pan) over medium-high heat.
TIP: After 2-3 minutes of burner being on, place a toothpick in the oil. You know the oil is ready (hot enough) when bubbles form around the toothpick.
Using a spiderweb or slotted spoon, lower potato batons in small batches and cook for 1 minute, moving them around once or twice while they cook. Remove from oil and place cooked fries onto freshly-lined baking sheet.
TIP: DO NOT salt the fries when they come out of the oil during the first round of frying. Salt breaks down the fat in the oil and also reduces the smoking point, so if you salt them during this round, you will be adding tons of salt to the oil during round two of frying and your fries will not cook properly.
Repeat with small batches until all fries are cooked.
Chill
Place fries to chill in refrigerator to chill for a minimum of 30 minute
TIP: If you have to prep other parts of your meal, this is the perfect time to do it. Save Round Two of frying for the final step in your meal prep so your fries are piping hot when served.
Frying - Round Two
Line a large bowl with paper towels.
Reheat the canola (or peanut) oil to 400℉ in wok (or fry pan) over medium-high heat.
Fry half the fries for 4 minutes, moving them around once or twice, until golden and crispy, transferring cooked fried to the lined bowl.
Repeat with second half, then sprinkle with salt (or preferred seasoning). Gently toss to coat the fries with seasoning and serve!
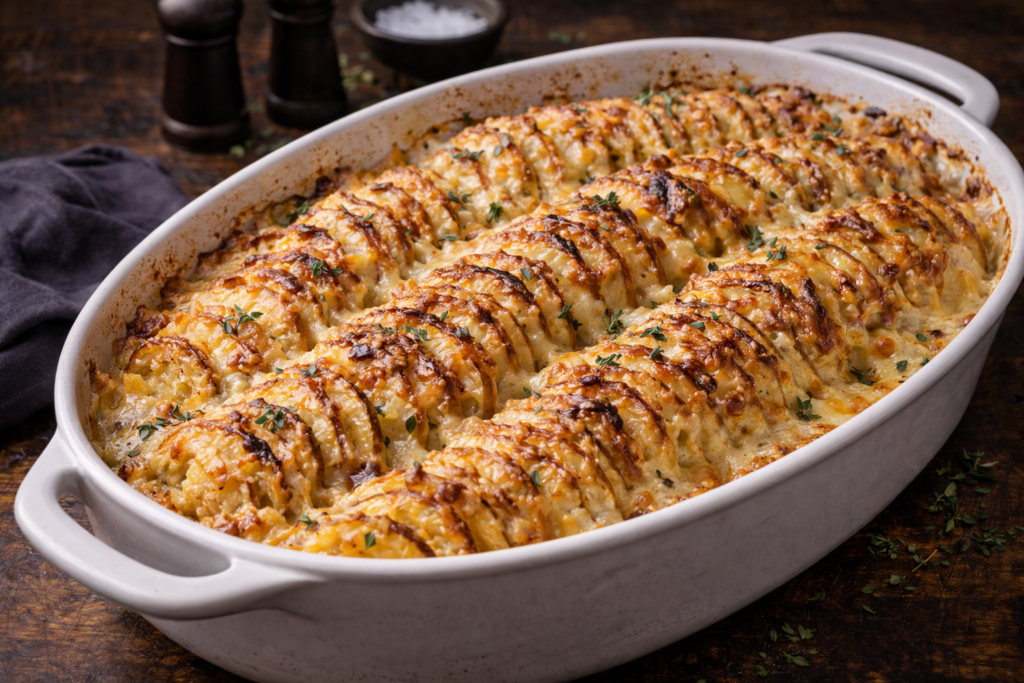
Thinly sliced potatoes layered vertically and baked in a rich cream infusion with nutty Gruyère until bubbling and golden. Crisp edges, tender centers, and a deeply savory finish make this French-inspired classic equal parts elegant and indulgent. Structured in presentation, layered in flavor, and unapologetically rich.
There’s something about Potatoes Au Gratin that feels timeless. It isn’t flashy. It isn’t complicated. But when done correctly, it commands the table.
This version leans into technique and presentation just as much as flavor. Thinly sliced potatoes are arranged vertically—like a ratatouille—allowing the sauce and Gruyère to weave through every layer. The result isn’t just creamy; it’s structured, defined, and intentional.
Why Gruyère matters.
If you’re making a true gratin, the cheese shouldn’t just melt—it should contribute character.
Gruyère is nutty, slightly sweet, and complex without overpowering the dish. It melts seamlessly into the sauce while still browning beautifully on top. Those caramelized ridges are where the depth lives—and Gruyère delivers that every time, especially coupled with Parmesan, like this recipe calls for in addition.
All about the Roux.
This gratin begins with butter and seasoned flour cooked briefly before being whisked with milk or half-and-half. Milk keeps it classic. Half-and-half leans more indulgent. Either way, the roux is what makes the texture intentional.
Starting with a roux gives the sauce body from the beginning. It creates a creamier, thicker consistency that coats each slice evenly and bakes into something structured rather than loose. The result is a gratin that slices cleanly and holds its shape without sacrificing silkiness.
Mandoline or Knife? Both Work.
I recommend using a mandoline because it allows you to set a consistent thickness—and consistency matters in a dish like this. Even slices cook evenly. They absorb the sauce at the same rate. They soften without turning mushy.
But if you’re confident with a chef’s knife, use it. A steady hand and a sharp blade will give you just as beautiful a result. The key is thin, uniform slices—not the tool itself. Technique matters more than equipment.
The Finish.
As it bakes, the sauce tightens and the Gruyère bubbles into golden ridges across the surface. The top should be deeply caramelized— not pale, not scorched—just structured and bubbling. Let it rest before serving. The layers settle. That’s when you know the technique worked.
You’ll find the full method outlined below, from preparing the roux to arranging the potatoes for that vertical finish. The process is straightforward—precision matters more than complexity. If you make it, let me know how it holds its structure—and what you paired it with.
Gruyère Pommes de Terre Au Gratin
Thinly sliced potatoes layered vertically and baked in a rich cream infusion with nutty Gruyère until bubbling and golden. Crisp edges, tender centers, and a deeply savory finish make this French-inspired classic equal parts elegant and indulgent. Structured in presentation, layered in flavor, and unapologetically rich.
Wash and peel potatoes, making sure to re-rinse each potato after peeling, drying each with a paper towel.
Pre-heat oven to 400℉
Using a kitchen mandoline, slice each potato into ⅛" or 3mm slices. Once all the potatoes are sliced, use paper towel to soak up excess water from slices, and place in a mixing bowl.
Sprinkle 1 tsp salt, ½ tsp pepper, 1 tsp onion powder, ½ tsp thyme onto potato slices and mix in bowl until all the slices are coated with the seasoning blend.
Sauce
In a medium sauce pan, melt 4 tbsp butter on medium heat.
Once butter is melted, add 4 tbsp flour, ½ tsp garlic powder, ½ tsp paprika and whisk until combined; heat until mixture has a nice golden color.
Add 2 cups milk (or half and half) and whisk until the milk, butter, and flour are nice and creamy smooth (no clumps); bring the sauce to a simmer.
Constantly stirring, continue to cook for about 10 minutes or until sauce thickens and coats the whisk; remove from heat.
Add 1½ cups of the grated Gruyère and ¼ cup of the grated Parmesan, folding it into the sauce until melted and thoroughly incorporated.
Assembly
Grease casserole dish and load in potato slices standing vertically in about three rows (much how you would arrange the veggies in a ratatouille); be sure not to pack the slices too tightly, as you want the sauce to be able to work its way between the slices as it cooks.
Pour half the sauce over the potatoes, taking a fork to ensure the sauce works its way between the slices; top with remaining sauce, spreading evenly and making sure the potatoes are completely covered.
Top with remaining ½ cup Gruyère and ¼ cup Parmesan cheeses, spreading evenly.
Cover with lid (or foil if dish doesn't have a lid) and bake for 45 minutes.
Uncover and continue baking for another 35 minutes or until the potatoes are tender (when fork is inserted) and the cheese has a golden brown color.
Remove from oven and let rest on the counter for about 10 minutes before serving. This gives the sauce time to cool and bind.
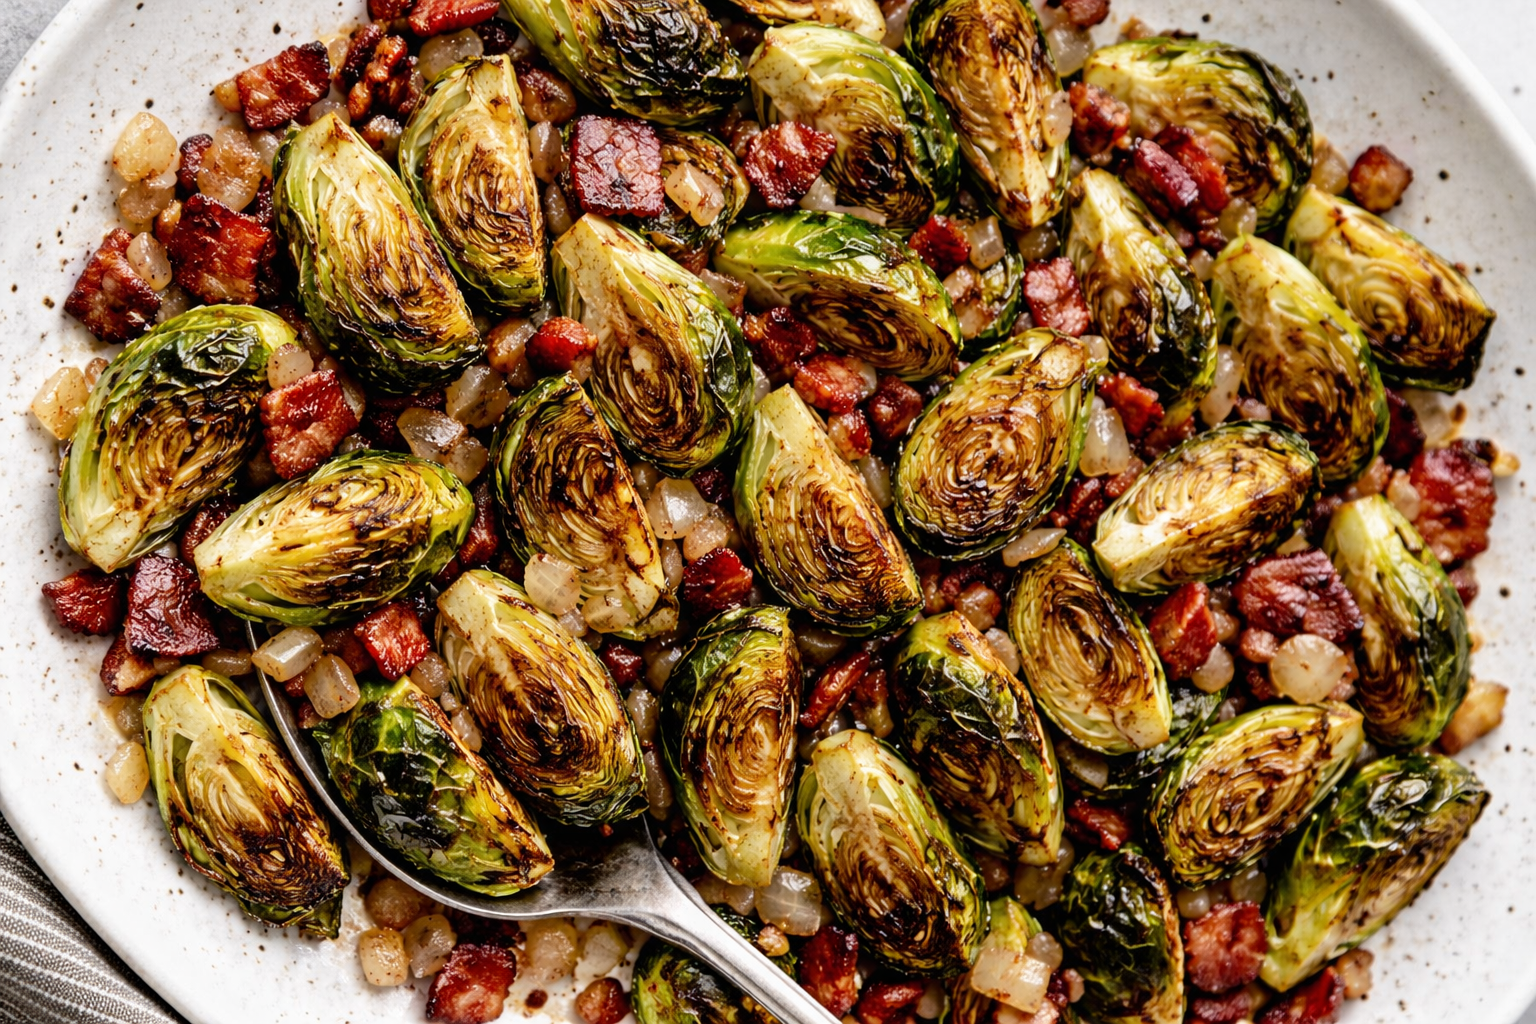
Roasted Brussels sprouts tossed with crisp bacon and reduced balsamic until caramelized and glossy. The balance of smoky, tangy, and sweet makes this a bold, flavor-packed addition to any feast.
Brussels sprouts have earned a bad reputation over the years—but only because they’ve been handled poorly. When roasted correctly, they’re crisp at the edges, tender at the center, and deeply nutty in a way that feels far more intentional than their boiled predecessors.
This version keeps things simple—but deliberate. The sprouts roast on their own sheet pan, seasoned and coated, spaced out and left undisturbed long enough to develop real color. High heat allows the outer leaves to blister and crisp while the interior softens without turning mushy.
Baking the bacon.
I always bake my bacon in the oven versus frying. Not only does it prevent nuisance bacon splatter, but baking it ensures it turns properly crisp instead of soft or chewy or overdone and burnt—and it also leaves behind rendered bacon grease that doesn’t go to waste in this recipe.
Typically, depending on the cut and the brand, bacon is baked in the oven at 400°F for 15-20 minutes, but we take advantage of the oven already being hot and bake it alongside the sprouts, checking it at 15 minutes, and then every so often following, until it reaches your personal desired crispiness.
Layers of flavor.
Once the bacon comes out of the oven, I reserve a bit of that rendered fat and use some of it to sauté the minced shallot and red bell pepper. These two ingredients are optional, but i think they compliment this dish perfectly, absorbing the smokiness of the bacon while adding subtle sweetness and depth. Everything comes together only at the end. The roasted sprouts, crisped bacon, and sautéed aromatics are tossed lightly in a balsamic glaze that clings to the edges without masking the caramelization or overpowering.
The sprouts remain the star. The bacon and aromatics add savory depth. The glaze ties it all together with balance and brightness. It’s structured. Intentional. And bold enough to hold its own beside a rich main course. My husband—who abhors most vegetables—is even in love with this dish. Done properly, Brussels sprouts don’t need a lot of disguising. They just need heat—and a little respect.
The recipe card below breaks it down step by step, but the goal is simple: crisp edges, properly rendered bacon, softened shallots and peppers, and a balsamic glaze that clings without drowning the pan. Nothing should feel heavy or sticky. Roast the sprouts with confidence. Let them darken. Let the bacon crisp fully before it’s chopped and folded back in. Build the flavor in layers, then toss everything together at the end so each component keeps its integrity. And above all, let the sprouts lead.
Bacon & Balsamic Roasted Brussels Sprouts
Roasted Brussels sprouts tossed with crisp bacon and reduced balsamic until caramelized and glossy. The balance of smoky, tangy, and sweet makes this a bold, flavor-packed addition to any feast.
Remove and discard any damaged or discolored leaves from Brussels sprouts; wash Brussels sprouts thoroughly with cold water.
On a butcher's block (or cutting board), trim and discard stem ends from each Brussels sprout with a Chef's knife.
TIP: Save any leaves that come loose from the trimming process. These add a lovely crunch to the final dish when roasted.
Cut each Brussels sprout into quarters and toss into a mixing bowl with the loose leaves.
Toss Brussels sprouts with olive oil (enough to lightly coat, about 2 tbsp), 2 tsp salt, 1 tsp pepper, 1 tsp onion powder, and 1 tbsp garlic until they are evenly coated with oil and seasonings.
TIP: If you'd like to add a bit more depth of flavor, you can add 1-2 tsp balsamic glaze at this stage, before roasting, but be sure the glaze evenly coats with the oil and seasonings.
Pour Brussels sprouts onto a parchment-lined baking sheet and spread evenly into a single layer.
Bacon Prep
On second parchment-lined baking sheet, place 4-6 slices of bacon (see NOTE), spacing them evenly.
NOTE: The amount of slices can be adjusted to your taste, but I say 4-6 slices, depending on the thickness/cut of the bacon you buy. I typically go with 4 slices of a thicker cut, hickory or applewood smoked bacon.
Roasting
Place Brussels sprouts on top rack and bacon on middle rack of pre-heated oven.
Roast the Brussels sprouts and baconfor 15 minutes.
TIP: If you'd like to include one or both of the optional ingredients listed, prep them during this 15 minutes.
Pull Brussels sprouts out of oven and stir; replace to top rack and cook for another 15 minutes.
The bacon will only take about 15-20 minutes to cook, depending on thickness and desired crispiness, so check on it when stirring the Brussels sprouts; if it's not cooked to your desired crispiness, leave in and check at about 1-minute intervals until you're happy with it.
Optional Ingredients (choose none, one, or both)
On a butcher's block (or cutting board), mince shallot and/or red bell pepper with a Chef's knife; set aside.
Combining Ingredients
Once you remove the bacon from the oven, move cooked bacon to paper towel to remove excess grease and help it crisp a bit more.
Retain about 3 tbsp of bacon grease and discard the rest with the parchment paper.
Transfer bacon from paper towel to butcher block and chop into ¼" pieces with Chef's knife.
OPTIONAL: If you opted to include one or both of the optional ingredients listed, heat 2 tbsp of bacon grease in large skillet and sauté shallot and/or bell pepper until nice and tender.
Once Brussels sprouts are finished, remove from oven, transfer to mixing bowl, and add bacon.
OPTIONAL: If you opted to include one or both of the optional ingredients listed, add them to the mixing bowl with the Brussels sprouts and bacon here.
Drizzle balsamic glaze over ingredient mixture, enough to lightly coat when mixed. The amount of balsamic glaze is dependent on your taste preferences, so adjust accordingly.
OPTIONAL: If you would like to add a bit more bacon flavor, add 1 tbsp of the reserved bacon grease to the mixing bowl.
Mix ingredients thoroughly and transfer to oven safe serving dish; it's ready to serve, or you can set aside and reheat in oven when ready to serve.
TIP: Because of the temperature of the oven needing to be higher than most recipes, I cook this side ahead of my main course and put it in an oven-safe dish so that I can return it to the oven for the last 15 minutes of cook time of my main course. It especially works well if your main course also gets cooked in the oven.