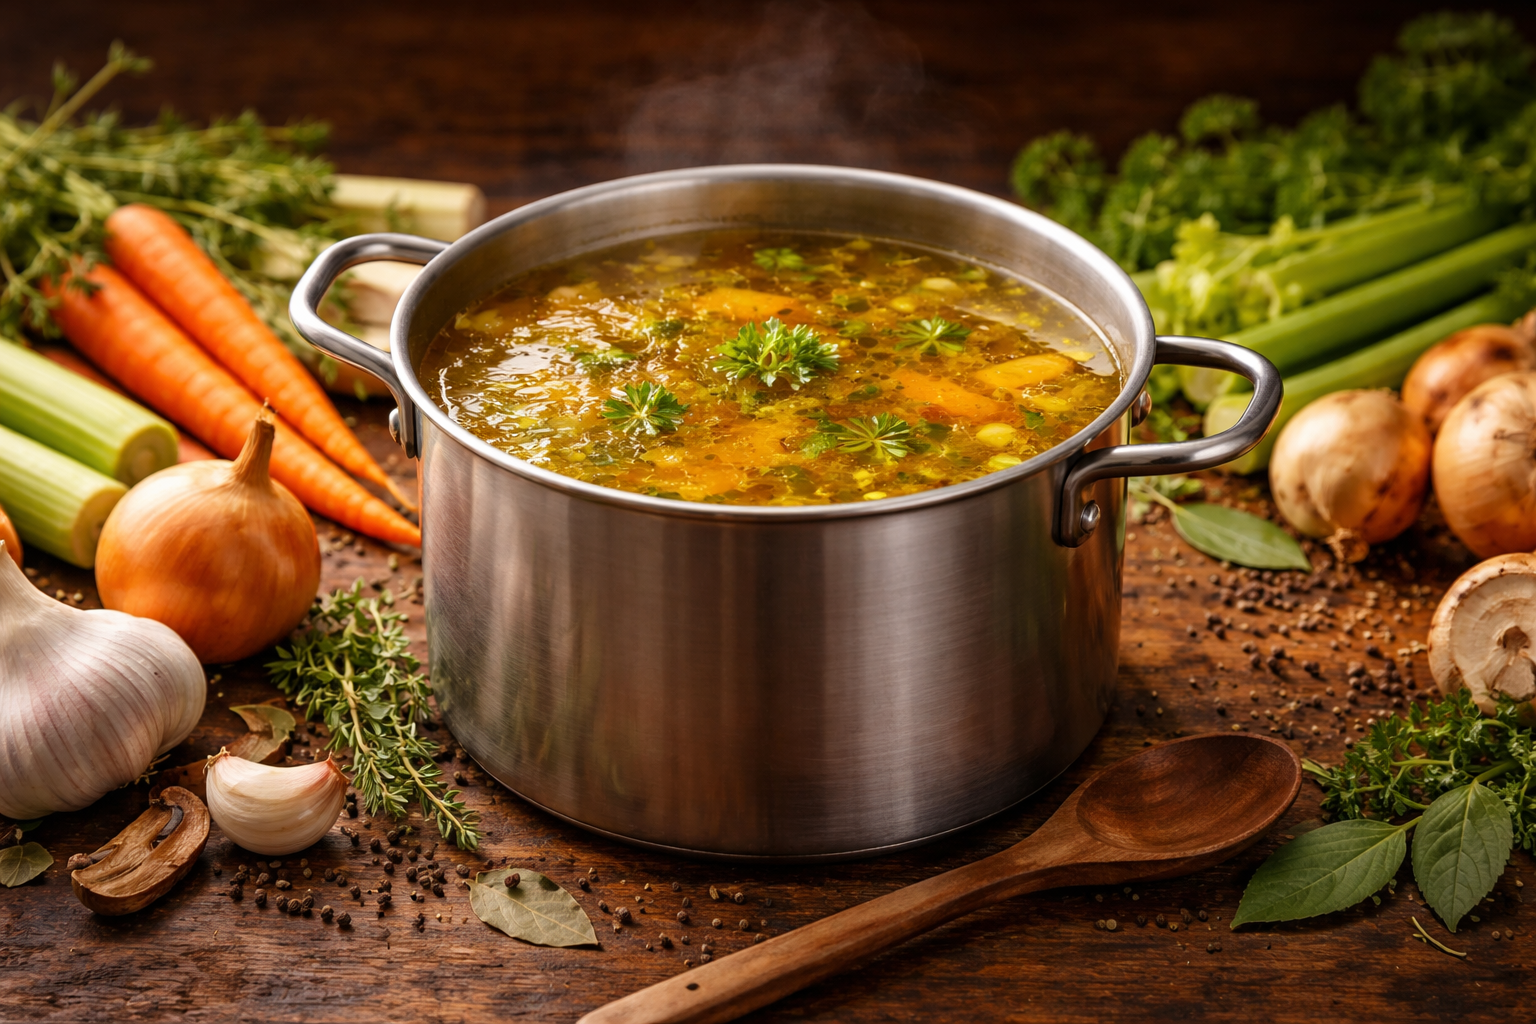
Chicken stock is built on transformation—where structure comes from collagen, not just composition. As bones gently simmer, they release body and depth, giving the liquid a quiet weight that carries flavor rather than just holding it. Aromatics round the edges, but the foundation is what sets it apart: a subtle richness that coats the palate without feeling heavy.
At its best, chicken stock is clear, layered, and cohesive—savory without being overpowering, with a natural balance between warmth, depth, and lift. It works quietly beneath the surface—carrying flavors, bridging ingredients, and giving the dish a sense of cohesion that would otherwise be missing.


Homemade Chicken Stock
Chicken stock is built on transformation—where structure comes from collagen, not just composition. As bones gently simmer, they release body and depth, giving the liquid a quiet weight that carries flavor rather than just holding it. Aromatics round the edges, but the foundation is what sets it apart: a subtle richness that coats the palate without feeling heavy.At its best, chicken stock is clear, layered, and cohesive—savory without being overpowering, with a natural balance between warmth, depth, and lift. It doesn’t announce itself. It supports, reinforces, and connects, turning individual components into something that feels complete.
Print
Pin
Rate
Servings: 8 servings
Calories: 63kcal
Ingredients
Bones
- 2 whole chicken carcasses
Vegetables
Seasoning
- 3 whole bay leaves
- 2 tsp sea salt
- 1 tbsp peppercorns (whole)
Liquid
- 12 cups filtered water
Instructions
Roasting
- Pre-heat oven to 450℉.
- Place 2 whole chicken carcasses in large roasting pan.
- Toss 2 medium onions (washed, skins left on, quartered), 3 large carrots (coarsely chopped), 4 stalks celery(coarsely chopped), 2 tops leek (coarsely chopped), 5 whole garlic cloves (smashed) in 2 tbsp olive oil, salt, and pepper and place in roasting pan with the chicken bones.
- Roast for at least 30 minutes.
TIP: The same approach doesn’t have to stop at chicken. Turkey bones—whether from a full roast or broken-down parts—can be used on their own or combined with chicken to create a more layered poultry stock. Turkey brings a slightly deeper, richer backbone, while chicken keeps the profile balanced and versatile. Treated the same way, the result shifts subtly in character without changing the technique—just a broader expression of the same foundation.
TIP: You can substitute the onion, carrots, and celery for 4 cups of my Mirepoix recipe.
Simmering
- Remove roasting pan from oven and transfer roasted vegetables, bones, and pan drippings into an 8-quart stockpot.
- Add seasonings (3 whole bay leaves, 2 tsp sea salt, and 1 tbsp peppercorns) and 12 cups filtered water (cold) and slowly bring to a boil over medium-high heat.
- Reduce heat to low and simmer gently, covered, for 4 hours.
- Remove from heat and add fresh herbs (¼ cup parsley & ¼ cup thyme) to stockpot.
- Let the herbs steep while the broth cools for at least 20 minutes, then use a spider strainer ladle (or slotted spoon) to remove the larger solids to a mixing bowl.
TIP: If you don’t want to manage the stovetop, a slow cooker offers a more hands-off approach. The steady, low heat naturally maintains the kind of gentle extraction stock benefits from, without the risk of over-agitation. Add everything to the pot, cover with water, and let it run on low for several hours or overnight. You’ll still want to skim early if needed, but beyond that, it largely takes care of itself—producing a stock that’s just as cohesive, with less active attention.
Straining
- Place a mesh strainer over an empty stock pot (large enough to hold the quantity of broth being poured in) and strain and discard what is filtered by the strainer.
TIP: If the mesh strainer let through small particles, clean the original (now empty) stockpot and mesh strainer; place clean mesh strainer over the clean stockpot and line with 2-4 layers of dampened cheese cloth (wetting it first will prevent the cloth from absorbing the broth); run the broth through the cheesecloth layers for an additional filtering.
Storing
- Broth will keep in refrigerator for 4-5 days, or you can freeze the broth and store in the freezer for 3-5 months.
SEE NOTES SECTION FOR FREEZER STORAGE TIPS
Notes
NUTRITION NOTE: The nutritional values are for the fresh recipe ingredients listed on the card, but if you are like me, I make my stock using vegetable scraps I keep in the freezer. Six to seven (6-7) loosely-packed cups of scraps will do the trick, so long as the scraps contain the bulk of ingredients listed on the recipe card.
FREEZER STORAGE NOTE: The best way to freeze broth is by utilizing silicone freezer trays, such as Souper Cubes. Make sure broth is completely chilled in the refrigerator before pouring into trays. Freeze broth cubes completely then transfer to airtight freezer bags so that you can free up and reuse the trays for other things.
Nutrition
Calories: 63kcal | Carbohydrates: 8g | Protein: 1g | Fat: 4g | Saturated Fat: 1g | Polyunsaturated Fat: 0.4g | Monounsaturated Fat: 3g | Sodium: 637mg | Potassium: 219mg | Fiber: 2g | Sugar: 3g | Vitamin A: 4860IU | Vitamin C: 9mg | Calcium: 53mg | Iron: 1mg