A Good Rim Job

A well-built rim does more than decorate the glass—it shapes the way a cocktail is experienced from the very first taste. Whether it reinforces what’s already in the drink or introduces contrast, the right combination of flavor and texture can sharpen, soften, or elevate the entire build. Handled with intention, the rim becomes part of the cocktail itself, not just something sitting on the edge.

A Good Rim Job

Lick It Before You Sip It

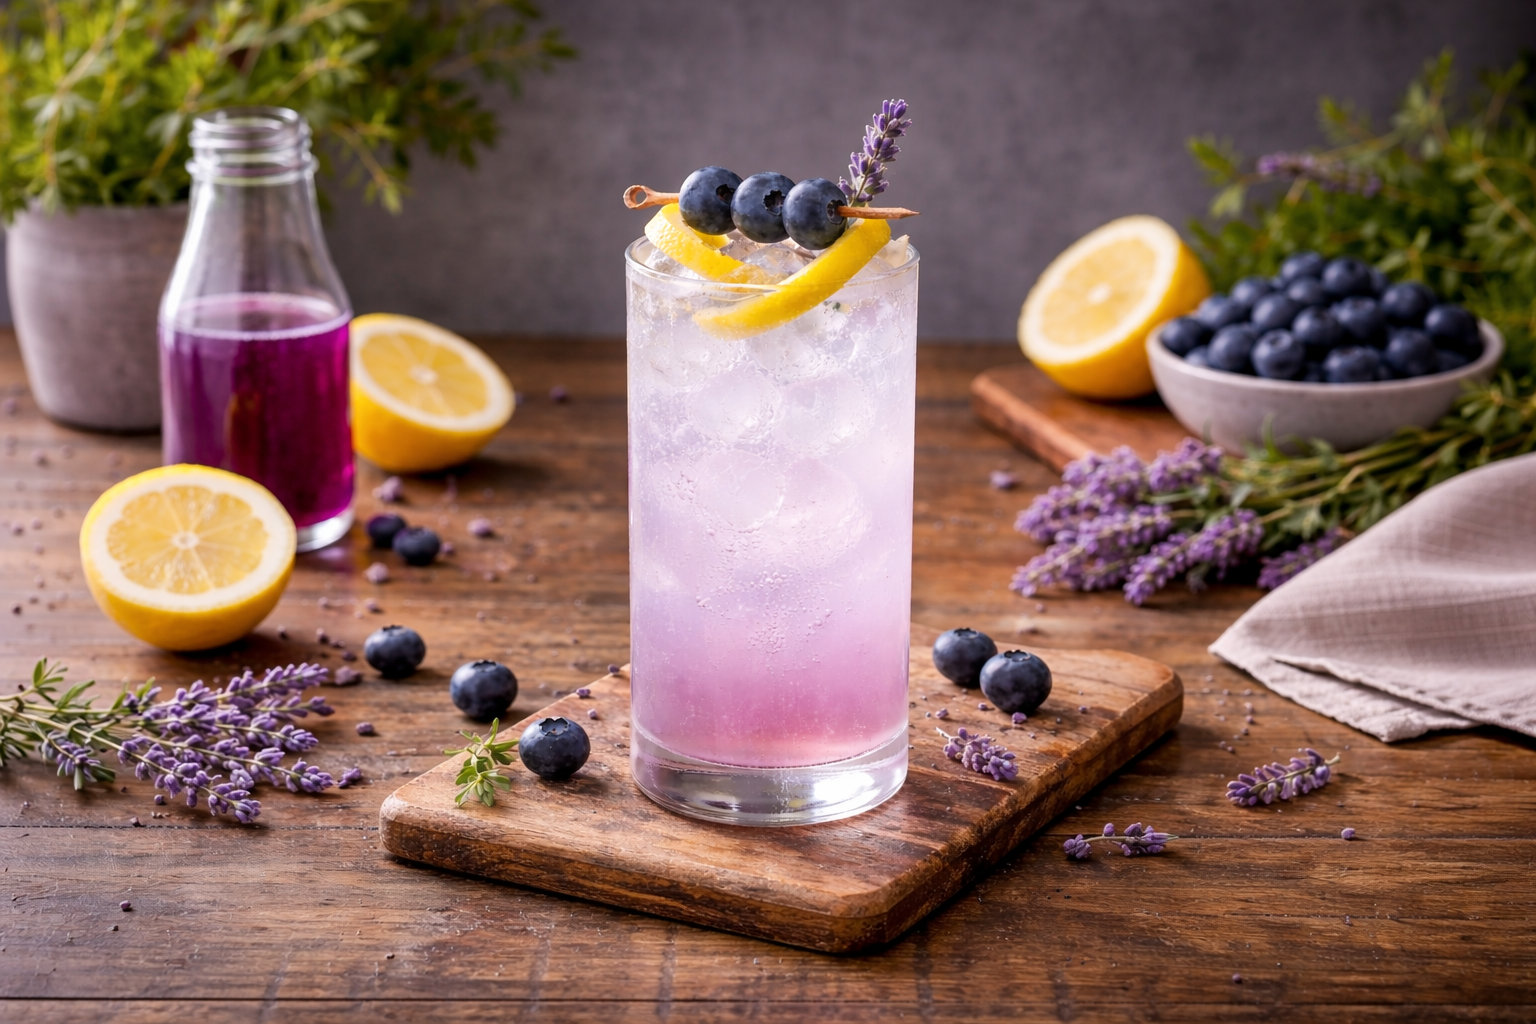
The rim of a glass is easy to treat as decoration, but it’s doing more than that. It’s the first taste—before the first sip—and it sets the direction for everything that follows. It can sharpen what’s already in the glass, soften it, or introduce contrast that changes how the cocktail reads from start to finish. A margarita with a salt rim doesn’t just taste seasoned—it feels brighter, more structured. A sugared rim on a citrus-forward drink rounds the edges before the acidity hits. The rim isn’t separate from the drink—it’s part of the build.

Complement vs Contrast

A good rim works in one of two directions: it either reinforces what’s already in the glass, or it creates tension against it. The difference comes down to intention. The rim should either support the drink or challenge it in a way that makes sense.

  • A complementary rim builds on existing flavors. Salt with citrus. Sugar with fruit. Cocoa with coffee. These choices deepen the profile and make the drink feel more cohesive.
  • A contrasting rim does the opposite. It introduces something the drink doesn’t already have—heat against sweetness, salt against bitterness, spice against cream. When it works, it adds dimension. When it doesn’t, it feels disconnected.

Application Matters

The adhesive you choose determines how the rim behaves and how it integrates with the drink. For a clean, classic application, a simple swipe of lime or lemon juice is enough. It lightly coats the rim without adding weight, allowing salt or sugar to adhere while keeping the focus on the cocktail itself.

When the goal is something more constructed or decorative, a stronger base is needed. Thicker elements such as reduced simple syrup, agave, maple syrup, honey, melted chocolate or frosting, and even fruit preserves or jellies provide the necessary grip to support heavier or more textured rims. In these cases, the adhesive does more than hold—it contributes to the overall flavor, becoming part of the drink rather than sitting alongside it.

The balance comes down to control. Too much, and the rim begins to dominate, adding unnecessary weight and sweetness. Too little, and it fails to hold, breaking apart before it can serve its purpose. Proper application ensures the rim remains intentional, integrated, and consistent from the first sip to the last.

The Right Tools Make It Cleaner

A plate works in a pinch, and it’s how most people start—pour your salt or sugar onto a flat surface, dip, and move on. It gets the job done, but it’s not precise. Coverage can be uneven, excess collects where it shouldn’t, and it’s easy to end up with a rim that looks more accidental than intentional.

Dedicated tools make the process more controlled and consistent. Rim trays and multi-tiered rimmers separate adhesive and garnish into distinct compartments, allowing you to coat the glass cleanly without cross-contamination. They’re designed to match the diameter of standard glassware, which means a more even application and less waste. The result is a rim that looks deliberate and holds up from the first sip to the last.

It’s a small upgrade, but it changes the workflow. Less mess, better consistency, and a cleaner final presentation—especially when you’re making more than one drink at a time.

Bamboo Margarita Salt Rimmer

Crafted from Moso bamboo, this rimmer trades plastic for something more grounded—cleaner, sturdier, and built to last. The magnetic lid swings open with one hand and closes securely, keeping everything contained and ready when you need it. It’s a simple, well-executed tool that works best for single applications, giving you more control and a cleaner rim without the bulk of a multi-tier setup.

3-Tier Bar Glass Rimmer

This is the standard for a reason. The classic three-tier rimmer is what you’ll find behind most bars—built for efficiency and consistency. Made from durable, food-safe ABS plastic, it keeps salt, sugar, and citrus separate for quick, clean application. When you’re done, it folds down for compact storage and cleans easily by hand or in the dishwasher.

7-Tier Acacia Rimming Set

Built for bars running a full cocktail program, this multi-compartment rimmer keeps salts, sugars, citrus, and specialty blends separated for clean, consistent application without cross-contamination. The stackable design helps conserve space, while the wooden frame adds stability and makes it easy to move between prep and service.

12 Pack 4 oz Glass Spice Jars

These small glass jars are perfect for storing pre-made cocktail rim blends, keeping everything fresh, organized, and ready to use. Airtight lids prevent clumping, while the clear glass makes it easy to see what you’re working with—turning rimming into a consistent, controlled step instead of a last-minute add-on.

Stainless Steel Mortar & Pestle

A mortar and pestle gives you control over texture when building custom rim blends, allowing you to crush spices, dried citrus, or sugars to the exact consistency you need. Whether fine for clean adhesion or slightly coarse for added texture, it helps create rims that feel intentional and consistent from one glass to the next.

Electric Mill

An electric mill offers a quick, consistent way to break down ingredients for cocktail rims, especially when working with spices, salts, or dried elements. It allows you to control the grind size with minimal effort, making it easy to produce uniform blends that adhere cleanly and deliver a balanced texture from one glass to the next.

Texture Is Part of the Experience

A rim contributes more than flavor—it introduces texture, and that texture shapes how the drink is experienced from the first contact. Fine sugar dissolves almost immediately, blending seamlessly into the sip, while coarse salt or demerara crystals create a brief, subtle crunch before melting away. Crushed ingredients like graham crackers or candy add a more pronounced contrast, shifting the drink toward a dessert-like profile.

That variation isn’t incidental—it changes perception. Texture can slow the sip, add dimension, and create slight differences from one taste to the next, giving the drink more movement and preventing it from feeling flat or uniform.

Examples That Work

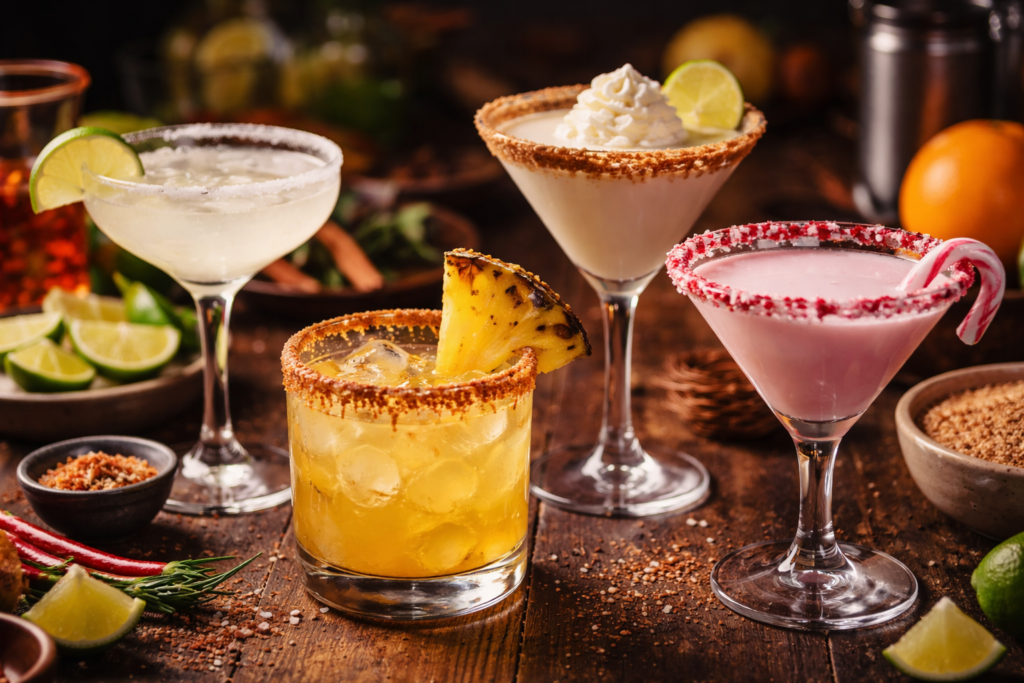
Some rims are classic for a reason. Others push a bit further. Each one works because it’s tied to what’s happening in the glass—not just what looks good on the rim.

  • Salt + Lime (Margarita): sharpens acidity, adds structure
  • Sugar (Daiquiri / Lemon Drop): softens citrus, rounds the edge
  • Graham Cracker (Key Lime Pie Martini): adds sweetness and texture, reinforces dessert profile
  • Crushed Candy Cane (Holiday Martini): cool mint + sugar, bright and seasonal
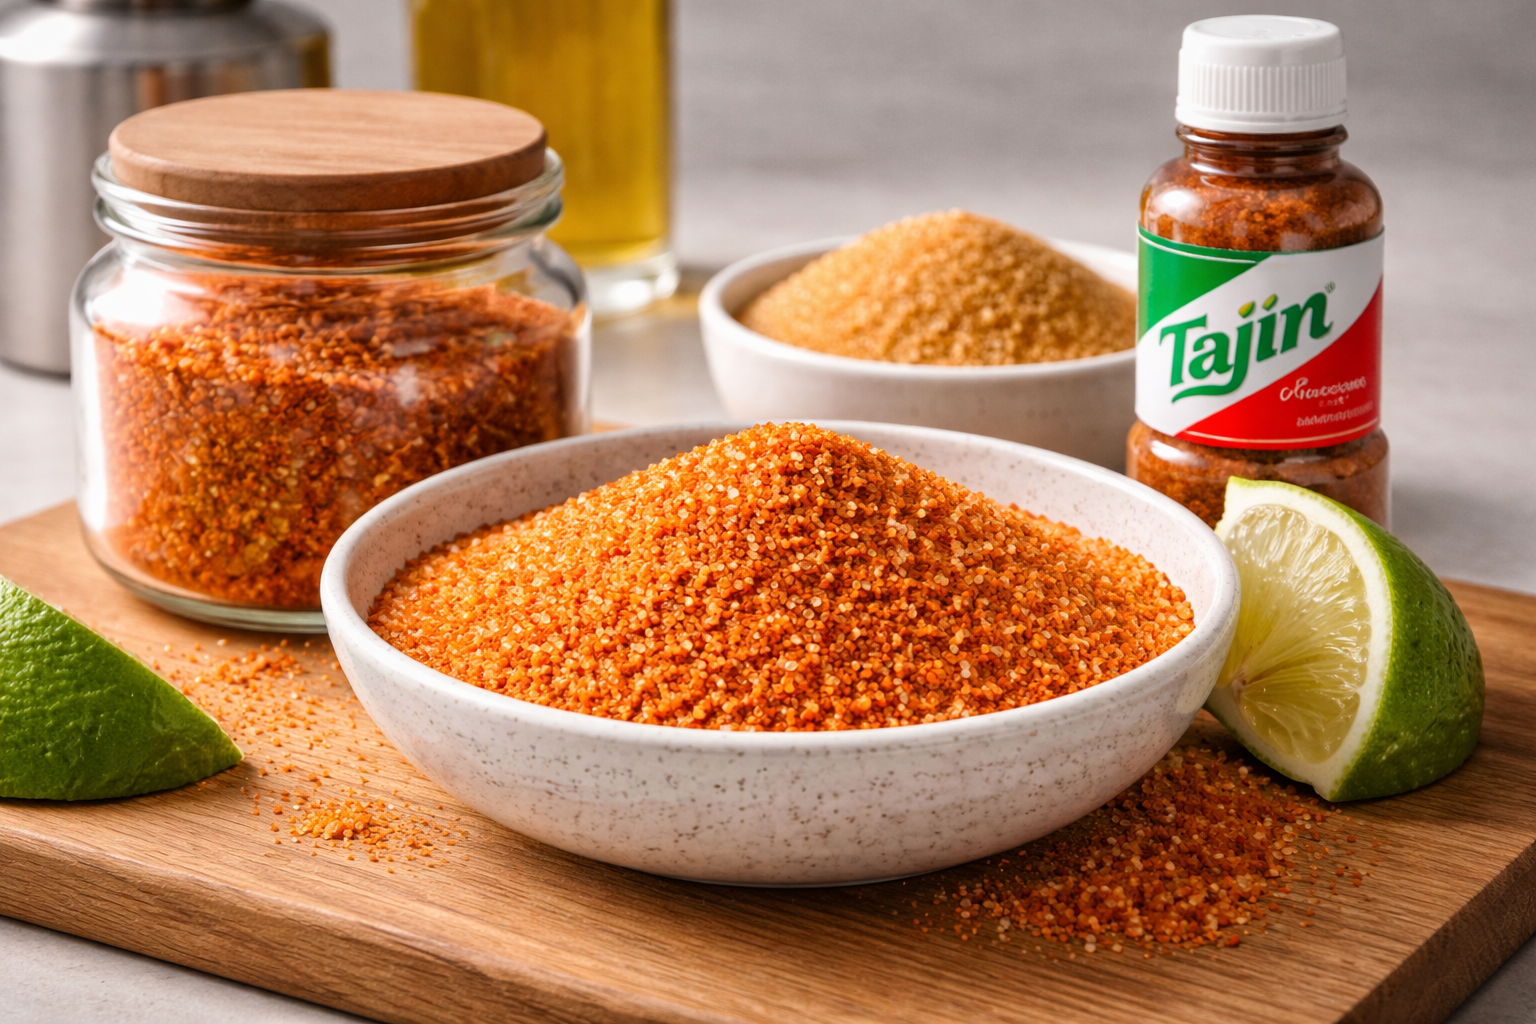
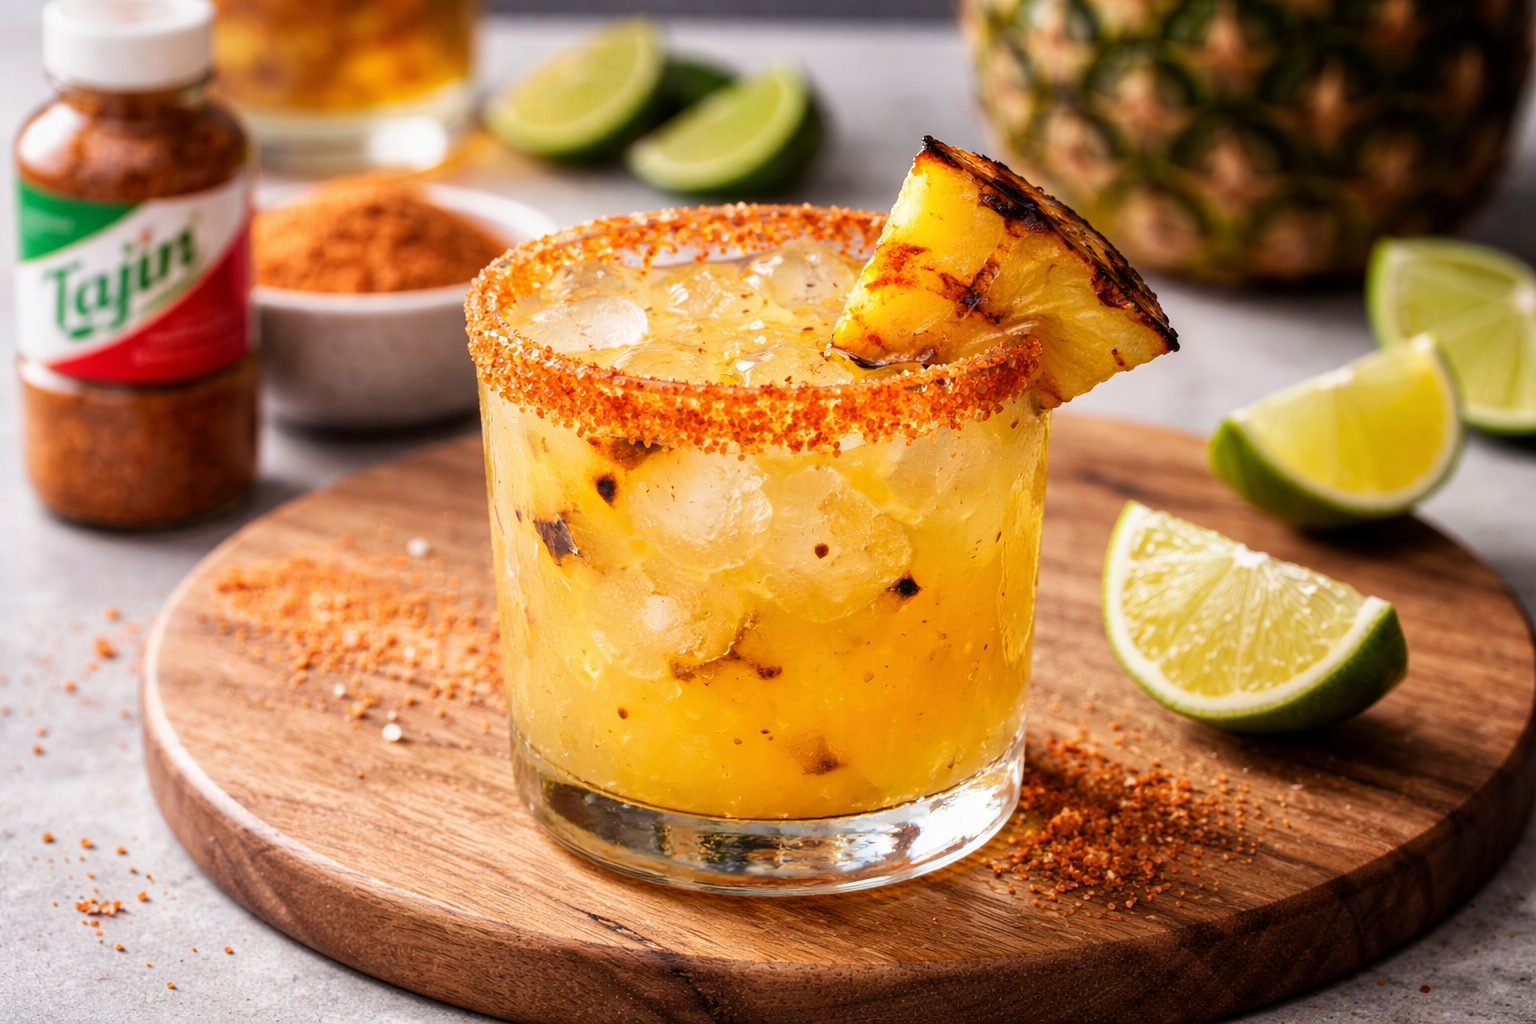
  • Sweet Tajín (Tajín + Demerara): heat, salt, and a touch of sweetness that bridges into the drink

Specialty Cocktail Rim Recipes

Piña de Fuego Simple Syrup

Piña de Fuego is built on contrast—sweet, charred pineapple layered with the deep, molasses notes of demerara sugar and finished with a controlled hit of habanero heat. Grilling the fruit first brings a subtle smokiness that cuts through the sweetness, while the pepper infuses just enough warmth to linger without overpowering. The result is a syrup that’s bold but balanced, where caramelized sugar, bright fruit, and slow-building heat come together in a clean, cohesive finish.

Piña de Fuego Simple Syrup

Sweet Heat

This is where sweetness meets fire and holds a steady balance between the two. Pineapple brings a bright, tropical sweetness that feels familiar at first, but it quickly deepens as the heat begins to rise. The habanero doesn’t hit all at once—it builds gradually, settling into a warm, lingering finish that stays present without overwhelming the palate.

What makes this syrup work is how those elements move together. The sweetness carries the heat forward, giving it structure and length, while the heat sharpens the fruit and keeps it from reading as one-dimensional. The result is a profile that feels layered and intentional, where each component supports the other instead of competing for attention. Used well, it shifts whatever it touches. 

Raising the Char

Grilling the pineapple does more than add color—it changes how the fruit behaves in the syrup. As it hits the heat, the natural sugars begin to caramelize and the surface develops char, introducing a deeper, more complex flavor before anything ever reaches the pot.

That process creates:

  • caramelization, which deepens and rounds out the fruit’s natural sweetness
  • light char, adding a subtle smokiness and a hint of bitterness
  • contrast, keeping the final syrup from reading as overly sweet

You’re not cooking the pineapple through—you’re transforming the exterior just enough to build that foundation. That early layer carries all the way through the syrup, giving it structure instead of letting it fall flat.

The Demerara Difference

Instead of standard white sugar, this uses demerara—and that shift changes more than just sweetness. Demerara retains a natural molasses content, which brings a deeper, more developed flavor into the syrup from the start. Rather than a clean, neutral sweetness, it introduces warm, toffee-like notes and a slightly darker profile that gives the syrup more presence. There’s also a subtle weight to it, allowing the flavor to carry longer instead of falling off quickly.

When combined with the charred pineapple, it reinforces the caramelization already in play instead of working against it. The two build on each other—one from the grill, one from the sugar—creating a base that feels layered and intentional. The result is a syrup that reads fuller and more cohesive, with a depth that standard sugar simply doesn’t provide.

Building the Base

The pineapple isn’t just steeped—it’s muddled directly into the sugar first, which changes how the entire syrup comes together. As the fruit breaks down, it releases its juice into the sugar, creating a thick, coarse mixture where the two are already integrated before any heat is applied. Instead of dissolving sugar into water and then layering flavor on top, the process starts by binding the sweetness directly to the fruit.

By the time water is added and the mixture hits the stove, the base is no longer separate components trying to come together—it’s already unified. That early integration allows the sugar to pull more from the pineapple, especially after it’s been charred, carrying those deeper, caramelized notes through the entire build rather than leaving them at the surface.

This approach may seem subtle, but it has a clear impact on the final result. The syrup reads more cohesive, with a flavor that feels fully developed from start to finish instead of something that comes together at the end.

Bringing the Burn

Habanero is a deliberate choice here. It brings more than just heat—it carries a natural fruitiness that mirrors the brightness of pineapple, allowing the two to work together instead of pulling in opposite directions. Where other peppers can read sharp or one-dimensional, habanero adds a fuller, more rounded heat that builds gradually and holds through the finish.

Controlling that heat starts with how the pepper is handled. The seeds and pith contain the highest concentration of capsaicin, so removing them keeps the burn from tipping too far. What’s left is a cleaner, more measured heat—one that layers into the syrup rather than dominating it. The goal is a slow rise, not an immediate spike.

Timing also plays a role. Adding the habanero after the sugar has dissolved allows the infusion to stay controlled, while a short boil followed by a longer steep gives the heat time to develop without becoming aggressive. The result is a burn that’s present and intentional—something that enhances the syrup rather than overwhelming it.

SAFETY NOTES: Because capsaicin is an oil, it doesn’t just rinse away with water. Wearing gloves when cutting the habanero is a simple step that prevents irritation or lingering burn on your skin. If you choose not to use gloves, make sure to wash your hands thoroughly with soap and cold water. Hot water can open your pores, allowing the capsaicin oils to penetrate deeper into the skin and potentially cause irritation or even blistering. And definitely do not touch your face or other body parts until your hands are thoroughly washed.

A note before you start.

This recipe is straightforward, but a few details shape the final result:

  • Don’t skip the charring step—that’s where the depth starts to build
  • Muddle the pineapple directly into the sugar so the base forms before it ever hits the heat
  • Keep the infusion controlled—you’re drawing out heat from the habanero, not letting it take over
  • Let the syrup fully cool before using—the char, sugar, and heat settle into a more balanced finish

Recipes that use this syrup...

You’ll find the full method outlined below, step by step—but the key is restraint. The char shouldn’t burn. The sugar shouldn’t overpower. The heat shouldn’t take over. Each step is about shaping the final balance, not just combining ingredients.

Piña de Fuego Syrup

Piña de Fuego is built on contrast—sweet, charred pineapple layered with the deep, molasses notes of demerara sugar and finished with a controlled hit of habanero heat. Grilling the fruit first brings a subtle smokiness that cuts through the sweetness, while the pepper infuses just enough warmth to linger without overpowering. The result is a syrup that’s bold but balanced, where caramelized sugar, bright fruit, and slow-building heat come together in a clean, cohesive finish.
Print Pin
Category: THIRST
Cuisine: Global
Course: Drinks
Keyword: Demerara, Habanero, Pineapple, Simple Syrup
Prep: 30 minutes
Cook: 15 minutes
Steep Time: 30 minutes
Total: 1 hour 15 minutes
Servings: 24 servings
Calories: 110kcal
Author: TastyDaddy

Ingredients

Instructions

Infusion Ingredient Prep

  • Throughly wash and dry a 2 lb. pineapple and 1 large habanero pepper (or 2 small peppers).
  • Cut top off pineapple; use pineapple corer/slicer to remove core and cut into rings.
  • Cut open habanero pepper and remove seeds and piths (a pepper's strongest heat is always in these parts, especially the pith); cut pepper into slices and set aside.
  • TIP: ALWAYS put on a pair of food safe, disposable gloves when handling any hot pepper, regardless of type. If you do not have gloves, just be sure not to touch any other part of your body, especially eyes and softer membranes—or your Piña de Fuego could painfully become Pinga de Fuego!
    It's also important that you wash your hands in COLD water and soap. Washing your hands in hot water will open your pores and potentially allow the capsaicin oil into your pores, which can burn and cause blistering.

Grilling Pineapple Outdoors

  • If you do not have an outdoor gas or charcoal grill, skip to step about Grilling Pineapple Indoors.
  • If you have an outdoor grill, load pineapple rings into a grill basket and place on grill until rings have a nice char from the flames; let basket cool before removing pineapple rings.

Grilling Pineapple Indoors

  • If you do not have an outdoor gas or charcoal grill, you can always use a stovetop grill pan to grill your pineapple rings. However, please note that it will not produce the same char as grilling them over an open flame, which will alter the final flavor profile slightly.

Syrup Prep

  • Chop charred pineapple until you have approximately 3 cups.
  • Pour 3 cups demerara sugar into 6-cup stockpot.
  • Add 3 cups pineapple into stockpot and muddle the pineapple into the sugar until a thick, coarse paste forms.
  • Add 3 cups water (filtered) into stockpot and stir to combine.
  • TIP: Instead of muddling, you can combine the water and charred pineapple chunks into a blender until well blended and pour into the stockpot over sugar; however, I have found that muddling/infusing the flavors into the sugar creates a better flavor.

Cooking

  • Heat ingredients in the stockpot over medium-high heat, stirring occasionally until sugar is completely dissolved.
  • Once the sugar is dissolved, add the sliced habanero.
  • Increase heat and bring to a boil for 5-7 minutes.
  • Remove from heat let ingredients steep for at least 30 minutes as it cools.
  • TIP: Periodically taste the syrup to check the heat level of the habanero as it steeps; remove habanero slices from the stockpot once you are happy with the heat level and allow syrup to cool completely.

Straining

  • Place mesh strainer over large pot or bowl (deeper than the depth of the strainer so that the liquid clears the bottom of the strainer).
  • Slowly pour contents of simmered liquid into strainer. Using muddler, gently press as much liquid from the contents of the strainer as possible (without damaging your strainer from the pressure).

Storing

  • Pour syrup into glass swing-top bottle (or jar if you don't have a bottle) and store at least 4 hours in the fridge to cool. Overnight cooling is even better.

Nutrition

Serving: 1oz | Calories: 110kcal | Carbohydrates: 28g | Protein: 0.1g | Fat: 0.03g | Saturated Fat: 0.002g | Polyunsaturated Fat: 0.01g | Monounsaturated Fat: 0.003g | Sodium: 2mg | Potassium: 31mg | Fiber: 0.3g | Sugar: 27g | Vitamin A: 16IU | Vitamin C: 10mg | Calcium: 7mg | Iron: 0.2mg

American Chop Suey

American Chop Suey is a one-pot classic built on simplicity done well—elbow macaroni folded into a savory tomato and beef sauce with softened onions, peppers, celery, and garlic. It’s hearty without being heavy, balancing acidity from the tomatoes with the richness of the meat, while a touch of Velveeta melts in to give the sauce a smoother, more cohesive finish.

The result is a dish that eats like comfort but holds its structure—sauce clinging to every curve of pasta, each bite consistent from start to finish. Depending on where you are, you might hear it called American Goulash, Johnny Marzetti, or something similar, but the foundation stays the same: familiar, unfussy, and built to satisfy.

American Chop Suey

A Regional Classic

American Chop Suey is one of those dishes where the name carries more history than the plate suggests. The term chop suey comes out of Chinese American cooking in the late 19th and early 20th centuries—often used to describe a mixed dish built from whatever ingredients were on hand. As it gained popularity in cities like New York and San Francisco, the name began to drift beyond its original context. Home cooks adopted it more loosely, applying it to one-pot meals that followed the same idea: combine what you have, cook it together, and make it feed a table.

Over time—especially in the Northeast—that concept took on a different identity, shaped by Italian-American kitchens and American home cooking. The ingredients shifted to tomato, pasta, and ground meat, but the underlying idea stayed the same. What remained wasn’t the cuisine—it was the structure: a cohesive, mixed dish built from simple components and made to satisfy.

How It Changes by Region

Because the dish was never standardized, it evolved differently depending on where it landed:

  • American Chop Suey (New England): Tomato-forward, often a bit looser, closer to a saucy pasta.
  • American Goulash (Midwest): Thicker, more concentrated, sometimes heavier on seasoning.
  • Beefaroni (Italian-American, general NE United States): A simpler, more streamlined stovetop version—ground beef and pasta in a smoother tomato sauce, typically with fewer vegetables and a more uniform consistency, reflecting Italian-American red sauce influence.
  • Johnny Marzetti (Ohio Valley): Often baked, occasionally layered, and more likely to incorporate cheese from the start.
  • Slumgullion (Upper Midwest and Western US): A more rustic, frontier-style version—often simpler, looser, and highly adaptable, sometimes stretching ingredients further with extra liquid or fewer aromatics.

Same foundation—different expressions shaped by local kitchens.

Building This Version

This version leans into control—treating each component with intention so the final dish holds together instead of blending into something indistinct. The base starts with onion and green bell pepper—standard aromatics for this dish. Celery isn’t traditional, but it’s part of how I grew up eating it. It adds a subtle vegetal depth and texture that carries through the sauce. In our kitchen, it was always around—either from the store in the off-season or pulled straight from the garden—so it became part of the build.

Garlic follows, just enough to bloom. Then the meat. Ground beef forms the base, but Italian sausage—sweet, mild, or hot—can be added depending on how you want to shape the flavor. Sweet or mild sausage rounds things out and leans more classic. Hot sausage adds heat and a sharper edge that cuts through the richness.

The Sauce: Flexible by Design

The sauce is layered to control both texture and balance:

  • Diced tomatoes for structure
  • Tomato soup for body and built-in richness
  • Passata for smoothness
  • Tomato paste for depth
  • Beef stock to add liquid for the final pasta cook and to bring it all together

There’s room to move here. A can of diced tomatoes with green chilis adds a subtle heat and brightness. Fresh garden tomatoes—when available—bring a cleaner, more natural acidity and a lighter texture that shifts the entire feel of the dish. I grew up seeing a spoonful of sugar added to cut through the sharpness of stewed tomatoes.

Instead, this version balances that same idea at the source—using a combination of passata and tomato soup. The soup leans slightly sweeter and richer, which softens the acidity and creates a smoother, more velvety base—especially once everything comes together with the cheese.

Why the Pasta Is Soaked, Not Boiled

Traditionally, this dish is made with elbow macaroni—and it works. But for leftovers, it tends to soften too much. Cavatappi or mini penne hold their shape better, giving the dish more structure even after it’s been refrigerated and reheated. My family would probably give me a strange look with this step, but instead of cooking the pasta separately (like I’d learned), I now soak my pasta in hot water and finish cooking it directly in the sauce later.

That shift does two things:

  • The pasta absorbs the flavor of the sauce as it finishes cooking.
  • The reserved soaking water introduces starch that helps bind everything together. It’s not optional, regardless of cooking before or soaking—it’s what tightens the sauce so it clings to the pasta instead of sitting around it.

The Velveeta Adjustment

Cheese isn’t part of the traditional New England version I grew up with, but during my time in Michigan, it was a common addition—usually shredded and mixed in or layered through. The problem was consistency. Shredded cheese tends to go stringy, and once it cools, it can separate or settle, leaving the bottom of the pot coated in congealed cheese.

Velveeta solves that. It melts cleanly into the sauce, creating a smooth, cohesive finish without turning the dish into something heavy or overly cheesy. Combined with the slightly sweeter, more rounded tomato soup base, it creates a texture that feels unified from edge to edge without separation.

Final Thoughts

American Chop Suey was never meant to be exact. It’s a dish shaped by what’s available, what’s familiar, and what works. The name comes from one place, the ingredients from another, and the method from somewhere in between. Handled with intention, it becomes something structured—balanced, consistent, and built to hold together from the first bite to the last.

You’ll find the full method outlined below, step by step—but the key is in how each stage builds on the last. From properly softening the aromatics, to layering the sauce, to finishing the pasta directly in the pot, each move is designed to control texture and consistency rather than leaving it to chance.

American Chop Suey

American Chop Suey is a one-pot classic built on simplicity done well—elbow macaroni folded into a savory tomato and beef sauce with softened onions, peppers, celery, and garlic. It’s hearty without being heavy, balancing acidity from the tomatoes with the richness of the meat, while a touch of Velveeta melts in to give the sauce a smoother, more cohesive finish.
The result is a dish that eats like comfort but holds its structure—sauce clinging to every curve of pasta, each bite consistent from start to finish. Depending on where you are, you might hear it called American Goulash, Johnny Marzetti, or something similar, but the foundation stays the same: familiar, unfussy, and built to satisfy.
Print Pin
Category: FEAST
Cuisine: American, Italian-American, Midwest, New England, Southern
Course: Main Course
Keyword: Comfort, Ground Beef, Macaroni, Tomato
Prep: 15 minutes
Cook: 25 minutes
Resting Time: 10 minutes
Total: 50 minutes
Servings: 8 servings
Calories: 629kcal
Author: TastyDaddy

Ingredients

Instructions

Wash the Vegetables

  • Thoroughly wash and dry green pepper, celery, onion, garlic, and parsley.

Soak the Pasta

  • Instead of cooking the pasta (as most recipes call for), I soak my pasta in hot water for about 20 minutes—while I prepare the rest of the ingredients—and finish cooking it in the sauce later.
  • The traditional recipe calls for elbow macaroni, but you can use other tubular pasta. I like to use cavatappi or mini penne (because they hold up better for leftovers).

Cut the Vegetables

  • With the butcher block and chef's knife, dice 1 large yellow onion and set aside in prep bowl.
  • Chop 2 stalks celery and set aside in prep bowl.
  • Dice 1 whole green bell pepper and set aside in prep bowl.
  • Mince 2 cloves garlic and set aside in prep bowl.
  • Trim stems off parsley and coarsely chop leaves, enough to fill ¼ cup.

Cook Vegetables

  • Heat Dutch oven over medium high heat and melt 2 tbsp butter.
  • Add diced onion, diced green pepper, and chopped celery to Dutch oven and cook until tender.
  • Add minced garlic to Dutch oven and brown for 1-2 minutes.
  • Remove cooked vegetables from pan and set aside in mixing bowl.

Brown Meat

  • Add 1 lb ground beef to Dutch oven and season with 1 tbsp Kosher salt, ½ tsp black pepper, 1 tsp dried oregano, 1 tsp dried basil, 1 tsp onion powder, 1 tsp paprika, and 1 tsp celery seed directly in pan.
  • If you'd like to make the dish a bit more hearty, add the optional 1 lb ground sausage.
  • Once meat is browned, drain excess fat.
  • Return meat to pan and add 1 tbsp Worcestershire sauce, stirring to combine.

The Sauce

  • Return veggies back to pan.
  • Empty 14 oz diced tomatoes (undrained) to pan; stir to combine
  • If you would like to add a little kick to the dish, substitute the plain diced tomatoes with a can mixed with green chilis instead.
  • Add 10.75 oz tomato soup, 10 oz passata (or tomato sauce), 6 oz tomato paste, and 2-3 cups beef stock; stir to combine and bring to a boil.

Add Pasta

  • While sauce is heating to a boil, reserve 1 cup of pasta soaking water; set aside.
  • Strain pasta with colander.
  • Once pot has started to boil, add pre-soaked pasta and reserved pasta water to pot and stir to combine.
  • Cover with lid and let pasta simmer for 5-7 minutes (or until desired tenderness).

Cheese

  • While pasta is cooking, cut 12 oz Velveeta cheese into cubes (so that it will melt easier).
  • Once pasta has finished cooking, add Velveeta cheese cubes to pot and stir until combined.

Serve

  • Garnish each serving with grated parmesan cheese and freshly-chopped parsley.

Nutrition

Calories: 629kcal | Carbohydrates: 45g | Protein: 35g | Fat: 35g | Saturated Fat: 14g | Polyunsaturated Fat: 3g | Monounsaturated Fat: 13g | Trans Fat: 1g | Cholesterol: 106mg | Sodium: 2453mg | Potassium: 1398mg | Fiber: 4g | Sugar: 15g | Vitamin A: 1594IU | Vitamin C: 23mg | Calcium: 334mg | Iron: 5mg

Lasagna Bolognese with Ricotta

Pasta, herbed ricotta, ragù alla bolognese, and melted cheeses layered with enough control to keep each component defined. The focus is on how everything comes together in the dish, so the final slice holds its structure from edge to center without collapsing or blending into one.

Lasagna Bolognese with Ricotta

Layered with intention.

This is where Daddy’s Ragù alla Bolognese moves into a full build—pasta, herbed ricotta, and melted cheeses layered with enough control to keep each component defined. The focus is on how everything comes together in the dish, so the final slice holds its structure from edge to center without collapsing or blending into one.

Start with the ragù.

This lasagna is built around my ragù, so it’s best to make that ahead of time. Let it cool slightly before assembling—warm enough to work with, but not hot. That gives you better control when layering and keeps the ricotta from breaking down as you build. It also gives the sauce time to settle, which helps it hold its place between layers instead of spreading too thin. Think of the lasagna as an extension of the ragù, not a separate recipe. The sauce is doing most of the work—you’re just giving it structure.

Breaking the build into parts.

Start by mixing the ricotta fully—egg, cheese, and herbs integrated so it spreads evenly without clumping. From there, divide it into three equal portions. Do the same with your shredded cheese. It’s a small step, but it keeps the layers consistent and prevents you from overloading one section while leaving another thin.

Once everything is portioned, the assembly becomes controlled instead of guesswork. Each layer has a clear role, and the final result reflects that. What makes this come together cleanly is treating each component as its own step.

Layering with structure.

The order matters. A thin layer of ragù goes down first to anchor the noodles. From there, the pattern builds—noodles, ricotta, cheese, then a heavier layer of sauce. That sequence repeats, giving you a balance of creaminess, melt, and depth in every bite.

The final layers shift slightly to finish clean:

  • noodles
  • herb ricotta cheese mixture
  • a layer of sauce
  • shredded cheese
  • and a final layer of cheese with a light dusting of oregano

That top layer sets the tone—golden, structured, and just enough texture to contrast what’s underneath.

Why this works.

This lasagna comes together cleanly because each component is built and layered with intention. As it bakes, everything settles into place. The sauce thickens slightly, the cheese melts and integrates, and the layers hold without blending into each other.

The ragù provides depth and structure, the ricotta—set with egg and fresh herbs—spreads evenly and holds its place, and the cheese layers bind everything without overwhelming the dish. Dividing the ricotta and cheese ahead of time keeps each layer consistent, so nothing feels heavy in one section or thin in another.

When it’s rested and cut, the slice should hold clean lines—defined layers, balanced proportions, and a structure that carries from the first cut to the plate.

You’ll find the full method outlined below. The ingredients are familiar, but the structure is what makes this version work—built step by step so the final dish feels as intentional as the sauce it’s based on.

Lasagna Bolognese with Ricotta

Lasagna Bolognese is a layered build that turns a slow-cooked ragù into something structured and complete—pasta, herbed ricotta, and melted cheeses stacked with intention so each layer holds its place. It’s rich without being heavy, balanced between meat, creaminess, and acidity, and built to let the ragù carry the dish from the first bite to the last.
Print Pin
Category: FEAST
Cuisine: Italian
Course: Main Course
Keyword: Bolognese, Lasagna, Ricotta
Prep: 40 minutes
Cook: 50 minutes
Resting Time: 20 minutes
Total: 1 hour 50 minutes
Servings: 8 servings
Calories: 451kcal
Author: TastyDaddy

Ingredients

Lasagna Noodles

Ricotta Mixture

Cheese Mixture

Topping

Instructions

Pre-heat

  • Pre-heat oven to 375℉

Cook & Cool the Noodles

  • Bring a large pot of salted water to a boil. Cook 15 whole lasagna noodles until just shy of al dente—they'll finish cooking while the lasagna bakes in oven.
  • Drain and rinse lightly with cool water to stop the cooking. Dry and lay noodles flat on a sheet tray or parchment so they don’t stick. Let cool completely in fridge.

Prepare the Ricotta Mixture

  • Add the following to the mixing bowl:
    • 15 oz ricotta cheese
    • 1 large egg
    • ¼ cup parmesan cheese
    • 2 tsp onion powder
    • ½ tsp Kosher salt
    • ¼ tsp black pepper
  • Wash and dry basil, parsley, and thyme.
  • Chop all herbs and place in the mixing bowl with the other ingredients.
  • Combine all ingredients until thoroughly integrated.
  • Separate into 3 equal portions.

Divide the Shredded Cheese

  • Separate the 6 cups mozzarella cheese(shredded) and 1½ cups parmesan cheese (shredded) into 3 equal parts (2 cups of mozzarella + ½ cup of parmesan) so you have even amounts for each layer.

Assemble the Lasagna

  • Spread a thin layer of Daddy's Ragù alla Bolognese (about 1 cup) into the bottom of a deep 9x13 baking dish.
  • Use a slotted spoon when measuring out sauce to remove almost all of the liquid, making your sauce layers more concentrated. Excess liquid will cause the lasagna to become watery/runny. You can even strain with cheese cloth, if needed.
  • Add a layer of lasagna noodles, followed by ⅓ of the Ricotta mixture, followed by 2 cups Daddy's Ragù alla Bolognese, followed by ⅓ of shredded cheese.
  • Repeat layer sequence two more times.
  • On final shredded cheese layer, top with 1 tsp Kosher salt and ½ tsp dried oregano.

Baking

  • Cover 9x13 dish with tented aluminum foil and bake at 375℉ for 30 minutes.
  • Remove foil after 30 minutes and bake an additional 15-20 minutes until golden and bubbling.

Resting

  • Let rest for 15–20 minutes before cutting. This allows the layers to set and hold their structure.

Notes

NUTRITION NOTE: Because the internal nutrition calculator uses an API program to pull the nutrition information, it did not pull the nutritional information for the ragù. For correct nutritional calculations, you must add the nutritional information for 7 servings of Daddy's Ragù alla Bolognese to 8 servings of the amounts listed above and divide the total by 8 servings to get the TRUE nutritional information per serving—I've done the math for you below:
  • Calories: 849.125 kcal
  • Carbohydrates: 21g
  • Protein: 53.25g
  • Fat: 60g
  • Saturated Fat: 29.5g
  • Polyunsaturated Fat: 3.625g
  • Monounsaturated Fat: 21.25g
  • Trans Fat: 0.878g
  • Cholesterol: 210.75g
  • Sodium: 2081.125mg
  • Potassium: 1095.125mg
  • Fiber: 4g
  • Sugar: 8g
  • Vitamin A: 5857.25 IU
  • Vitamin C: 18.875mg
  • Calcium: 904.75mg
  • Iron: 4.5mg

Nutrition

Calories: 451kcal | Carbohydrates: 7g | Protein: 34g | Fat: 32g | Saturated Fat: 19g | Polyunsaturated Fat: 1g | Monounsaturated Fat: 9g | Trans Fat: 0.003g | Cholesterol: 132mg | Sodium: 1368mg | Potassium: 179mg | Fiber: 0.5g | Sugar: 1g | Vitamin A: 1232IU | Vitamin C: 4mg | Calcium: 812mg | Iron: 1mg

Daddy’s Ragù alla Bolognese

This version of ragù leans into tradition but makes a few deliberate shifts—ground sausage in place of pancetta, mushrooms for added depth, and a controlled, staged build that keeps each element defined before it comes together.

It’s rich, meaty, and structured, with just enough cream at the end to round everything out without softening the identity of the sauce.

Daddy’s Ragù alla Bolognese

Slow-built, deeply layered.

This is a ragù that leans into tradition but doesn’t stay rigid to it—ground sausage in place of pancetta, and a staged build that keeps each element defined before it comes together. The mushrooms in this version are optional, but I like to include them for the added layer of umami and depth they bring to the sauce. It’s rich, meaty, and structured, finished with just enough cream to round it out without softening its identity.

Where it comes from.

This is a recipe that sits somewhere between memory and refinement. The foundation came from my mother—simple, comforting, and built with intention. I remember standing at the counter helping where I could, washing vegetables, cutting onions and carrots, and being handed the spoon every so often to stir the pot. It wasn’t rushed. The sauce would sit and develop, filling the house slowly, becoming part of the rhythm of the day as much as the meal itself.

Later, when I was in college, that foundation picked up a few new layers. A close Italian-American friend introduced me to his grandmother, who had her own way of doing things—small adjustments that made a difference. One of the simplest was adding just a pinch of sugar to the tomatoes to soften their acidity. Not enough to sweeten the sauce, just enough to round it out. It’s a detail I still come back to when the tomatoes need it.

Over time, those influences came together. What I’ve kept is the patience and intention behind the original—nothing rushed, nothing overloaded—just a process that builds gradually so each component has its place. What’s changed is how deliberately I approach each step now, paying closer attention to how everything comes together in the end. It’s still rooted in where it started. It’s just been shaped along the way.

Building it in stages.

What makes this ragù work isn’t just the ingredient list—it’s the sequencing. Each component is cooked separately at first, allowing it to develop its own flavor before being combined. The sausage renders fat and builds the base. The mushrooms deepen the savory profile. The soffritto softens and sweetens. The beef is seasoned and browned on its own, giving it structure before it ever hits the sauce. Nothing is rushed into the pot all at once. Everything is given space to develop, then brought together once it’s ready.

Why the adjustments work.

A few small shifts change the character of the sauce without pulling it away from its roots. Using sweet Italian sausage instead of pancetta keeps the pork element but adds more body and seasoning. The mushrooms—optional, but worth it—reinforce that depth, giving the sauce a more rounded, savory backbone without changing its identity.

From there, the adjustments are more subtle, but just as important. Garlic isn’t traditional in a classic ragù, but used sparingly, it adds a layer of aroma that supports the soffritto without taking over. Anchovy paste works the same way—completely disappearing into the sauce while adding a quiet, underlying umami that deepens everything around it.

Seasoning the beef directly in the pan builds flavor early, giving the meat its own structure before it’s incorporated into the sauce. The wine deglaze then pulls everything together, lifting the fond and setting a clean, cohesive base before the rest of the ingredients come in. None of these changes are meant to redefine the dish. They’re there to refine it—small adjustments that build a little more depth, a little more structure, and a little more control into the final result.

Letting it come together.

Once everything is in the pot, the work slows down. The simmer is where the sauce becomes cohesive—where the fat, liquid, and solids integrate into something that feels unified rather than layered. It thickens gradually, deepens in flavor, and settles into a texture that holds together without feeling heavy. There’s no shortcut here. Time is what turns the individual components into a proper ragù.

What I typically serve it with.

This is a sauce that benefits from the right pairing. It works best with wider, textured pasta or tubes—tagliatelle or pappardelle or penne rigate—where the sauce has something to cling to. It also holds up well in layered dishes like lasagna, where that depth carries through multiple components.

On its own, this lives in the Simmer category—a standalone sauce built slowly and intentionally. But I classify it as a Main Course beccause in practice, it’s meant to become one. Once it’s paired with pasta or layered into a dish, it shifts from component to centerpiece. However it’s served, the goal is the same: let the sauce lead.

Recipes that use this sauce.

You’ll find the full method outlined below. The ingredients are straightforward, but the structure is what makes it work—each step building toward a sauce that feels composed from start to finish.

And if you do make it, let me know how it turns out—and what you pair it with.

Daddy's Ragù alla Bolognese

Daddy’s Ragù alla Bolognese is a deeply layered, slow-built sauce rooted in tradition but shaped by experience. It takes the foundation I learned from my mother and refines it with a few intentional tweaks—drawing from time spent close to Italian-American kitchens—resulting in something richer, meatier, and more personal without losing its sense of origin.
Print Pin
Category: SIMMER
Cuisine: Italian
Course: Main Course
Keyword: Bolognese, Pasta, Ragù, Sauce
Prep: 30 minutes
Cook: 45 minutes
Simmer Time: 2 hours
Total: 3 hours 15 minutes
Servings: 8 servings
Calories: 455kcal
Author: TastyDaddy

Ingredients

Spices & Seasonings

Meat

Optional

Soffritto

Sauce

Instructions

Wash & Prep the Vegetables

  • Peel (make sure to remove the tough outer layer), wash, and dry 1 med yellow onion; using your chef knife, dice the onion; set aside in small bowl.
  • Wash, trim and dry the celery stalks; chop until you have 1½ cups celery; set aside in a small bowl.
  • Wash, trim, and peel carrots; give them a final rinse and dry them; dice until you have 1½ cups carrots; set aside in a small bowl.
  • Wash, dry, and trim the ends off 2 whole plum tomatoes; remove seeds and dice; set aside in small bowl.
  • Wash and dry 4 whole basil leaves; stack leaves and roll tightly; take your chef knife and cut into ribbons (chiffonade); set aside.
  • If including, thoroughly wash and dry portobello mushrooms; mince until you have enough to fill 2 cups.

Brown the Sausage

  • In a large Dutch oven over medium heat, cook 1 lb sweet Italian sausage until browned and lightly caramelized. Remove with a slotted spoon and transfer to a large bowl, leaving the rendered fat in the pot.

Cook the Mushrooms (optional)

  • If using mushrooms, add them to the sausage fat and cook until their moisture has released and reduced, and they begin to brown.
    Transfer to the bowl with the sausage.

Build the Soffritto

  • Add onion, celery, and carrots to the pot. Cook over medium heat until softened and lightly golden, about 8–10 minutes.
    Transfer to the bowl with the sausage and mushrooms.

Brown & Season the Beef

  • Add 1 lb ground beef to the pot. As it begins to cook, season directly in the pan with:
    • ½ tsp Kosher salt
    • ¼ tsp black pepper
    • ⅛ tsp crushed red pepper flakes
    • ½ tsp onion powder
    • 1 dash nutmeg
    Break the meat apart and allow it to brown, developing color rather than steaming.
    Transfer to the bowl with the sausage, vegetables, and mushrooms.Drain excess fat, leaving about 1 tablespoon in the pot.

Infuse the Stock

  • In a small saucepan, bring the 1 cup beef stock to a light simmer with 2 sprigs fresh thyme leaves (placed inside a spice infuser ball). Remove from heat and let steep while continuing the recipe.

Build the Base & Deglaze

  • Add 1 tbsp garlic (minced) to the remaining fat and cook over medium-low heat until fragrant, about 30–60 seconds.
    Stir in 1 tbsp anchovy paste until dissolved.
    Add 1 cup Sauvignon Blanc and deglaze the pan, scraping up any fond from the bottom. Let the wine reduce by about half.

Simmer the Sauce

  • Return all reserved ingredients (sausage, mushrooms, vegetables, beef) to the Dutch oven and stir to combine.
  • Remove thyme from beef stock.
  • Add the following to the Dutch oven:
    • 24 oz passata
    • 1 tbsp tomato paste
    • diced tomatoes
    • infused beef stock
    • 2 whole bay leaves
    Stir to combine and bring to a gentle simmer.
  • Reduce heat to low and simmer uncovered for at least 2 hours, stirring occasionally. The sauce should gradually thicken and develop a cohesive texture.

Finish

  • Once the sauce has finished simmering, remove bay leaves. Stir in ½ cup half and half until fully incorporated, then add basil.

Nutrition

Calories: 455kcal | Carbohydrates: 16g | Protein: 22g | Fat: 32g | Saturated Fat: 12g | Polyunsaturated Fat: 3g | Monounsaturated Fat: 14g | Trans Fat: 1g | Cholesterol: 90mg | Sodium: 815mg | Potassium: 1047mg | Fiber: 4g | Sugar: 8g | Vitamin A: 5286IU | Vitamin C: 17mg | Calcium: 106mg | Iron: 4mg

Blueberry Lavender Lemonade

Blueberry Lavender Lemonade brings a brighter, more aromatic edge to a classic—tart lemon layered with jammy blueberry and a subtle floral lift from lavender. It’s refreshing without being one-note, with just enough depth to keep it structured and clean from the first sip to the last.

Blueberry Lavender Lemonade

Bright, layered, and composed.

Blueberry Lavender Lemonade takes a familiar build and gives it more structure—tart lemon sharpened by a fruit-forward syrup and lifted with a subtle floral edge. The citrus stays bright and direct, while the blueberry adds body and a soft, rounded sweetness that keeps the drink from feeling thin. The lavender sits just behind it, not as a dominant flavor, but as a quiet lift that keeps everything clean and balanced.

It’s refreshing in the way lemonade should be—crisp, cooling, and easy to drink—but with enough depth to hold your attention. Instead of flattening into simple sweet and sour, it moves with a bit more intention, giving you something that feels composed rather than basic.

A classic, rebalanced.

At its core, this is still lemonade—citrus, sweetener, and water—but the sweetener here does more than just balance the acidity. Blueberry lavender syrup brings a different kind of weight to the drink. The blueberry gives it a soft, rounded depth that fills out the lemon without dulling it, while the lavender keeps everything from settling too heavily. It doesn’t come across as distinctly floral—it reads more as a clean edge that keeps the drink feeling open. That shift changes how the lemonade carries itself. The citrus stays clear, the sweetness feels integrated rather than added on, and the overall profile has a bit more shape to it—something that feels composed, not just mixed together.

Building it in layers.

The process is simple, but the order matters. Starting with freshly pressed lemon juice gives you a base that’s bright and direct—no muted citrus, no added bitterness. From there, the syrup is stirred directly into the juice, allowing the sweetness and fruit to integrate fully before dilution. This step sets the balance early, so nothing feels disconnected later. Once the water is added, the drink opens up. The acidity softens slightly, the aromatics become more noticeable, and everything settles into a profile that feels cohesive rather than mixed together at the end. A final stir is all it needs—clean, controlled, and ready to chill.

Where the ice comes in.

This is where the presentation shifts from simple to composed. Blueberry Lavender Lemon Ice is designed to mirror the drink itself—suspending the same visual elements inside the ice so the garnish becomes part of the structure. Instead of layering components on top, everything is built in from the start.

As the lemonade is poured over the spheres, the glass reads clearly and intentionally. The color of the drink, the shape of the ice, and the elements within it all align, giving the finished glass a sense of cohesion without adding anything unnecessary. It’s a detail that doesn’t complicate the build, but it changes how the drink presents from the moment it hits the table.

What I typically serve with it.

This is a drink that carries well across a range of settings because it’s balanced without being heavy. It works alongside lighter, citrus-forward dishes where the acidity complements rather than competes. It also pairs well with herb-driven plates, where the lavender finds a natural connection without standing out on its own.

As a non-alcoholic option, it holds its own—it doesn’t feel like a placeholder. It’s structured enough to stand independently, but flexible enough to build from. Add sparkling water for a lighter, more effervescent version, or use it as a base for a spritz or spirit-forward cocktail depending on the direction you want to take.

You’ll find the full method outlined below. The ingredients are simple, but the balance is what makes it work—clean citrus, controlled sweetness, and just enough lift to keep everything aligned.

Blueberry Lavender Lemonade

Blueberry Lavender Lemonade brings a brighter, more aromatic edge to a classic—tart lemon layered with juicy blueberry and a subtle floral lift from lavender. It’s refreshing without being one-note, with just enough depth to keep it structured and clean from the first sip to the last.
Print Pin
Category: THIRST
Cuisine: Global
Course: Drinks
Keyword: Blueberry, Lavender, Lemon, Lemonade
Prep: 15 minutes
Total: 15 minutes
Servings: 8 servings
Calories: 0.1kcal
Author: TastyDaddy

Ingredients

Instructions

  • Cut the 4 lemons in half.
  • Using the citrus press, juice the lemon halves into a 10-cup glass measuring cup (should yield approximately 1 cup juice).
  • Add 1 cup blueberry lavender simple syrup to the lemon juice and stir to combine.
  • Add 5 cups water to measuring cup and stir.
  • Using the bar spoon, stir contents of measuring glass until combined.
  • Add 6 blueberry lavender lemon ice spheres to a glass pitcher and pour contents from measuring cup into pitcher over ice to chill.
  • Serve immediately in ice-filled glasses. Garnish with blueberries and lemon wheel.

Notes

Please note: Nutritional facts are estimated and not an exact measurement.

Nutrition

Calories: 0.1kcal | Carbohydrates: 0.05g | Protein: 0.01g | Fat: 0.001g | Sodium: 7mg | Potassium: 1mg | Fiber: 0.01g | Sugar: 0.01g | Vitamin A: 0.1IU | Vitamin C: 0.3mg | Calcium: 5mg | Iron: 0.003mg

Blueberry Lavender Lemon Ice

Blueberry Lavender Lemon Ice is designed for presentation—suspending garnish directly within the ice so it becomes part of the drink’s composition rather than an afterthought. Clean, structured, and intentional, it elevates the glass or pitcher by building the visual story in from the start.

Blueberry Lavender Lemon Ice

Presentation, built in.

Ice doesn’t have to disappear into the background. When it’s handled with intention, it becomes part of the drink’s composition—adding structure, contrast, and a sense of finish before the first sip. It gives the glass a focal point, something that feels considered rather than incidental.

These decorative pieces are built for that purpose. Clean, well-formed ice with suspended elements that echo what’s in the glass, reinforcing the drink visually without adding clutter. Instead of layering garnish on top, everything is contained, controlled, and integrated—resulting in a presentation that feels composed from the start.

Controlling the placement.

What separates these from standard molds is how they’re built. If everything goes in at once, it floats, shifts, and freezes without structure—leaving the final piece looking scattered rather than composed. Freezing in stages changes that. It allows you to place each element deliberately, then lock it in position before adding the next layer. The result is controlled from the inside out, not left to chance.

That control is what gives the finished ice its clarity and intention. Each piece reads cleanly, with elements suspended exactly where they should be, creating something that feels designed rather than incidental. It’s a small adjustment in process, but it completely changes how the ice presents in the glass.

Where they work.

These are built for drinks where presentation carries weight—where the glass is part of the experience, not just the vessel.

They’re especially effective in something like Blueberry Lavender Lemonade, where the ingredients inside the ice mirror what’s already in the drink. That continuity keeps the build cohesive without adding anything extra.

They also translate well across a range of lighter, more aromatic drinks:

  • Lavender Collins or Blueberry Lavender Collins – the vertical glass gives the ice room to read clearly, reinforcing the botanical and fruit elements
  • Blueberry Margarita – adds contrast against the citrus-forward base, elevating a more casual build into something more composed
  • Spritzers and wine-based drinks – where the color and clarity of the ice stand out against lighter liquids
  • Iced teas and tea-based cocktails – where the lavender becomes more visually pronounced and complements the structure of the drink
  • Mocktails and non-alcoholic builds – where presentation carries even more of the experience

In each case, the ice doesn’t compete—it reinforces what’s already there.

The process.

  1. Fill each mold halfway with filtered water
  2. Add your elements (lemon, blueberries, lavender), spacing them intentionally
  3. Freeze until partially set (about 1–2 hours)
  4. Top off with more water to fully encase the ingredients
  5. Freeze until solid

Once frozen, remove and store in a sealed container until ready to use.

Other shapes.

This approach isn’t limited to spheres—the same method works across different molds, with small adjustments to fit the form.

  • Large cubes: use lemon wheel halves or segments so they sit flat and remain visible
  • Collins spears: switch to lemon twists or peels, layering blueberries along the length
  • Smaller molds: scale everything down—fewer blueberries, smaller lavender sprigs, thinner citrus cuts

The principle stays consistent: keep the composition clean, scale the ingredients to the mold, and build in stages so everything stays where you place it.

Silicone Ice Sphere Mold

A 2.5-inch silicone ice sphere mold produces a single, large piece of ice that chills efficiently while slowing dilution. The flexible silicone allows for easy release, and the size gives the sphere enough presence to elevate the drink from casual to intentional.

Silicone Large Ice Cube Mold

A silicone large ice cube mold produces a clean, solid cube that chills with control while slowing dilution—one of the reasons it’s a staple for Old Fashioneds. The size gives the drink a more composed, deliberate look, and the flexible silicone ensures an easy, consistent release every time.

Silicone Collins Spear Ice Mold

A silicone Collins spear ice mold creates long, narrow ice designed for highball and Collins glasses. The shape chills efficiently while maintaining a clean, vertical presentation that keeps taller drinks looking structured and intentional.

Blueberry Lavender Simple Syrup

Blueberry Lavender Simple Syrup leans into an unexpected pairing—ripe, jammy blueberry layered with the soft, aromatic lift of lavender—bringing fruit and floral together in a way that feels balanced rather than competing. The blueberry provides depth and natural sweetness, while the lavender adds just enough brightness to keep it from reading heavy or overly sweet, creating a syrup that’s both structured and nuanced.

Blueberry Lavender Simple Syrup

Fruit meets floral.

Blueberry and lavender aren’t a conventional pairing, and if either one is pushed too far, they can easily work against each other. But when they’re handled with restraint, they meet in a place that feels balanced rather than competing. The blueberry brings depth and natural sweetness—soft, slightly jammy, and familiar—while the lavender sits just behind it, adding a gentle aromatic lift that keeps the syrup from feeling heavy or one-dimensional. It doesn’t read as overtly floral. Instead, it sharpens and brightens the fruit, giving the syrup a cleaner, more structured finish.

Fruit and floral can easily work against each other if one isn’t kept in check. Lavender, especially, has a tendency to overpower if it’s not handled carefully. Here, the goal is restraint. The blueberry leads—rich, slightly jammy, and familiar—while the lavender sits just behind it, adding a subtle aromatic layer rather than taking over. It should read as lifted, not perfumed. That balance is what makes the syrup usable across more than just one application.

Building flavor without losing clarity.

Like any infused syrup, this comes down to timing—but more importantly, control. Blueberries break down quickly once they hit heat, releasing their juice, color, and natural pectin into the liquid. That early breakdown is what gives the syrup its body and structure, creating a base that feels full rather than thin. The fruit does most of its work upfront, and it does it fast.

Lavender doesn’t follow the same rules. It extracts quickly, but not always cleanly. Left too long, it can shift from soft and aromatic to sharp, medicinal, or overly perfumed. It’s not something you build over time—it’s something you layer in carefully and pull back before it takes over. That’s why the process is split in intention. A controlled simmer allows the blueberries to fully express themselves, while the lavender is handled with a shorter, more deliberate steep—just long enough to integrate, not dominate. You’re not chasing intensity here. You’re managing it. Push the lavender too far, and the syrup loses clarity. Pull it at the right moment, and it simply lifts the fruit, sharpening the edges and keeping everything balanced.

Where it lands.

When it’s dialed in, the syrup reads as focused and adaptable rather than overtly fruit-forward or floral. The blueberry gives it body and a subtle tartness that holds up under dilution, while the lavender keeps the profile lifted and clean, preventing it from settling into something dense or overly sweet. That balance is what makes it useful—it doesn’t dominate, it integrates.

It’s the kind of syrup that opens up once it’s in use. Stir it into lemonade and the citrus sharpens the fruit, bringing the blueberry forward while keeping the finish clean. Add it to iced tea and the lavender becomes more pronounced against the tannins, giving the drink a more aromatic, almost structured quality. Build it into a cocktail and it shifts again—gin pulls the floral notes forward, vodka lets the blueberry lead, and something like bourbon or a darker spirit rounds it out into something deeper and more grounded.

What you end up with isn’t a syrup that dictates direction—it’s one that responds to it. It adapts to what you build around it, giving you something that can move between bright and refreshing, or more layered and composed, depending on how you use it.

What I typically use it in.

This is a syrup that works best when it sets the direction rather than competing for it, especially in lighter, more aromatic builds where that balance of fruit and floral can stay intact.

At the bar, it shifts depending on the base. With gin, the lavender becomes more pronounced and structured without feeling overly botanical. With vodka, the blueberry carries more of the weight, while the lavender keeps the profile clean. Added to sparkling wine or soda, it opens up—lighter, more refreshing, and more aromatic as it stretches across the glass. It also works well in tea-based builds, where tannins give the lavender more definition and keep the drink from drifting too sweet.

In the kitchen, it’s just as effective where a little lift is needed. Brushed into cakes or sponge layers, it adds moisture without weighing them down. Spoon-drizzled over ice cream, panna cotta, or custards, it cuts through richness and adds structure. Folded into fruit-based desserts—compotes, fillings, or macerated fruit—it sharpens and refines rather than simply sweetening.

Recipes that use this syrup...

Blueberry Lavender Simple Syrup

Blueberry Lavender Simple Syrup leans into an unexpected pairing—ripe, jammy blueberry layered with the soft, aromatic lift of lavender—bringing fruit and floral together in a way that feels balanced rather than competing. The blueberry provides depth and natural sweetness, while the lavender adds just enough brightness to keep it from reading heavy or overly sweet, creating a syrup that’s both structured and nuanced.
Print Pin
Category: THIRST
Cuisine: Global
Course: Drinks
Keyword: Blueberry, Lavender, Simple Syrup
Prep: 30 minutes
Cook: 30 minutes
Cooling Time: 4 hours 15 minutes
Total: 5 hours 15 minutes
Servings: 24 servings
Calories: 107kcal
Author: TastyDaddy

Ingredients

Instructions

Infusion Ingredient Prep

  • If you are using fresh blueberries, wash thoroughly. Skip this step if using frozen.

Syrup Prep

  • Pour 3 cups of granulated white sugar into 6-cup stockpot.
  • Add 3 cups of blueberries into stockpot and muddle into sugar until blueberries are thoroughly smashed and sugar is stained with blueberry juice completely.
  • Add 3 cups filtered water onto muddled sugar and stir to combine.

Cooking

  • Bring ingredients to a boil in the stockpot until sugar is completely dissolved.
  • Reduce heat to and let ingredients simmer for at least 30 minutes.
  • Add 1 tbsp culinary grade lavender buds.
  • Remove stockpot from heat and let lavender steep in mixture while it cools for at least 1 hour.

Straining

  • Place mesh strainer over large pot or bowl (deeper than the depth of the strainer so that the liquid clears the bottom of the strainer).
  • Slowly pour contents of simmered liquid into strainer. Using muddler, gently press as much liquid from the contents of the strainer as possible (without damaging your strainer from the pressure).

Storing

  • Pour syrup into glass swing-top bottle (or jar if you don't have a bottle) and store at least 4 hours in the fridge to cool. Overnight cooling is even better.

Nutrition

Serving: 1oz | Calories: 107kcal | Carbohydrates: 28g | Protein: 0.1g | Fat: 0.1g | Saturated Fat: 0.01g | Polyunsaturated Fat: 0.03g | Monounsaturated Fat: 0.01g | Sodium: 2mg | Potassium: 15mg | Fiber: 0.4g | Sugar: 27g | Vitamin A: 12IU | Vitamin C: 2mg | Calcium: 4mg | Iron: 0.1mg

Black Orchard Old Fashioned

Black Orchard Old Fashioned leans into depth without losing its edge. ZingBing Syrup brings a layered sweetness—ginger up front, cherry just behind—while bourbon anchors the drink with warmth and structure. Angostura adds familiar spice, and black walnut bitters round everything out with a subtle, nutty richness that lingers on the finish.

It drinks darker than a classic Old Fashioned, but more defined—sweetness sharpened by bite, fruit grounded by bitterness. The result is balanced, composed, and just a little unexpected without straying from what makes the original work.

Black Orchard Old Fashioned

Dark fruit, sharpened.

The Black Orchard Old Fashioned leans deeper than the classic without losing its structure—ZingBing Syrup brings ginger heat and tart cherry, while black walnut bitters round it out with a subtle, nutty finish. It’s familiar at its core, just pushed slightly darker and more defined.

A classic, adjusted.

At its heart, this is still an Old Fashioned. The structure doesn’t change—spirit, sugar, bitters—but the syrup shifts the balance.

ZingBing replaces the sugar cube with something that already carries contrast. Ginger adds lift, cherry adds depth, and together they give the drink more shape before the bourbon even enters the glass. The role of the bitters becomes more important here, not less. Angostura keeps the drink grounded in its original profile, while black walnut adds a layer that softens and deepens without getting in the way.

Building the drink in the glass.

Like any Old Fashioned, this comes down to control more than complexity. Start with the syrup and bitters so they integrate fully. Once the ice goes in, the pour and stir should be deliberate—just enough to chill and slightly dilute, but not enough to flatten the edges. The goal is to keep the progression intact: ginger up front, cherry through the middle, bourbon and spice on the finish.

The orange peel isn’t just garnish here. Warming it before expressing pulls out a deeper, slightly caramelized citrus oil that sits on top of the drink and ties everything together.

Where it lands.

It drinks darker than a classic Old Fashioned, but more structured—sweetness held in check, not leading the way. When it’s balanced, the drink moves cleanly:

  • bright ginger heat at the front
  • cherry and bourbon through the center
  • warm spice and walnut lingering at the end

What I typically serve with it.

This is the version I pair with my Lomo Saltado. The ginger in the syrup leans into the aromatics in the stir-fry instead of competing with them, while the black walnut bitters echo the nuttiness in the coconut rice. It ends up feeling cohesive across the plate—nothing fighting for attention, everything reinforcing the same flavor direction.

It also holds up well alongside grilled or roasted meats, or with darker, nut-forward desserts—but it’s at its best when it’s part of a full build rather than standing on its own.

You’ll find the full method outlined below. The process is simple, but the details matter—small adjustments in dilution, expression, and balance are what make this version work.

Black Orchard Old Fashioned

The Black Orchard Old Fashioned leans into depth without losing its edge. My ZingBing Syrup brings a layered sweetness—ginger up front, cherry just behind—while bourbon anchors the drink with warmth and structure. Angostura adds familiar spice, and black walnut bitters round everything out with a subtle, nutty richness that lingers on the finish.
It drinks darker than a classic Old Fashioned, but more defined—sweetness sharpened by bite, fruit grounded by bitterness. The result is balanced, composed, and just a little unexpected without straying from what makes the original work.
Print Pin
Category: THIRST
Cuisine: Global
Course: Drinks
Keyword: Angostura Bitters, Black Walnut Bitters, Bourbon, Cherry, Ginger
Prep: 3 minutes
Total: 3 minutes
Servings: 1 drink
Calories: 140kcal
Author: TastyDaddy

Ingredients

Instructions

  • In an Old Fashioned (rocks) glass, add ¼ oz ZingBing simple syrup, 2 dashes Angostura bitters, and 1 dash Fee Brothers Black Walnut bitters.
  • Add ice sphere to glass and pour 2 oz bourbon over sphere.
  • With your bar spoon, stir contents of glass to chill the cocktail.
  • With a vegetable peeler (or knife), remove an inch-wide section of an orange peel. Be sure not to cut past the pith (white part) so that the flesh of the orange isn't exposed.
  • Strike a match and gently heat the orange part of the rind with the flame for 5-10 seconds.
  • While holding match between the glass and the peel, give the rind a gentle squeeze to express the oil; the citrus oil will flame and settle onto the drink.
  • Take the orange side of the peel and rub along the rim of the glass—this will ensure the remaining oil will flavor and scent the entire rim; place orange peel in glass.
  • Skewer a Filthy® cherry with a garnish pick and toss in glass alongside the peel.

Nutrition

Calories: 140kcal | Carbohydrates: 1g | Sodium: 1mg | Potassium: 1mg | Sugar: 0.3g | Iron: 0.02mg

ZingBing Simple Syrup

ZingBing Syrup is a sharp, fruit-driven simple syrup that leads with the clean bite of fresh ginger before rounding into the deep, tart sweetness of cherry. It’s built for contrast—bright, slightly punchy, and structured enough to cut through richer flavors without getting lost. The ginger keeps it lifted; the cherry gives it body.

Use it anywhere you want sweetness with edge: stirred into bourbon or rye for a darker, spiced profile, shaken into citrus-forward cocktails for added depth, or brushed into desserts where a little acidity keeps things from going flat.

ZingBing Simple Syrup

Sweet with a bite.

ZingBing Syrup is built on contrast—sharp, aromatic ginger layered over the deep, slightly tart sweetness of Bing cherries. It’s not just a way to sweeten something. It’s a way to shape it. At its core, this syrup is about balance. The ginger keeps things lifted and bright, while the cherry brings body and depth. Together, they create something that feels clean, structured, and just a little bit unexpected.

Where the flavor starts.

What makes this syrup different isn’t just the ingredients—it’s how they come together from the start. Instead of dissolving sugar first and infusing afterward, the process begins by working the ginger and cherries directly into the sugar. As they’re muddled, the ginger releases its oils and the cherries give up their juice, staining the sugar and building flavor before any heat is applied.

By the time the water goes in, the base is already doing more than just sweetening. It’s carrying aroma, acidity, and a bit of bite—everything that gives the finished syrup its edge.

Building structure into something simple.

Simple syrup tends to lean one-dimensional if you let it. This one doesn’t. A few small choices make the difference:

  • freshly grated ginger for a clean, immediate heat
  • Bing cherries for their deeper, slightly tart profile
  • a controlled simmer to steep without dulling the brightness

The goal isn’t to overpower—it’s to layer. The ginger shouldn’t dominate, and the cherry shouldn’t feel heavy. They meet in the middle, supported by just enough sweetness to hold everything together.

The balance in the finish.

When it’s done right, ZingBing lands in that space between sweet, tart, and sharp. The ginger hits first, the cherry follows, and the sweetness lingers just long enough to tie it together without flattening it. It’s the kind of syrup that doesn’t disappear into whatever you’re using it in—it actually defines it.

What I typically use it in.

ZingBing is flexible, but it works best where contrast matters.

At the bar

  • stirred into bourbon or rye for depth and a subtle spiced fruit note
  • shaken with gin for something brighter and more aromatic
  • added to sparkling wine or soda for a lighter, sharper build

In the kitchen

  • brushed into cakes or layered desserts
  • spooned over ice cream or soft cheeses
  • used to make a vinaigrette
  • reduced slightly further into a glaze for pork or duck

A note before you start.

This recipe is straightforward, but a few details matter:

  • Don’t skip the muddling step—that’s where the flavor is built
  • Keep the heat controlled—you’re steeping, not aggressively reducing
  • Let the syrup fully chill before using—the flavor settles and rounds out as it rests

Recipes that use this syrup...

You’ll find the full method outlined below, from building the base in the sugar to simmering and straining the finished syrup.

ZingBing Simple Syrup

ZingBing Simple Syrup is a sharp, fruit-driven simple syrup that leads with the clean bite of fresh ginger before rounding into the deep, tart sweetness of cherry. It’s built for contrast—bright, slightly punchy, and structured enough to cut through richer flavors without getting lost. The ginger keeps it lifted; the cherry gives it body.
Use it anywhere you want sweetness with edge: stirred into bourbon or rye for a darker, spiced profile, shaken into citrus-forward cocktails for added depth, or brushed into desserts where a little acidity keeps things from going flat.
Print Pin
Category: THIRST
Cuisine: Global
Course: Drinks
Keyword: Cherry, Ginger, Simple Syrup
Prep: 30 minutes
Cook: 30 minutes
Cooling Time: 4 hours 15 minutes
Total: 5 hours 15 minutes
Servings: 24 servings
Calories: 145kcal
Author: TastyDaddy

Ingredients

Instructions

Infusion Ingredient Prep

  • Wash ginger root and cherries (if using fresh) thoroughly.
  • Run the edge of a spoon along the ginger root to loosen and peel the skin, discarding, and rinse the root. Dry with paper towel.
  • Grate about ¼ cup (4 tbsp) of ginger.
  • If you are using fresh cherries, remove cherry pits. Skip to next step if using frozen.
  • Coarsely chop cherries until you have approximately 3 cups of cherries.

Syrup Prep

  • Pour 3 cups of granulated white sugar into 6-cup stockpot.
  • Pour ¼ cup (4 tbsp) grated ginger on top of sugar and muddle ginger into sugar to infuse the flavor into it.
  • Once ginger is integrated with the sugar, add 3 cups of chopped cherries onto sugar and muddle into sugar until sugar is stained with cherry juice completely.
  • Add 3 cups filtered water onto muddled sugar and stir to combine.
  • TIP: Instead of muddling, you can combine the water, ginger, and cherries into a blender until well blended and pour into the stockpot over sugar; however, I have found that muddling/infusing the flavors into the sugar creates a better flavor.

Cooking

  • Bring ingredients to a boil in the stockpot until sugar is completely dissolved.
  • Reduce heat to a medium simmer and let ingredients steep for at least 30 minutes.
  • Remove stockpot from heat and let cool for at least 15 minutes.

Straining

  • Place mesh strainer over large pot or bowl (deeper than the depth of the strainer so that the liquid clears the bottom of the strainer).
  • Slowly pour contents of simmered liquid into strainer. Using muddler, gently press as much liquid from the contents of the strainer as possible (without damaging your strainer from the pressure).

Storing

  • Pour syrup into glass swing-top bottle (or jar if you don't have a bottle) and store at least 4 hours in the fridge to cool. Overnight cooling is even better.

Nutrition

Serving: 1oz | Calories: 145kcal | Carbohydrates: 36g | Protein: 1g | Fat: 0.1g | Saturated Fat: 0.002g | Polyunsaturated Fat: 0.002g | Monounsaturated Fat: 0.002g | Sodium: 4mg | Potassium: 5mg | Fiber: 1g | Sugar: 33g | Vitamin A: 538IU | Vitamin C: 0.05mg | Calcium: 15mg | Iron: 0.3mg