Dry Riesling plays differently depending on how it’s built. Anthony Road leans toward balance over austerity—the 2022 is bright and structured, with a touch of softness that makes it easier to work with across a range of dishes.
On the Nose
Clean and expressive—crisp apple, tangerine, and lime zest lead, with delicate floral notes and a subtle herbal edge. There’s a light mineral thread running underneath that keeps everything grounded.
On the Tongue
Bright and precise, but not sharp. The acidity is high, as expected, but it’s balanced by a slight softness that rounds out the edges. Citrus and orchard fruit carry through the palate, with a clean, mineral finish and just enough texture from lees aging to give it some presence. It reads dry—but not aggressive.
On the Record
Details:
Producer: Anthony Road Wine Company
Region: Finger Lakes, New York
Vintage: 2022
Varietal: Riesling
ABV: 11.7%
pH: 2.9
Acidity: 8.5 g/L
Residual Sugar: 7.5 g/L
Average Brix at Harvest: 19.6°Bx
Harvest: October 11th, 12th, & 14th, 2022
Winemaking Notes: Machine harvested fruit. Pressed into stainless steel tank to cold settle for two days then racked off the juice bottoms into stainless steel tanks to ferment. Native and commercial yeasts were employed to create many expressions of the fruit that would be used in the final blending of the wine. The wine spent about 7 months resting on the lees before the wine was readied for bottling.
Critical Reception:
Vinous — 92 pts
James Suckling — 90 pts
Wine & Spirits — 92 pts
TastyDaddy Rating: 8.9 / 10 Highly versatile, technically precise, and more adaptable than most wines labeled “dry.”
On the Table
This is where the wine really shows its value—it’s built to handle complexity. It works best with dishes that balance salt, acidity, and a bit of richness, especially when there’s an aromatic component in play. The high acidity keeps everything lifted, while the slight softness prevents it from turning sharp against soy, citrus, or spice.
It’s particularly strong with:
Soy-based dishes and umami-driven sauces
Ginger, citrus, and lightly spiced profiles
Fried elements and starch (fries, rice, noodles)
Seafood or lighter proteins with bold seasoning
On the Wallet
Typically $18–$25, depending on the retailer.
This sits firmly in the high-value tier—you’re getting precision, balance, and versatility at a price point where most wines are far less interesting. For what it delivers, this punches well above its weight.
Drinkware isn’t about aesthetics—it’s about intention. Different drinks call for different vessels, each designed to influence temperature, dilution, aroma, and overall experience. From glass to metal, the material and shape both play a role in how a drink is served and how it evolves. The right choice enhances what’s already there, while the wrong one works against it. Learn the difference, and your drinks instantly feel more dialed in.
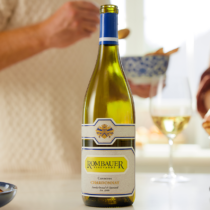
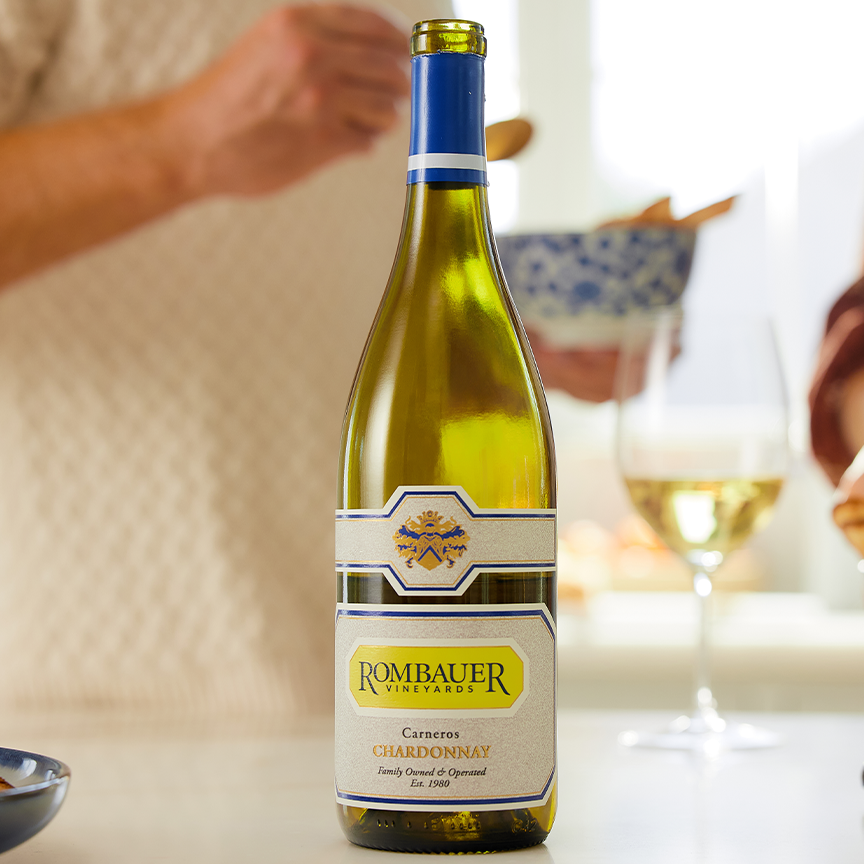
Rombauer | Carneros Chardonnay (2024)
Not all Chardonnay plays the same role at the table. Some are built for acidity and precision—others are built for richness and weight. Rombauer has long leaned into the latter, producing a style that’s full, expressive, and designed to hold its own alongside more indulgent dishes. The 2024 Carneros release continues that approach with confidence.
On the Nose
Immediately expressive and unmistakably ripe—pineapple, mango, and baked apple come forward first, followed by notes of vanilla, buttercream, and a touch of toasted oak. There’s a hint of citrus underneath, but this leans warm and lush rather than bright and restrained. It’s aromatic in a way that announces itself the moment it’s poured.
On the Tongue
Full-bodied and creamy, with that signature Rombauer richness. The palate is layered with ripe tropical fruit—pineapple and peach—wrapped in vanilla and caramelized oak. Malolactic fermentation shows clearly here, giving it that smooth, buttery texture people either seek out or avoid.
The acidity is present, but it plays a supporting role—it keeps the wine from feeling heavy, but this is very much about texture and indulgence over sharpness or minerality. The finish is long, round, and slightly sweet-leaning in perception due to the ripeness of the fruit.
On the Record
Details:
Producer: Rombauer Vineyards
Region: Carneros, California
Vintage: 2024
Varietal: Chardonnay
ABV: 14.6%
Average Brix at Harvest: 24°Bx
Harvest: August 28 – October 8, 2024
Cooperage: 9 months in French & American oak (37% new)
Fermentation: Full malolactic
Bâtonnage: Lees stirring every 7-10 days
Critical Reception:
Not yet widely reviewed for the 2024 vintage. Historically, Rombauer Carneros Chardonnay vintages tend to land in the low-mid 90s among major critics (92-96 points in the past years).
TastyDaddy Rating: 8.6 / 10 Not subtle—but that’s the point. It delivers exactly what it promises, and it does it well.
On the Table
This leans rich and full, so the food needs to meet it there. Dishes built around butter, cream, or cheese tend to align naturally, especially when paired with roasting or pan-searing to develop depth and light caramelization. Salt and texture do the rest—bringing the wine into balance so its richness integrates rather than dominates.
Some examples of dishes that pair well:
Gruyère, Comté, or aged Alpine cheeses
Pasta in cream or cheese-based sauces
Roast Chicken with pan jus or cream sauce
Chicken Cordon Bleu
Creamy Shrimp Risotto
Butter-poached lobster or crab
On the Wallet
Typically $40–$50 retail, depending on the market.
This sits in that upper-mid tier where you’re paying for consistency and style recognition as much as the wine itself. If you like bold, buttery Chardonnay, this feels worth it. If you prefer lean, mineral-driven wines, this will feel overpriced for your palate.
Drinkware isn’t about aesthetics—it’s about intention. Different drinks call for different vessels, each designed to influence temperature, dilution, aroma, and overall experience. From glass to metal, the material and shape both play a role in how a drink is served and how it evolves. The right choice enhances what’s already there, while the wrong one works against it. Learn the difference, and your drinks instantly feel more dialed in.
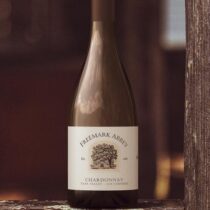
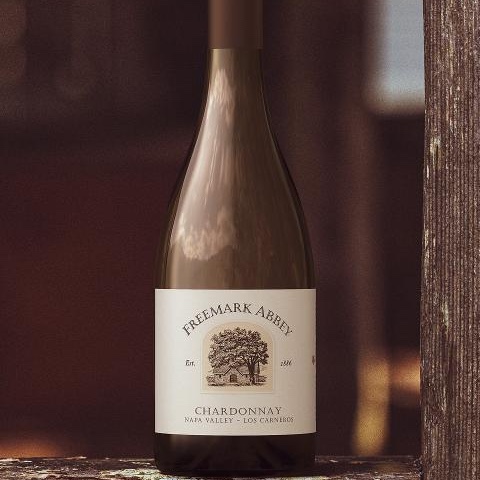
Freemark Abbey | Los Carneros Chardonnay (2021)
On the Nose
Bright orchard fruit leads—crisp apple, ripe pear, and citrus zest—layered with a subtle floral lift. Oak sits just beneath it, adding soft vanilla and toasted almond without dominating. It’s composed and restrained, not overly aromatic, but clearly intentional.
On the Tongue
Medium-bodied with a creamy, polished texture that never tips into heavy. The oak reads as structure rather than butter—vanilla, light toast—balanced by Carneros acidity that keeps everything lifted. Citrus and stone fruit carry through the mid-palate, finishing clean with a slight mineral edge.
On the Record
Details:
Producer: Freemark Abbey
Region: Los Carneros, Napa Valley
Vineyard: Huichica Hills
Vintage: 2021
Varietal: 100% Chardonnay
ABV: 14.5%
pH: 3.47
Harvest: September 11–16, 2021
Aging: 100% French oak (≈16% new)
Critical Reception:
The Wine Independent — 94 pts
Wine Enthusiast — 93 pts
James Suckling — 92 pts
Wine Spectator — 92 pts
Gismondi on Wine — 88 pts
CellarTracker (Community) — 90.7 pts
Vivino — 4.1 / 5
TastyDaddy Rating: 8.8 / 10 A strong consensus wine—critics cluster in the low-to-mid 90s, with community scores reinforcing it as reliably well-executed rather than polarizing.
On the Wallet
$60 retail | $48 member pricing
This sits firmly in premium territory. You’re not buying this as a casual weeknight Chardonnay—you’re buying it for intention: a pairing-driven dinner, a bottle that needs to hold up to richer food, or something that delivers balance without leaning too hard into butter or austerity.
At this price, the value isn’t about affordability—it’s about precision and versatility. And this delivers both.
Drinkware isn’t about aesthetics—it’s about intention. Different drinks call for different vessels, each designed to influence temperature, dilution, aroma, and overall experience. From glass to metal, the material and shape both play a role in how a drink is served and how it evolves. The right choice enhances what’s already there, while the wrong one works against it. Learn the difference, and your drinks instantly feel more dialed in.
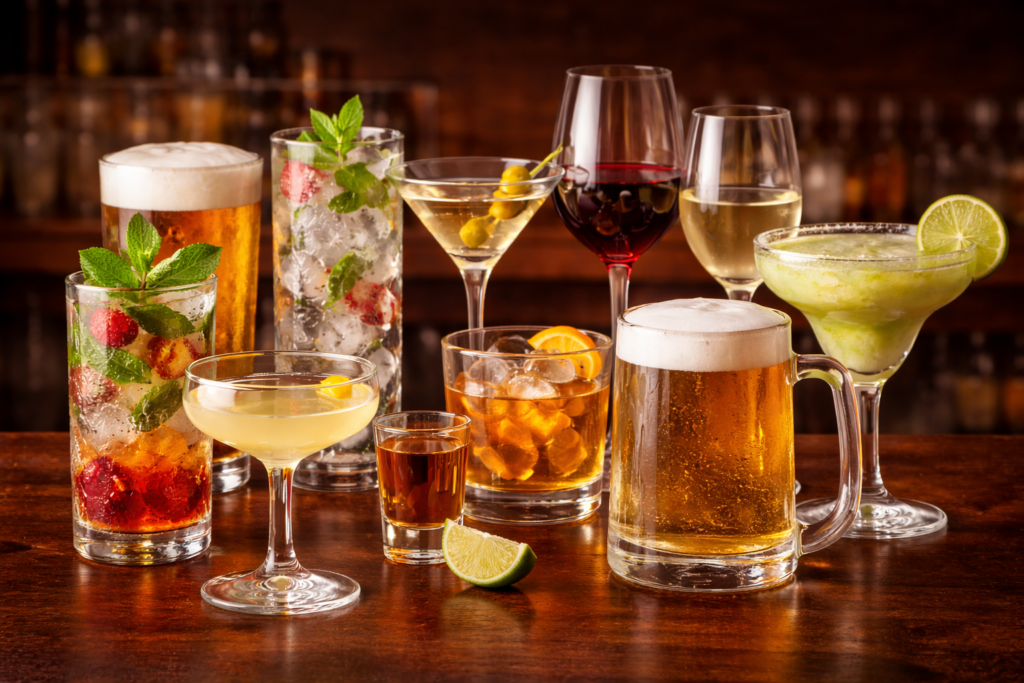
Drinkware 101: Choosing the Right Vessel for Every Drink
Introduction
Drinkware isn’t about aesthetics—it’s about intention. Different drinks call for different vessels, each designed to influence temperature, dilution, aroma, and overall experience. From glass to metal, the material and shape both play a role in how a drink is served and how it evolves. The right choice enhances what’s already there, while the wrong one works against it. Learn the difference, and your drinks instantly feel more dialed in.
Shot glasses
Shot glasses are built for precision and immediacy, delivering controlled portions in a single, direct serve. While often grouped together, their variations influence both volume and presentation.
The modern shot glass became standardized in the United States in the late 19th to early 20th century, as saloons and distilleries began formalizing pour sizes for consistency and taxation. Earlier versions existed in Europe as small spirit cups, but the American bar culture is what cemented their modern use.
A pony shot typically holds around 1 ounce, a term that dates back to 19th-century American bartending, where “pony” referred to a smaller-than-standard measure.
A shooter glass, generally 2 to 3 ounces, emerged later alongside layered and novelty shots in late 20th-century bar culture, where visual presentation became part of the experience.
Short / Spirit-Forward Glasses
These glasses are designed for drinks served over ice, where dilution is gradual and intentional. Their shorter, wider form allows for stirring, aromatic expression, and controlled evolution.
Old Fashioned Glass - 6 to 10 oz
The Old Fashioned glass, also known as a rocks glass, lowball, or tumbler, typically holds between 6 to 10 ounces. Its wide opening allows for easy stirring and the expression of citrus oils, making it ideal for spirit-forward cocktails like the Old Fashioned or Negroni, where the drink develops as the ice melts.
Tall glasses are built for drinks with length—cocktails that incorporate mixers, carbonation, or larger volumes of ice. Their vertical design helps preserve structure while maintaining balance over time. The rise of tall drinkware is closely tied to the late 19th and early 20th centuries, when carbonation became more widely available and drinks began incorporating soda water as a key component.
The Delmonico glass, typically 5 to 9 ounces, is named after Delmonico’s restaurant in New York, one of the first fine dining establishments in the United States. It represents an early form of structured mixed-drink service, functioning as a more compact highball.
A highball glass, generally 8 to 12 ounces, takes its name from the “highball” style of drink—spirit topped with a larger proportion of mixer. The term dates back to late 19th-century railroad slang, later adopted into bar culture.
A Collins glass, typically 10 to 14 ounces, is named after the Tom Collins cocktail, popularized in the 19th century. Its taller shape accommodates longer, citrus-forward drinks that require both dilution and volume.
A zombie glass, usually 12 to 16 ounces or more, emerged in the mid-20th century alongside tiki culture, designed for larger, multi-ingredient cocktails that required both capacity and visual presence.
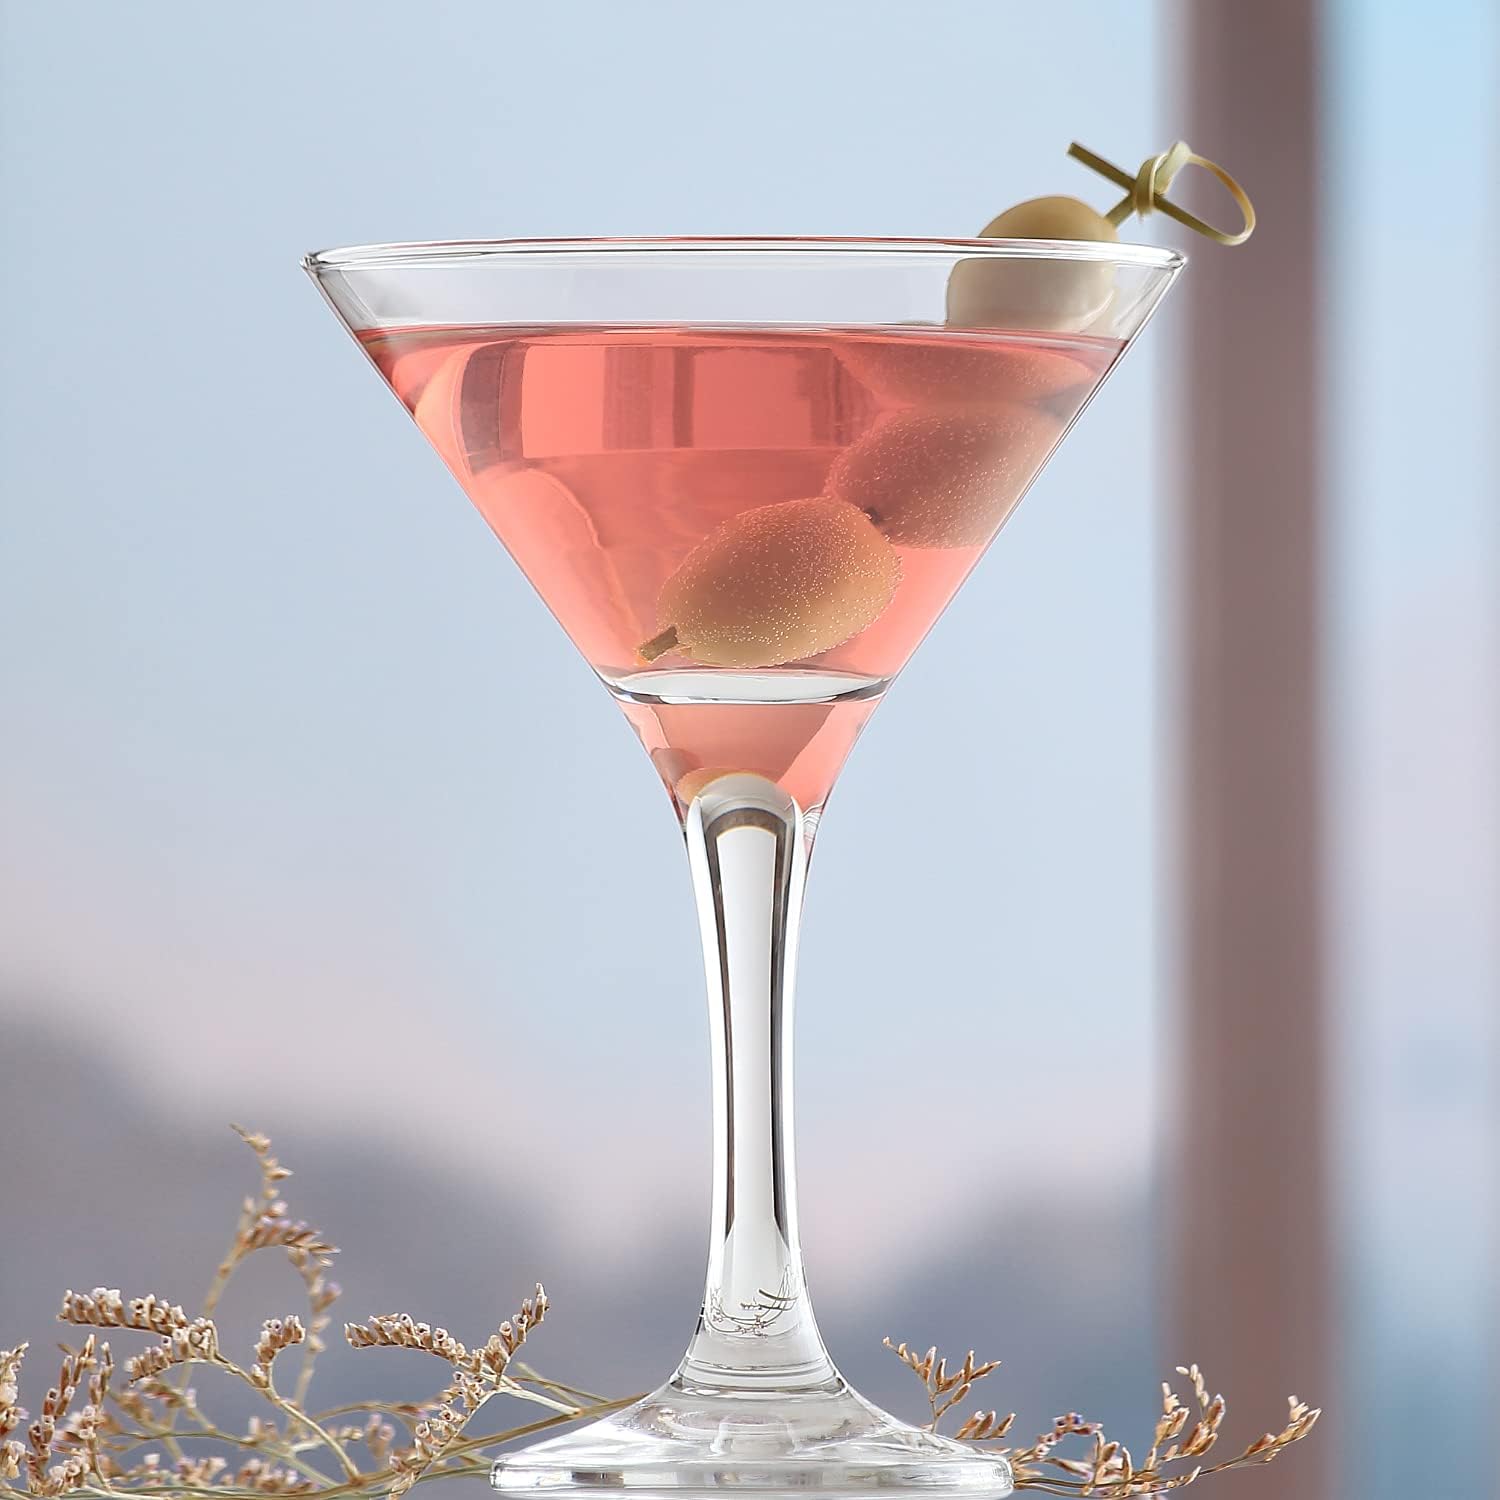
Stemmed Cocktail Glasses (Served “Up”)
Tall glasses are built for drinks with length—cocktails that incorporate mixers, carbonation, or larger volumes of ice. Their vertical design helps preserve structure while maintaining balance over time. The rise of tall drinkware is closely tied to the late 19th and early 20th centuries, when carbonation became more widely available and drinks began incorporating soda water as a key component.
The martini glass, or cocktail glass, typically 6 to 10 ounces, evolved in the early 20th century during Prohibition-era cocktail culture. Its exact origin is debated, but it became iconic as cocktails shifted toward being served chilled and without ice.
A coupe glass, generally 5 to 8 ounces, dates back to 17th-century France and was originally used for champagne. It later rose in popularity during the early 20th century—particularly the Prohibition and “Gatsby” era—before becoming a staple for cocktails served up due to its stability and shape.
The Nick & Nora glass, typically 4 to 6 ounces, is named after characters in The Thin Man films of the 1930s, reflecting a more refined, controlled cocktail service style.
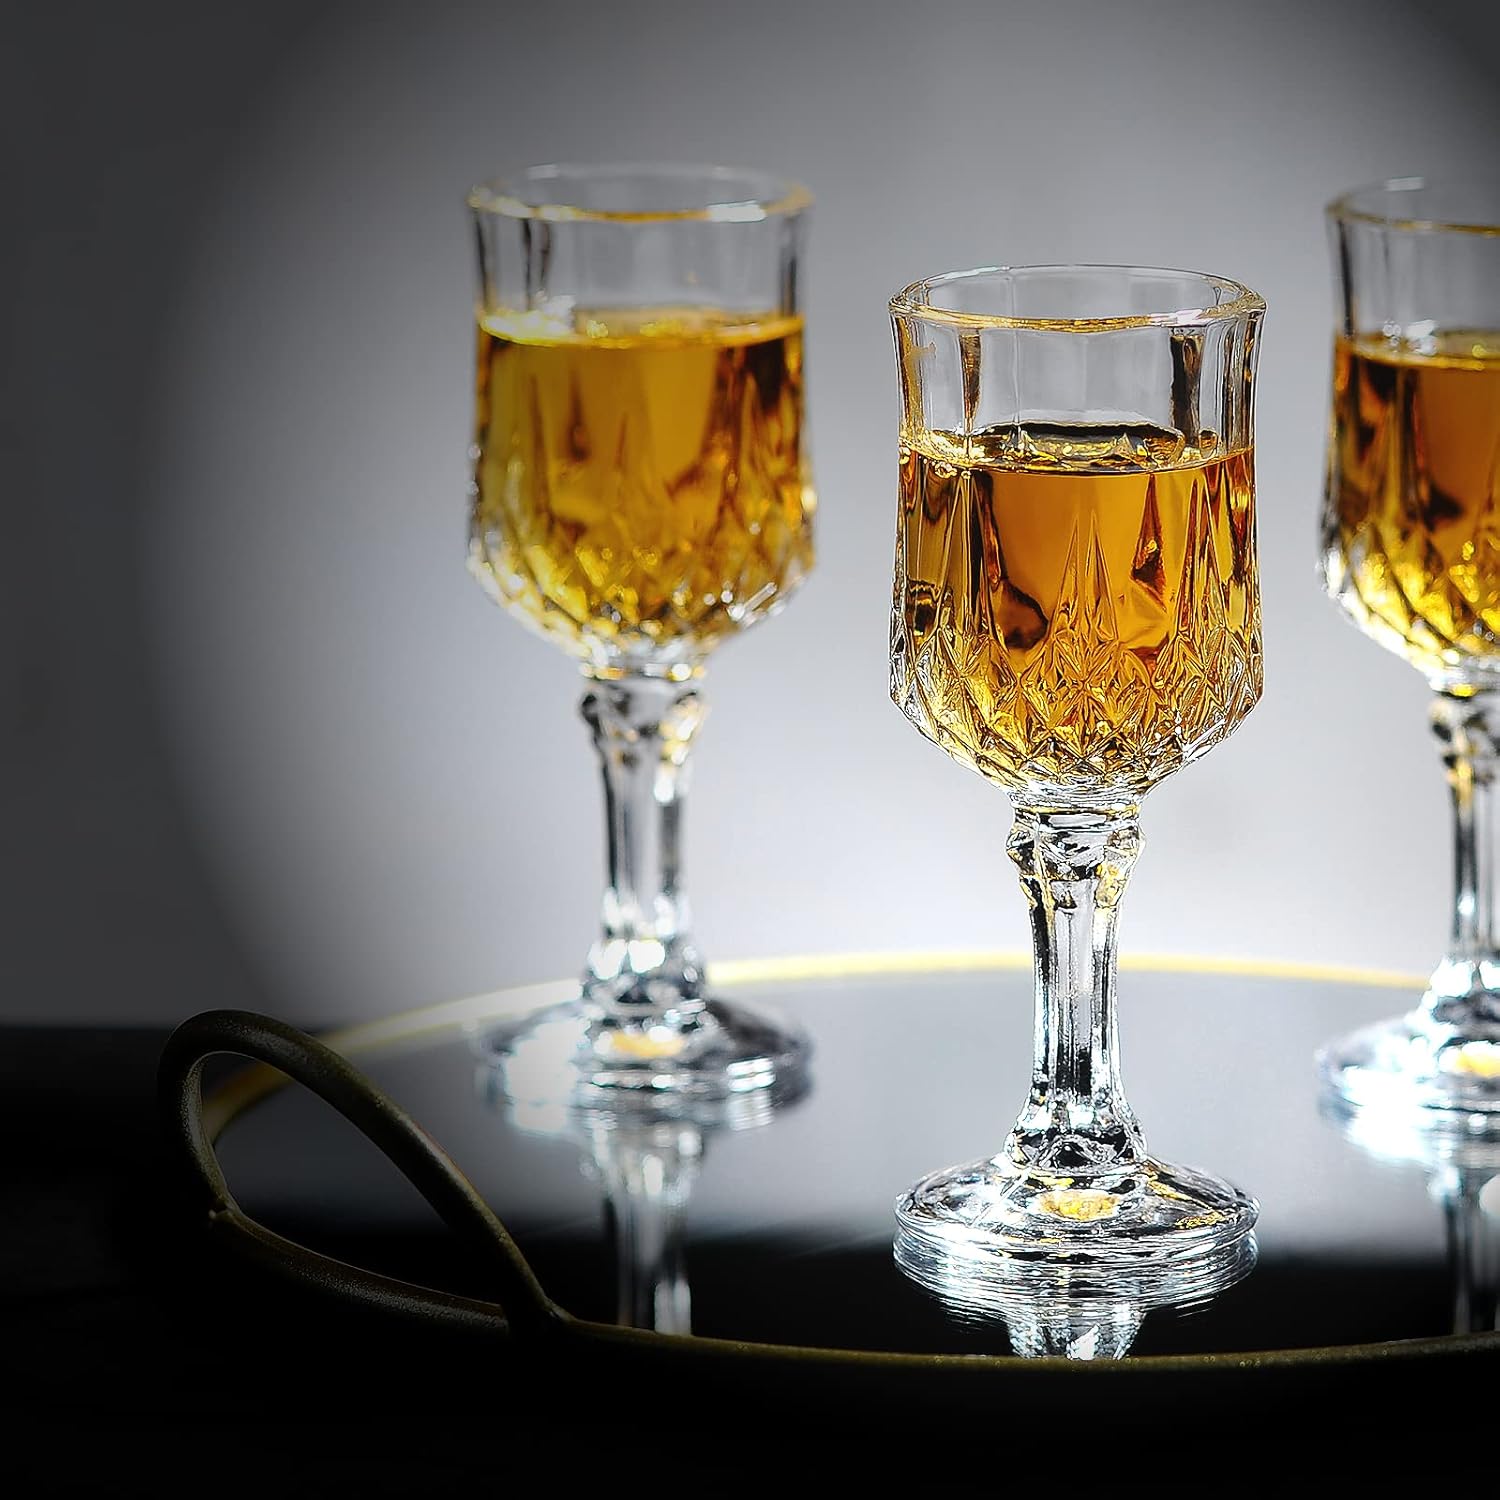
A cordial glass, typically 1.5 to 2 ounces, has roots in European after-dinner drinking traditions, designed for liqueurs served in small, concentrated portions.
A brandy snifter, ranging from 8 to 18 ounces, originated in 18th-century Europe, designed to warm the spirit slightly while concentrating aroma through its narrow opening.
An absinthe glass, generally 6 to 10 ounces, became popular in 19th-century France, often featuring a reservoir to guide the traditional dilution ritual.
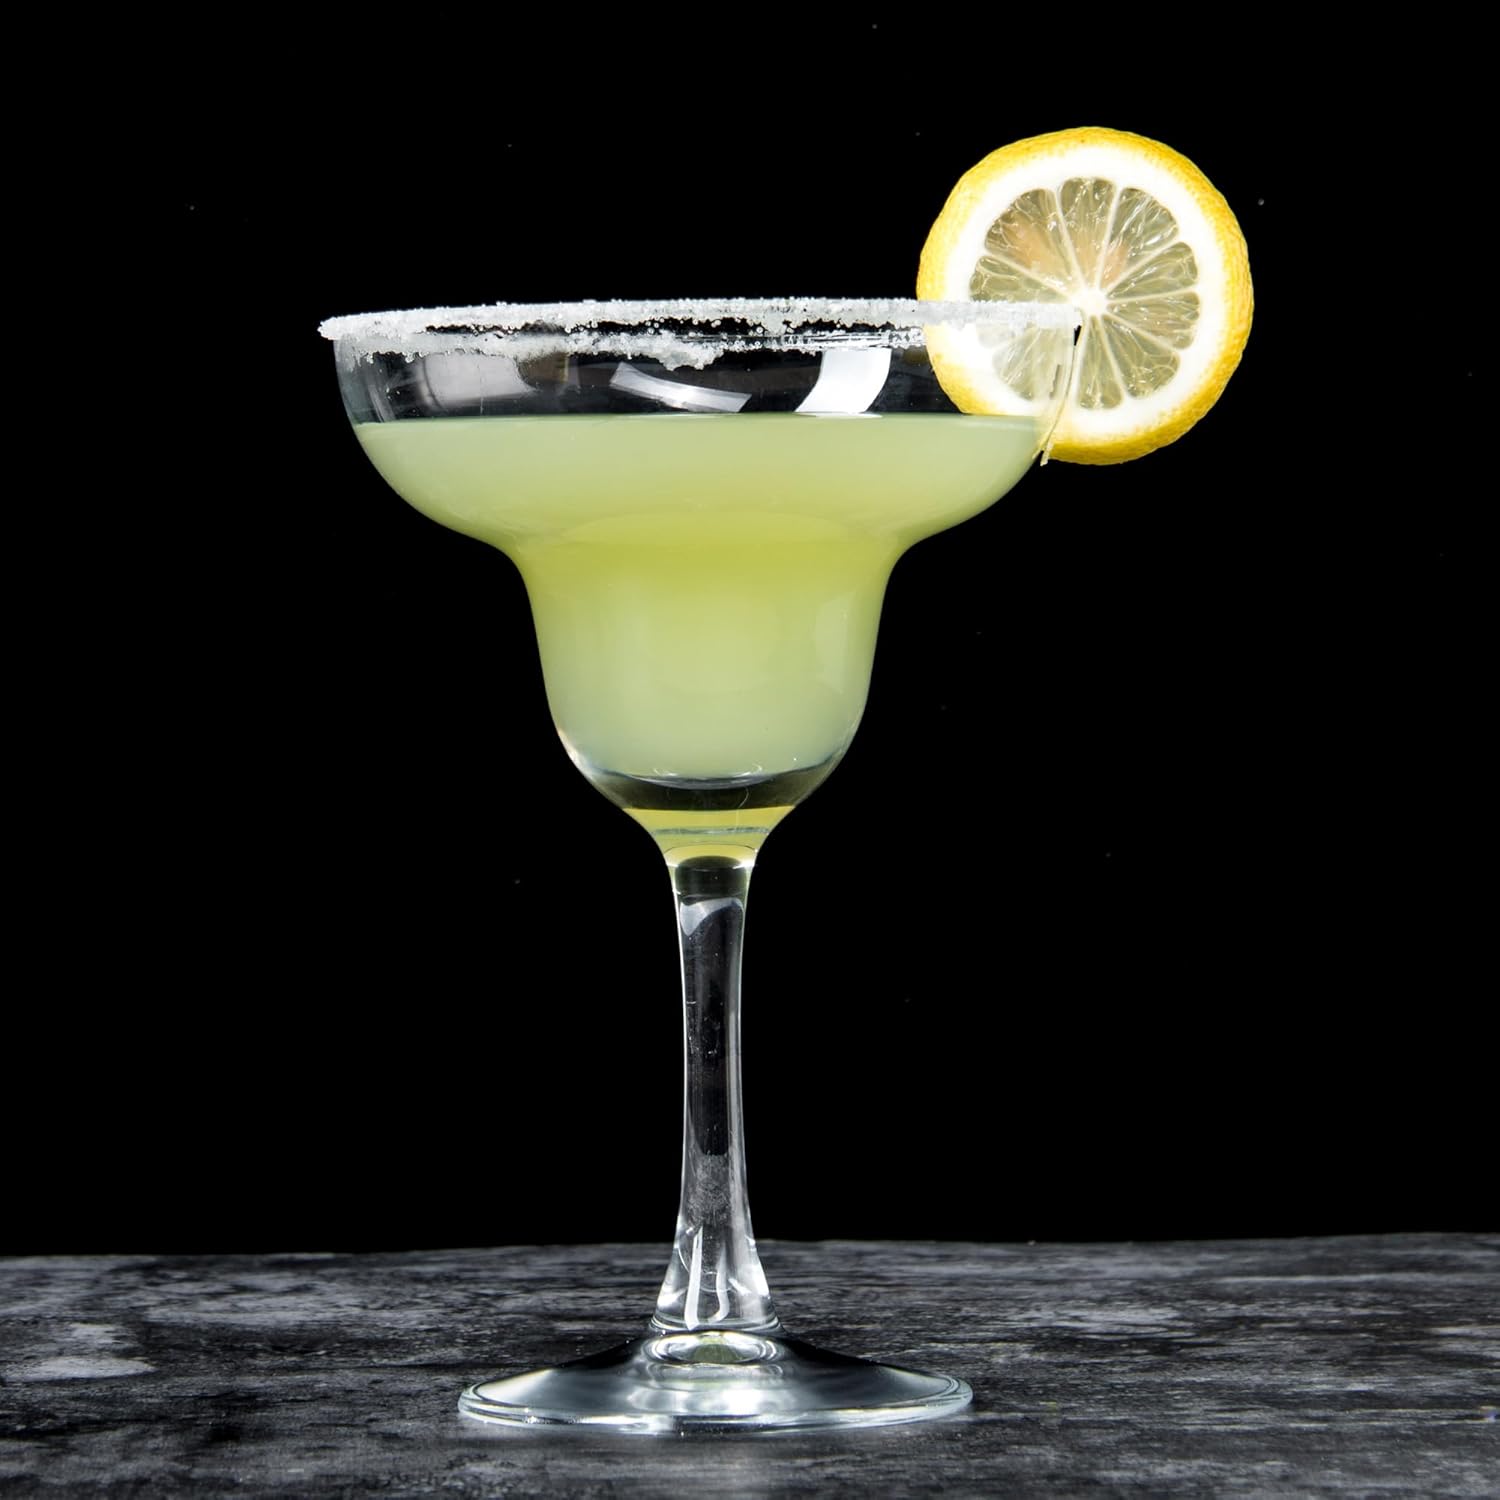
Large-Format & Aromatic Cocktail Glasses
These glasses are designed for drinks that rely on volume, ice, and aromatic layering, where the experience extends beyond the liquid itself. Their larger bowls and taller profiles create space not just for the drink, but for garnishes, dilution, and movement as the cocktail evolves. Ice plays a more active role here, slowly integrating into the drink over time, while the wider openings allow aromas—often from citrus, herbs, or botanicals—to develop and reach the nose before the first sip. In many cases, presentation becomes part of the function, with the glass helping to frame both the visual and sensory experience in a way that smaller, more restrained vessels cannot.
The margarita glass, typically 10 to 16 ounces, evolved in the mid-20th century alongside the cocktail itself, designed to highlight salted rims and citrus-forward profiles.
A hurricane glass, often 16 to 20 ounces, was popularized in New Orleans at Pat O’Brien’s in the 1940s, designed specifically for the Hurricane cocktail.
A sling glass, typically 10 to 14 ounces, traces its origins to the Singapore Sling and similar long-form cocktails from the late 19th to early 20th century.
The Copa de Balón, generally 16 to 20 ounces, originates from Spain, where it became standard for gin and tonic service, emphasizing botanical aroma through its wide bowl.
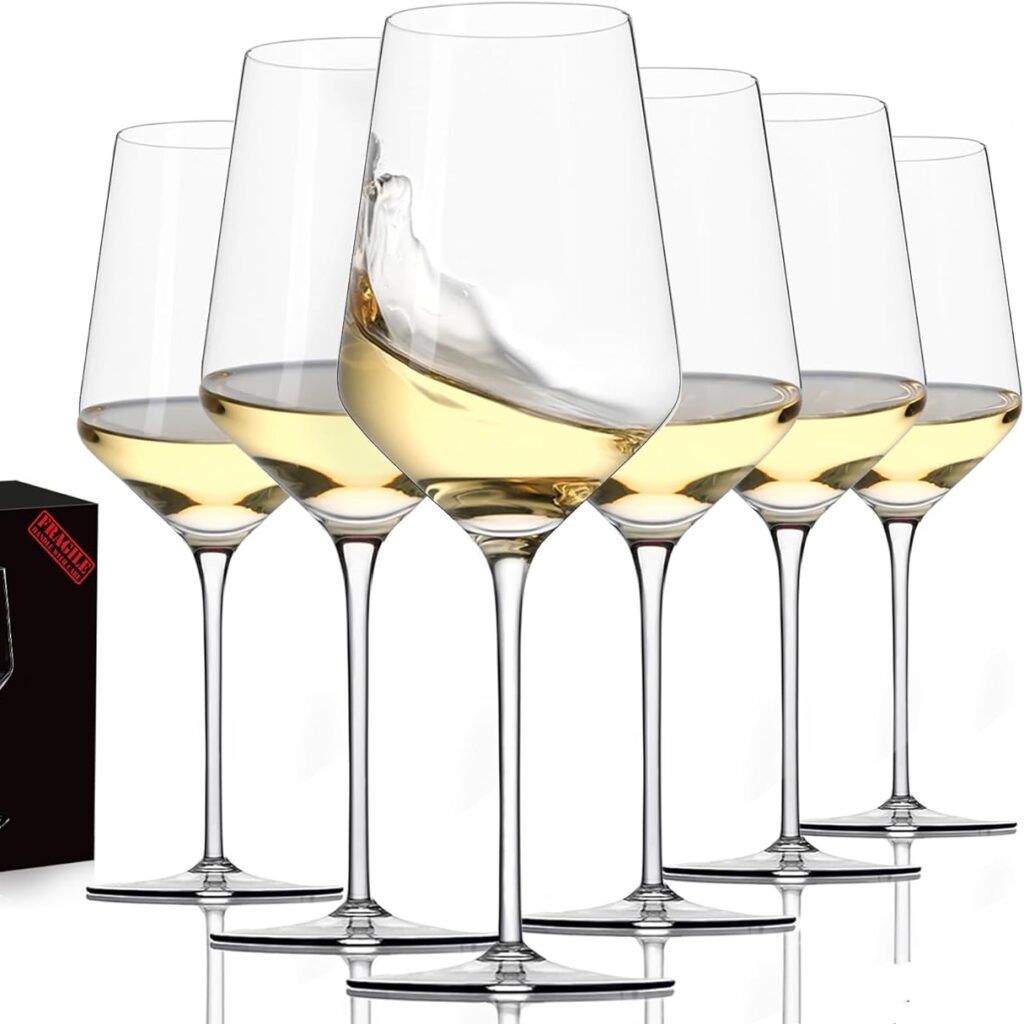
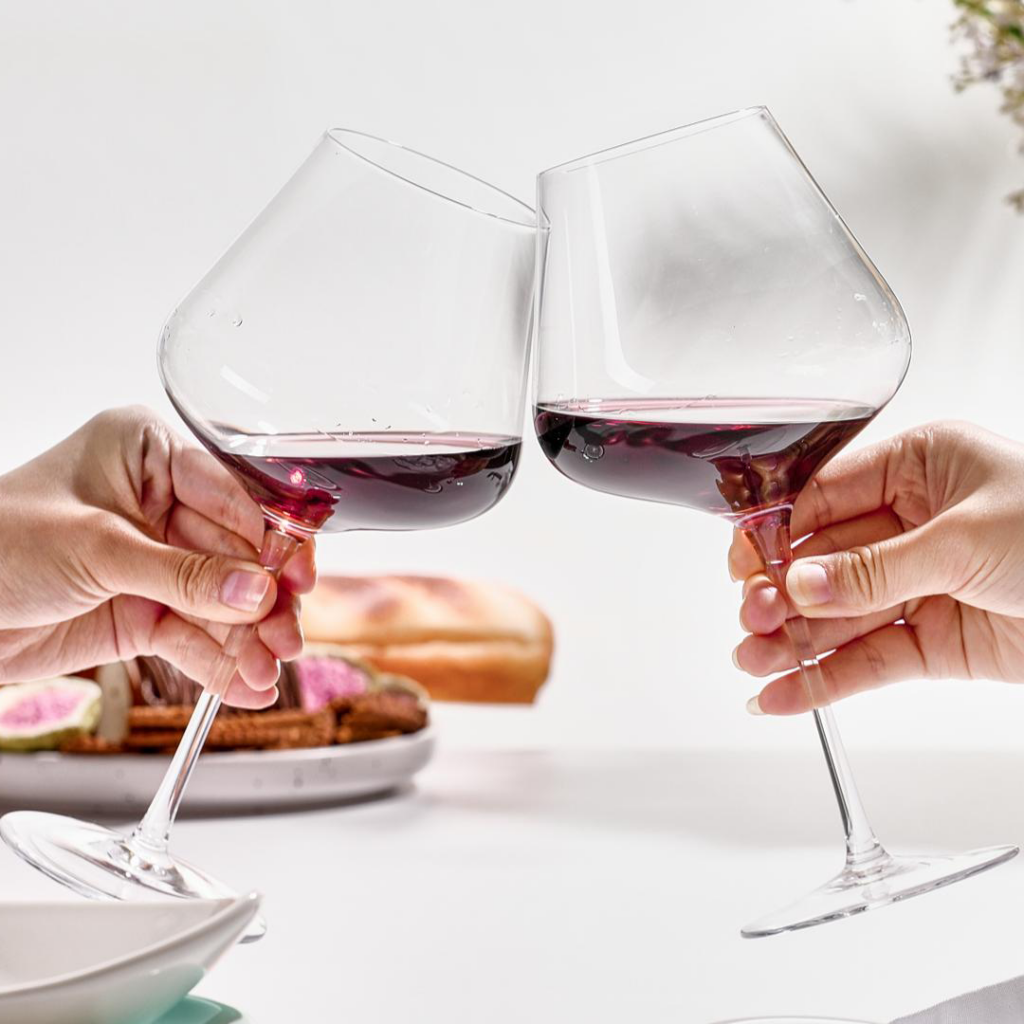
Wine Glasses
Wine glassware is designed around aroma, aeration, and temperature control, with its evolution closely tied to European wine traditions. The shape and size of the bowl influence how much air interacts with the wine, how aromas are captured and directed, and how the liquid moves across the palate. Narrower glasses help preserve cooler temperatures and focus more delicate notes, while wider bowls allow fuller-bodied wines to open up and develop complexity. Over time, these distinctions became more intentional, with specific glass styles emerging to complement different types of wine rather than simply serving them.
A red wine glass, generally 12 to 18 ounces, is designed with a broader bowl to allow for aeration, helping to open up aromas and soften tannins while enhancing overall depth.
A balloon-style red wine glass, typically 16 to 22 ounces, developed over centuries to enhance aeration and aromatic complexity in fuller-bodied wines like Burgundy.
A champagne flute, typically 6 to 10 ounces, became popular in the 18th and 19th centuries as sparkling wine production advanced, designed to preserve carbonation.
A grappa glass, typically 3 to 6 ounces, developed in Italy to concentrate the intense aromatics of distilled grape spirits.
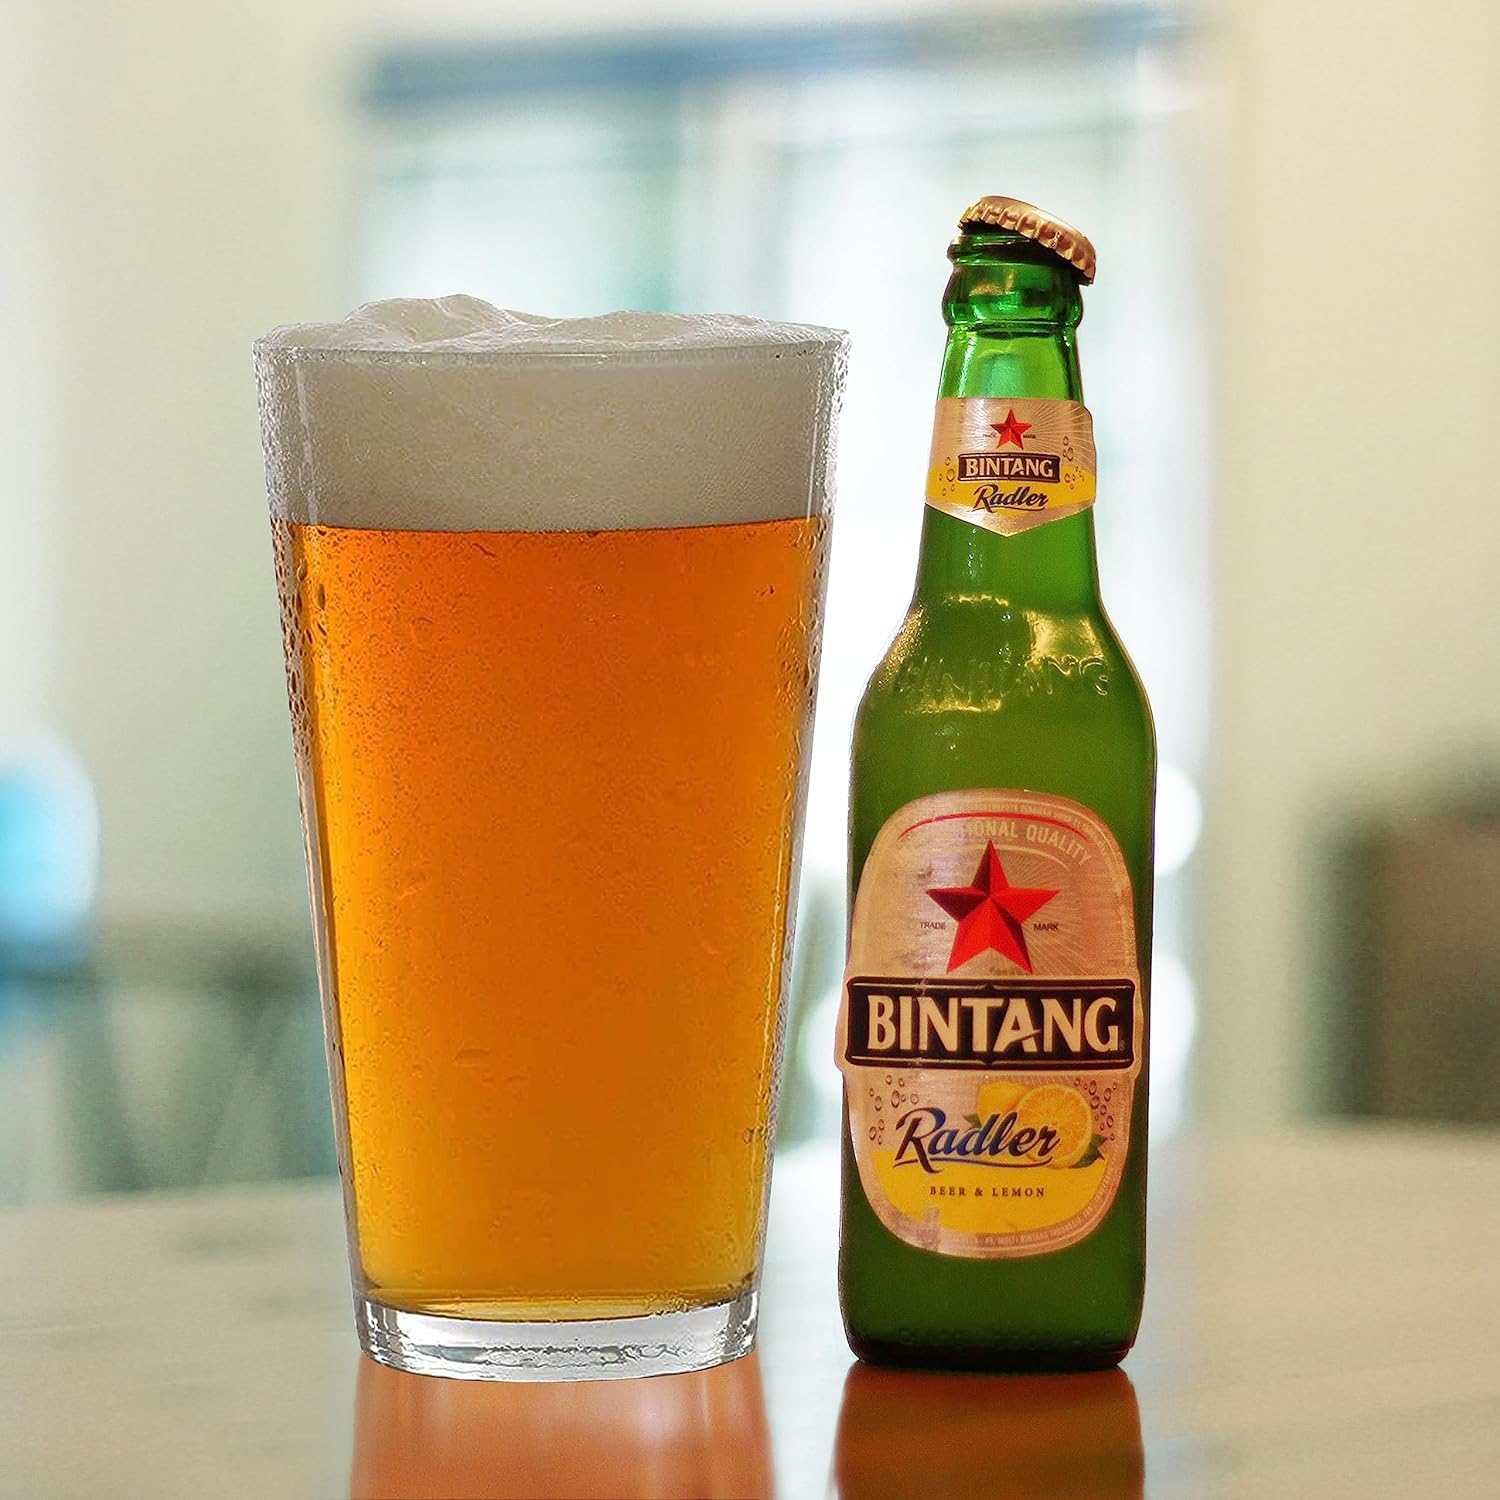
Beer Glasses
Beer glassware is deeply tied to European brewing traditions, where specific shapes evolved to complement different styles. Over time, brewers and drinkers recognized that factors like foam retention, carbonation, and aroma all change depending on the vessel. Taller, tapered glasses highlight clarity and preserve effervescence, while wider bowls allow aromas to develop and support a fuller head. Even elements like rim shape and glass thickness play a role in how the beer is perceived, turning what might seem like a simple pour into a more intentional and style-driven experience.
An American pint glass (or Shaker), typically 16 ounces, features a slightly-tapered, cylindrical shape and is one of the most versatile, widely-used beer glasses. Common in American bars, it’s suitable for a broad range of styles—from ales and lagers to stouts—though isn’t optimized for any one in particular.
A nonic (or Imperial) pint, usually 16 to 20 ounces, is an English variation of the pint glass, distinguished by a slight ridge near the top. That ridge improves grip, prevents chipping when stacked, and helps support a more stable head, making it well-suited for British ales and pub-style service.
A pilsner glass, generally 12 to 16 ounces, is tall, slim, and slightly tapered. Its shape showcases clarity and color while preserving carbonation and supporting a defined head, making it ideal for pilsners, lagers, and other lighter, effervescent beers.
A tulip glass, typically 12 to 16 ounces, features a bulbous body with a flared rim. This design traps and concentrates aroma while promoting head retention, making it particularly well-suited for Belgian ales, IPAs, and saisons where aroma plays a central role.
A snifter, usually 8 to 14 ounces, has a wide bowl and short stem, allowing the beer to be gently swirled. This enhances aromatic release while concentrating those aromas at the rim, making it ideal for high-ABV beers like imperial stouts, barleywines, and stronger IPAs.
A weizen glass, typically 16 to 23 ounces, is tall with thin walls and a distinctive curved profile. Its shape supports a large, stable head while allowing the beer’s signature banana and clove aromas—common in wheat beers—to fully develop.
A goblet or chalice, generally 12 to 20 ounces, is thick-walled and stemmed, designed to handle heavier, more complex beers. Its wide bowl allows for aromatic development, while the sturdy construction supports higher carbonation and richer styles like Belgian ales and German bocks.
A stange (or rye glass), usually 6 to 10 ounces, is tall, slender, and cylindrical. Its narrow shape preserves carbonation and directs delicate aromas, making it ideal for lighter, more subtle beers like Kölsch, Gose, and other crisp, low-profile styles.
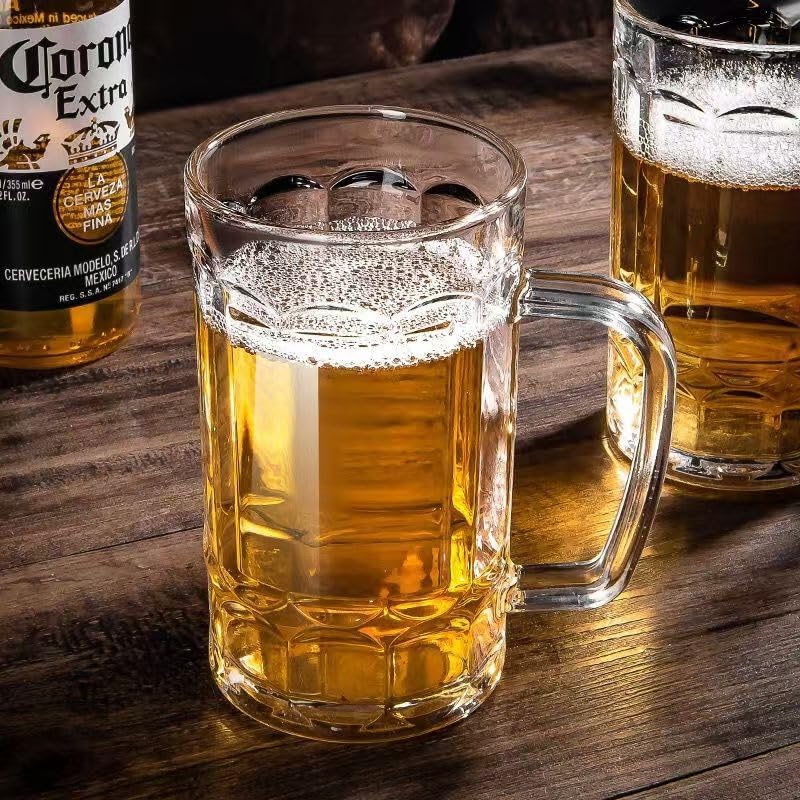
A beer mug, typically 12 to 20 ounces or more, is thick, durable, and handled to maintain temperature and reduce heat transfer. Traditionally rooted in German beer culture, it’s well-suited for lagers and easy-drinking session beers.
Specialty Glasses
Not all drinkware is defined by shape alone. Some vessels are built around temperature, material, or the overall experience of the drink, playing a more active role in how it’s served and perceived. In these cases, the material itself becomes part of the function—whether it’s metal amplifying cold, glass retaining heat, or ceramic insulating the drink over time. These choices don’t just support the drink; they shape how it feels in the hand, how it’s presented, and how it’s experienced from start to finish.
A tiki mug, generally 12 to 20 ounces or more, is typically made from ceramic and emerged in mid-20th century tiki culture, where presentation and escapism were central to the drinking experience.
A milkshake glass, typically 12 to 16 ounces, developed alongside American diner culture in the early to mid-20th century, designed for thick, blended drinks (like Mudslides) served with straws and spoons.
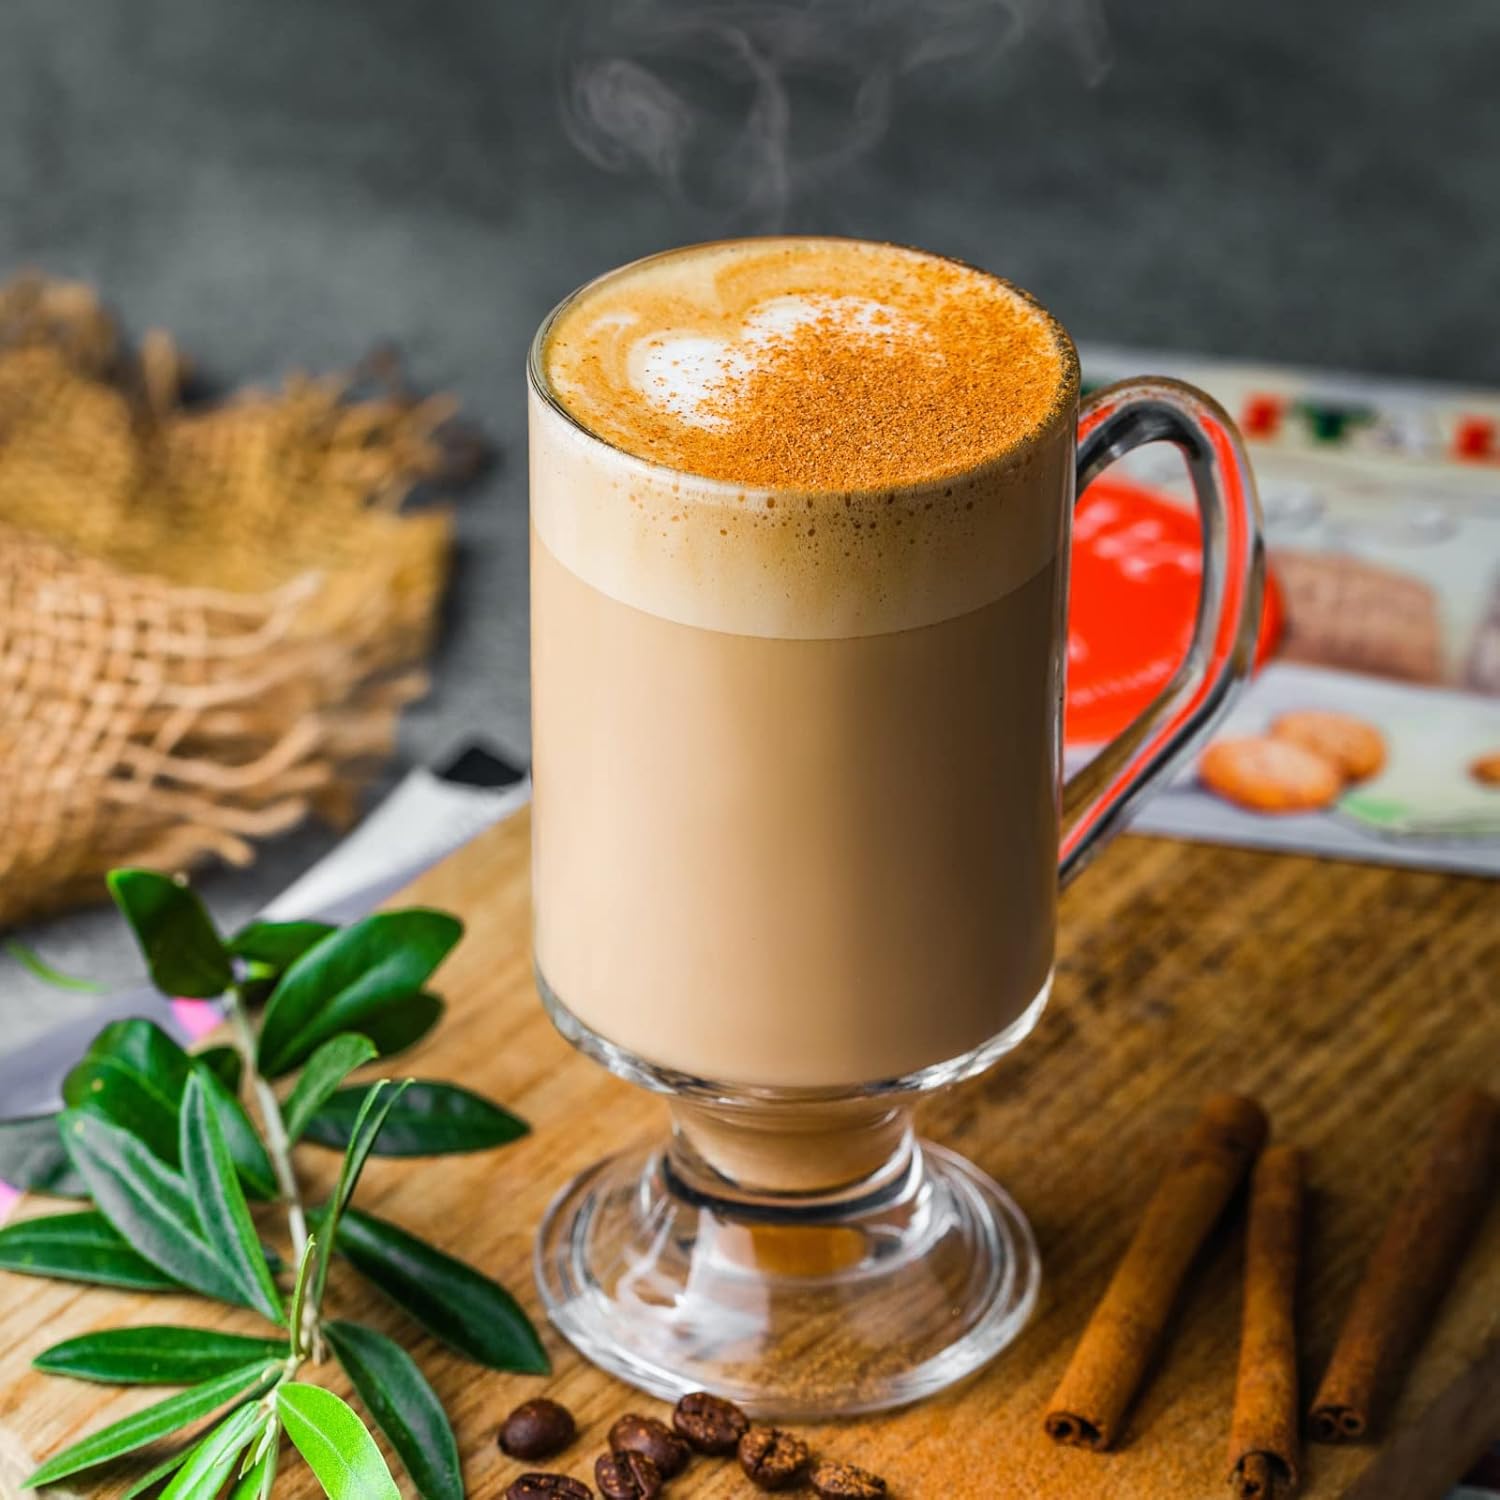
An Irish coffee glass, generally 8 to 12 ounces, originated in the mid-20th century with the Irish Coffee itself, designed to handle heat while showcasing layered presentation.
A julep cup, typically 10 to 12 ounces, dates back to the American South in the 18th and 19th centuries, where metal cups were used to keep drinks cold in warm climates. Its frosted exterior became part of the identity of the Mint Julep.
A mule mug, usually 12 to 16 ounces, was popularized in the 1940s alongside the Moscow Mule, largely as a marketing tool, but its copper construction became integral to the drink’s identity.
Final Thoughts
Drinkware isn’t about having more options—it’s about having the right one for the drink in front of you. Once you understand how size, shape, and material influence balance, temperature, and aroma, you stop treating the vessel as an afterthought and start using it as part of the build. The glass becomes an extension of the technique, guiding how the drink is mixed, served, and experienced from the first sip to the last.
As those choices become more intentional, small details begin to matter more. How quickly the drink chills, how it dilutes over time, and how aromas rise and meet the nose before you taste all start to connect. The right vessel doesn’t call attention to itself, but it allows the drink to perform exactly as it was designed to.
A good drink doesn’t start with the liquor—it starts with how you build it. You can stock your shelves with quality spirits and keep fresh citrus on hand, but if your tools are working against you, the final result will always fall short. Weak dilution, unbalanced ratios, and inconsistent texture are rarely about the ingredients themselves—they’re almost always about a lack of control in the process.
Essential Tools 101
A good drink doesn’t start with the liquor—it starts with how you build it. You can stock your shelves with quality spirits and keep fresh citrus on hand, but if your tools are working against you, the final result will always fall short. Weak dilution, unbalanced ratios, and inconsistent texture are rarely about the ingredients themselves—they’re almost always about a lack of control in the process.
Barware isn’t about aesthetics or trying to recreate a professional bar setup at home. It’s about giving yourself the ability to execute a drink with intention. The right tools allow you to control balance, dilution, temperature, and texture in a way that transforms a drink from something acceptable into something deliberate. The goal isn’t to have more tools—it’s to have the right ones, and to understand why they matter.
The Non-Negotiables
When it comes to building a bar that actually produces good drinks, a handful of tools carry almost all of the weight. These aren’t aesthetic additions or nice-to-have upgrades—they are what give you control over the drink itself. Without them, even the best ingredients won’t come together the way they should.
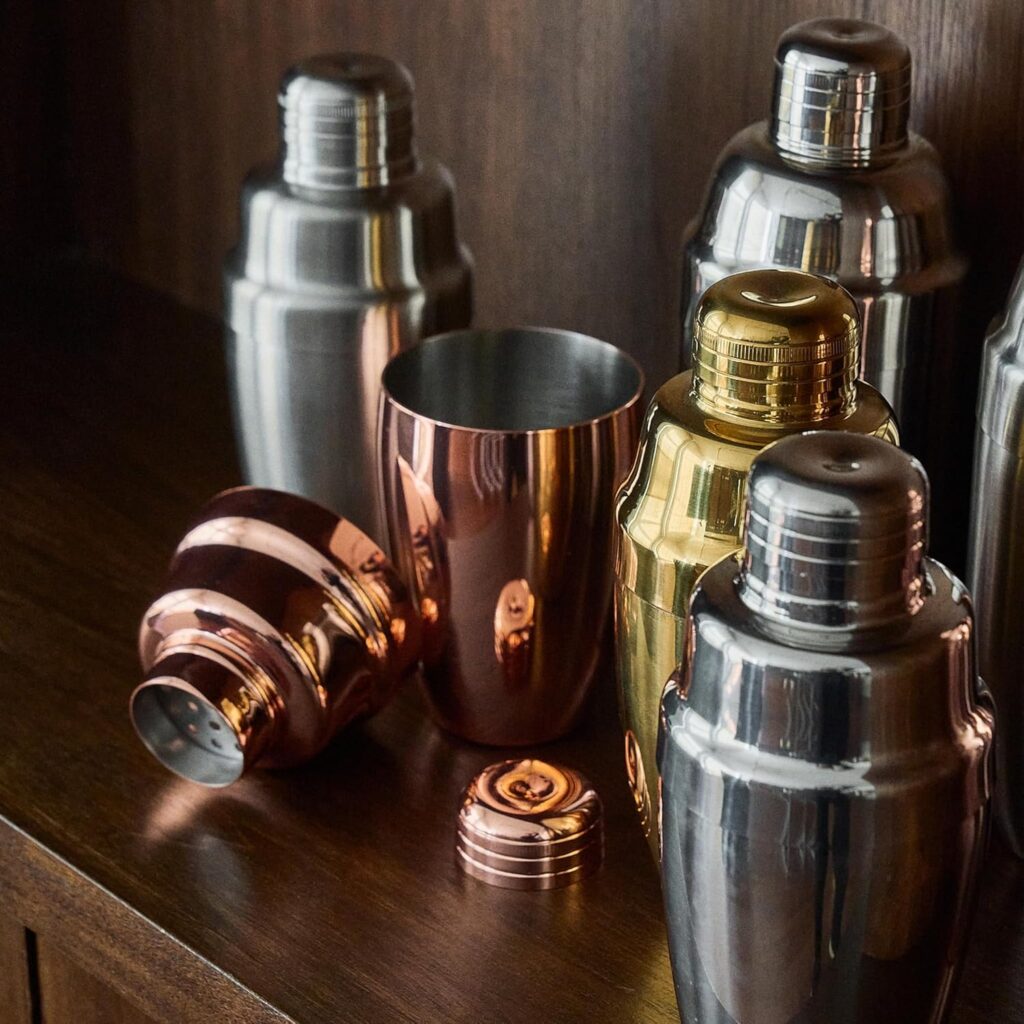
Shaker
A shaker is essential for any cocktail that includes citrus, juice, egg white, or syrup. Shaking does far more than combine ingredients—it rapidly chills the drink, introduces controlled dilution, and aerates the mixture to create a lighter, more cohesive texture. Without it, drinks that should feel bright and structured instead come across as heavy, flat, or disconnected. While all shakers serve the same core purpose, the way they’re built affects how they perform. Understanding the differences allows you to choose the one that fits your workflow rather than working against it.
The Boston shaker is the most widely used style, consisting of a large metal tin paired with either a pint glass or a second metal tin. It’s favored for its durability, speed, and control, particularly once you’re comfortable with the technique. The seal forms naturally during shaking and releases cleanly with a firm tap, making it efficient in both professional and home settings.
The metal-on-metal variation has become the standard in most modern bars due to its durability and temperature responsiveness, while the classic metal-and-glass setup remains common in more traditional environments. Either way, the Boston shaker is built for performance and tends to be the preferred option for long-term use.
The Cobbler shaker is a three-piece design that includes a built-in strainer and cap. Its self-contained structure makes it more approachable, particularly for beginners, since it doesn’t require a separate strainer and feels more intuitive to assemble and use.
That convenience comes with trade-offs. Cobbler shakers can sometimes stick after shaking due to temperature changes, and the built-in strainer offers less control compared to a separate Hawthorne strainer. Still, for those just starting out or looking for simplicity, it provides a straightforward entry point into cocktail making.
Often referred to simply as a Japanese shaker, this is a refined version of the Cobbler design. While structurally identical, the difference lies in precision and craftsmanship. These shakers are engineered with tighter tolerances, resulting in a smoother seal, easier separation, and a more controlled pour through the integrated strainer.
The experience is noticeably more refined, but the function remains the same. It’s less about necessity and more about preference—an upgrade in feel and performance rather than a fundamentally different tool.
The French shaker occupies a middle ground between the Boston and Cobbler styles. It is a two-piece, all-metal design like the Boston, but without the use of a pint glass and without a built-in strainer. Its clean, minimal form makes it visually appealing, but it requires a separate strainer and offers a slightly different feel when sealing and opening.
While less common, it appeals to those who prefer the simplicity of a two-piece design with a more streamlined aesthetic. Functionally, it performs well, but it is rarely the first choice for a foundational setup.
Jigger
A jigger is what brings consistency to your drinks. Cocktails rely on proportion, and even small deviations in measurement can shift a drink from balanced to sharp, flat, or overly strong. While free-pouring may feel intuitive, it introduces variability that makes it difficult to replicate results, especially when you’re still building muscle memory.
That said, there is another path to consistency—one that comes from repetition and training rather than tools. In professional settings, bartenders are often taught to “count” their pours, developing an internal rhythm that allows them to measure with surprising accuracy. It’s a skill that can be refined over time, and when done well, it’s both efficient and precise.
Personally, that’s the method I was trained on. We practiced it to the point of muscle memory—timed pours, accuracy tests, even competitions—and it becomes second nature once it’s ingrained. But that level of consistency doesn’t happen overnight, and it’s easy to overestimate accuracy without realizing it.
For most home bars, a jigger remains the most reliable way to control your ratios while you’re learning. It removes guesswork, builds your understanding of proportion, and helps you develop a feel for how a drink should come together. Even if you eventually move toward free-pouring, starting with a jigger gives you a baseline that makes everything else more intentional.
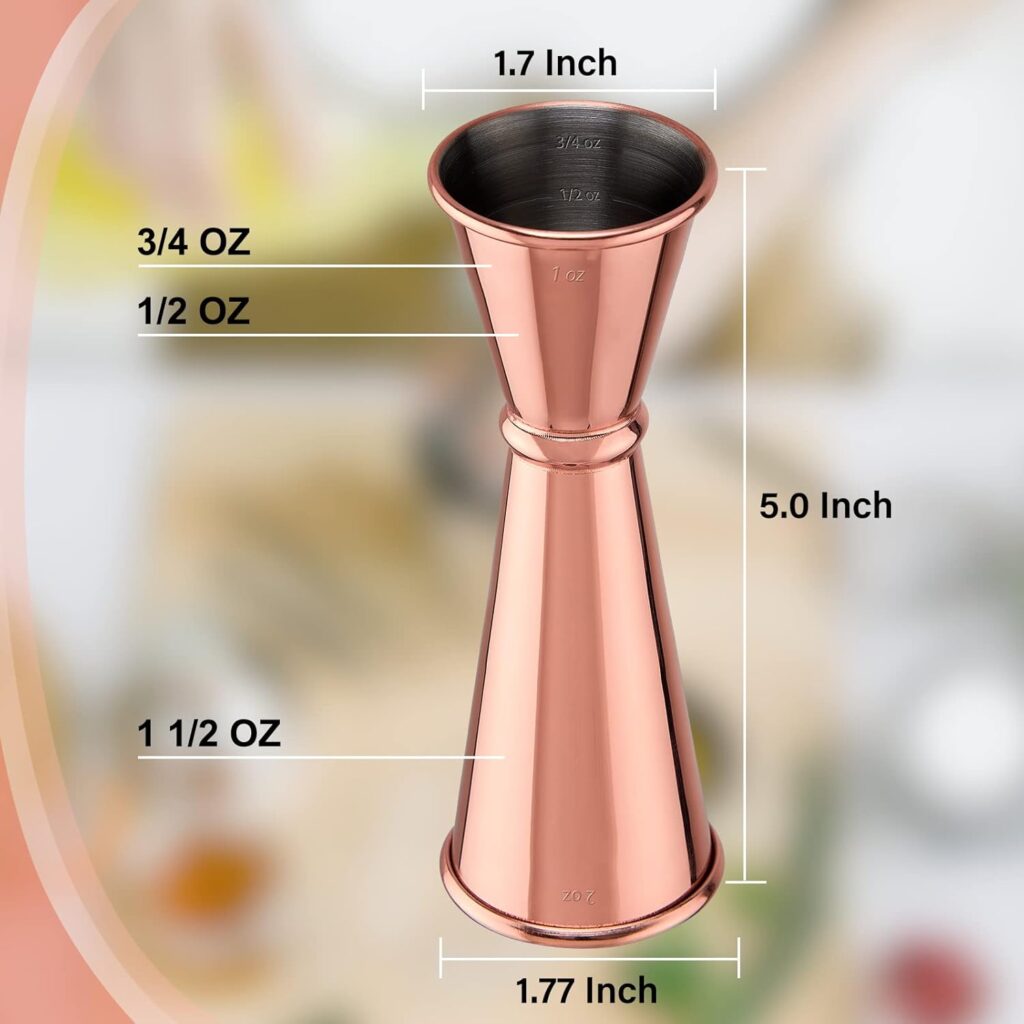
Standard Double Jigger
The most common style is the double-sided jigger, typically offering two measurements—often one ounce on one side and two ounces on the other, with additional internal markings for smaller quantities. Its symmetrical design makes it quick to use and easy to incorporate into your workflow. A well-designed jigger should feel balanced in the hand, pour cleanly, and have clearly visible measurement lines. Over time, even if you rely less on it, it remains a valuable reference point for dialing in proportions and maintaining consistency.
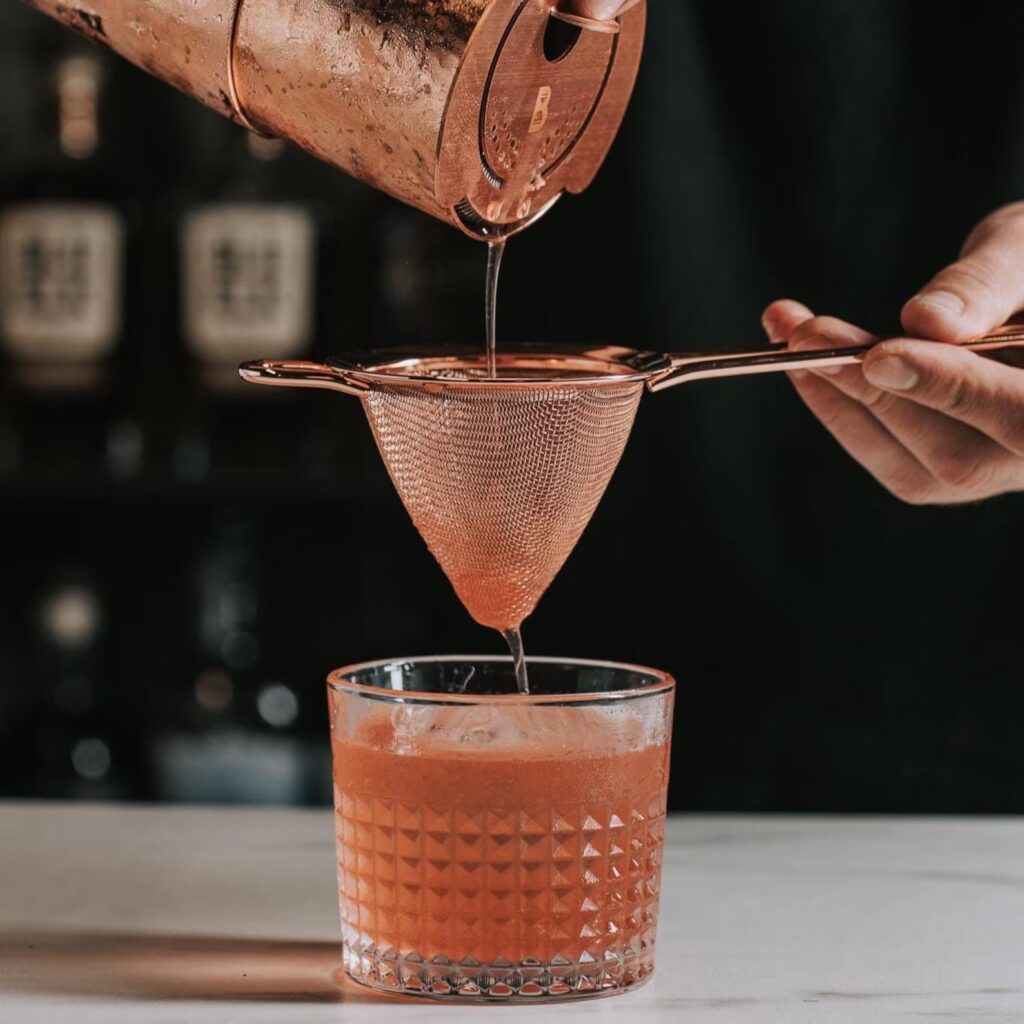
After a drink is shaken or stirred, a strainer controls what makes it into the glass. This step is essential for maintaining texture, preventing unwanted ice shards or solids from diluting the drink further, and ensuring a clean final presentation.
The Hawthorne strainer is the standard for use with a Boston shaker and French shaker. Its coiled spring fits snugly against the inside of the tin, allowing it to catch ice and other ingredients while still letting liquid flow smoothly. It provides control over the pour and adapts easily to different shaker sizes. This is the most versatile and widely used strainer, making it the default choice for most setups.
A fine mesh strainer is often used alongside a Hawthorne strainer for double straining. This additional layer removes smaller ice fragments, pulp, and fine particles that would otherwise affect the texture of the drink.While not necessary for every cocktail, it becomes especially valuable when working with citrus, herbs, or egg whites, where clarity and smoothness are more noticeable.
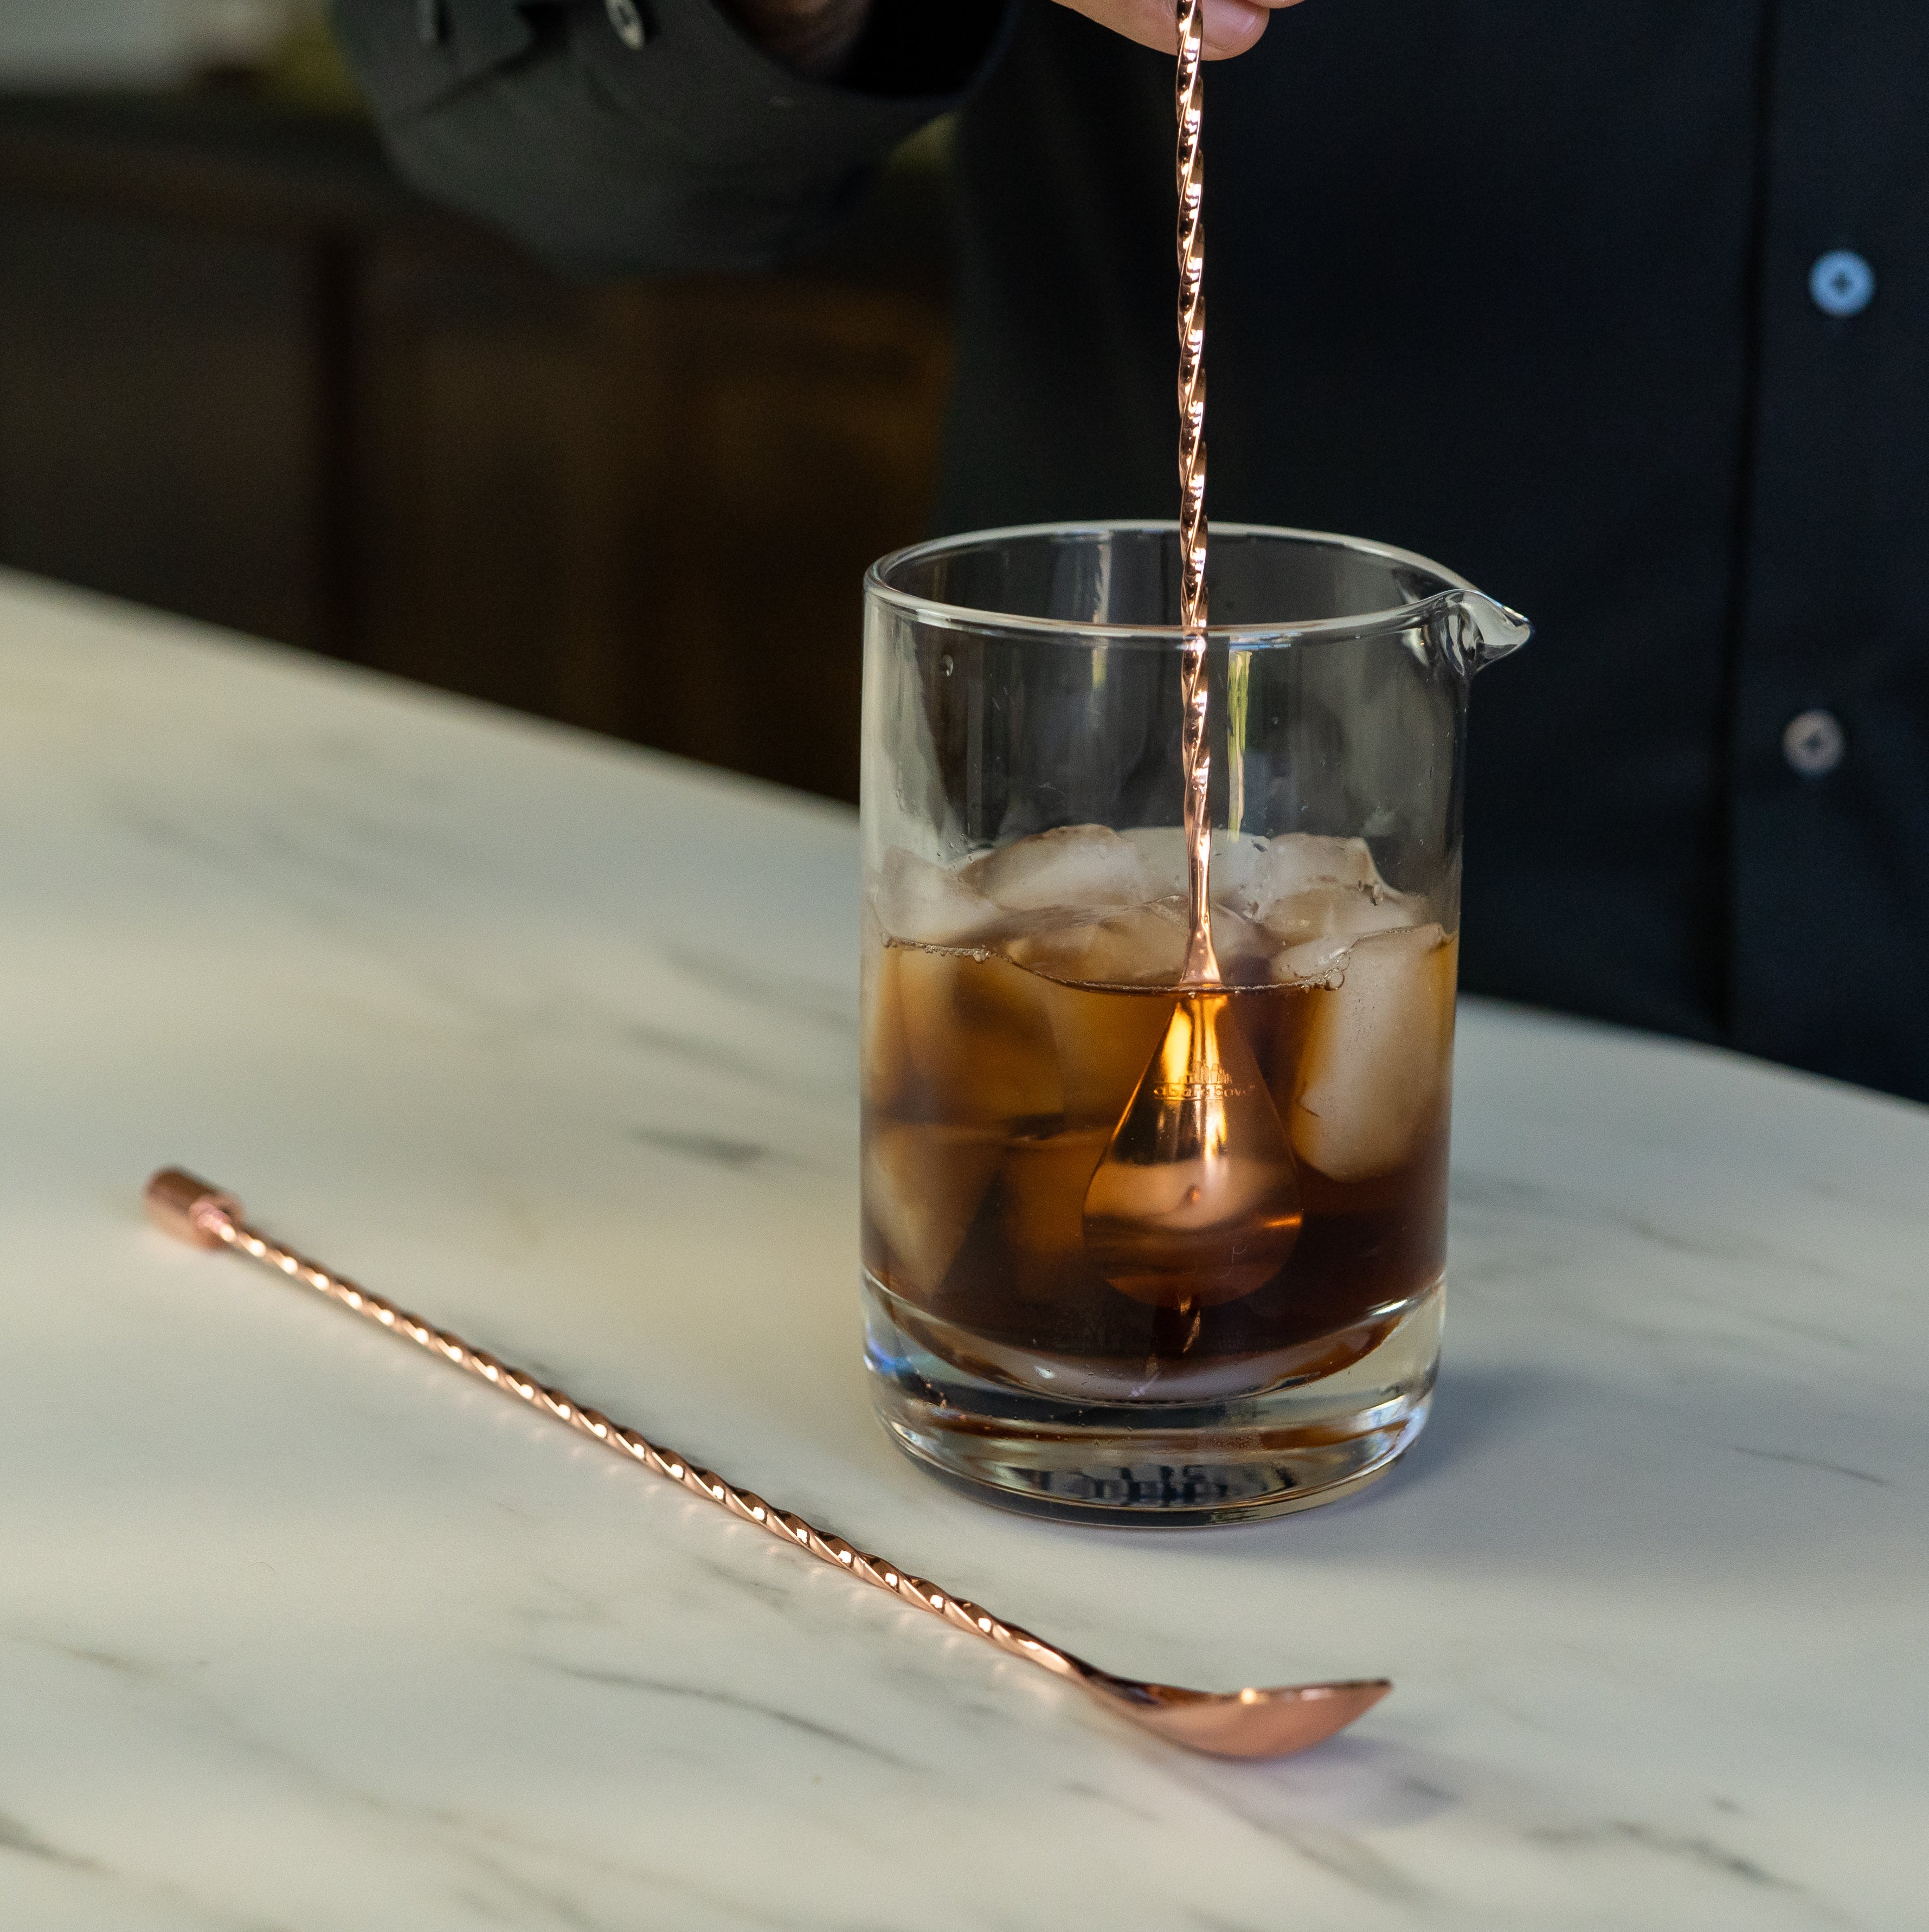
Bar Spoon
A bar spoon is designed specifically for stirring cocktails, particularly those that are spirit-forward and do not require shaking. Its long handle allows it to reach the bottom of a mixing glass, while its twisted shaft helps guide smooth, controlled movement through the liquid.
Stirring is about precision rather than force. The goal is to chill and dilute the drink evenly without introducing unnecessary agitation. A proper bar spoon makes this process feel fluid and controlled, whereas a standard spoon often feels clumsy by comparison.
Fresh citrus is one of the most impactful ingredients in a cocktail, and how you extract it matters. Bottled juice lacks the brightness and complexity of fresh citrus, often resulting in drinks that taste muted or unbalanced.
A citrus press allows you to extract juice efficiently while keeping seeds and excess pulp out of the mix. It simplifies the process, improves yield, and ensures consistency from one drink to the next. For any cocktail that relies on citrus, it’s an essential tool that delivers immediate results.
Once the foundational tools are in place, the next layer of barware is less about making a drink possible and more about making it better. These are the tools that refine technique, improve texture, and elevate presentation. You can absolutely make great cocktails without them, but once you start using them, the difference becomes difficult to ignore.
A mixing glass becomes essential the moment you begin working with spirit-forward cocktails. Drinks like an Old Fashioned, Manhattan, or Negroni are not meant to be shaken, as shaking introduces aeration that disrupts their texture. Instead, they rely on controlled stirring to chill and dilute while maintaining clarity and weight.
While you can technically stir in a shaker tin or even a standard glass, a proper mixing glass provides both space and stability. Its wider base allows for smoother, more controlled movement of the bar spoon, which results in more even dilution. Over time, this translates into drinks that feel more cohesive, with a cleaner finish and a more intentional texture.
A julep strainer is traditionally used with a mixing glass, offering an alternative to the Hawthorne strainer when working with stirred drinks. Its bowl-shaped design fits neatly inside the mixing glass, allowing you to control the pour while keeping ice back.
Functionally, it achieves the same goal as a Hawthorne strainer, but the experience is different. The julep strainer feels more streamlined in this context, particularly when working exclusively with stirred cocktails. It’s less about necessity and more about preference, but for those who enjoy the process as much as the result, it adds a level of refinement that feels intentional rather than improvised.
A muddler becomes important when working with fresh ingredients such as herbs, fruit, or sugar cubes. The goal is not to crush aggressively, but to gently press and release essential oils and juices without breaking down the ingredients too far.
This distinction matters more than most people realize. Over-muddling, especially with herbs, can introduce bitterness that throws off the balance of the drink. A proper muddler gives you control over that pressure, allowing you to extract flavor cleanly while maintaining the integrity of the ingredients. It’s a simple tool, but one that rewards restraint and technique.
Garnish is often treated as an afterthought, but it plays a critical role in how a drink is experienced. Aroma is a major component of flavor, and citrus oils—expressed over a drink or incorporated as a garnish—can completely change how it presents.
A peeler, channel knife, or zester allows you to work with citrus in a more controlled and intentional way. Whether you’re creating a wide peel to express oils over an Old Fashioned or a finer zest to layer subtle aroma into a drink, these tools give you the ability to shape that final detail. It’s not just about appearance—it’s about enhancing the drink before the first sip.
Ice is one of the most overlooked components of a cocktail, yet it has a direct impact on both dilution and presentation. Standard ice cubes melt quickly and inconsistently, which can dilute a drink faster than intended and alter its balance as it sits.
Large-format ice—whether in the form of spheres or oversized cubes—melts more slowly and evenly. This gives you greater control over how the drink evolves over time, particularly in spirit-forward cocktails like an Old Fashioned. The slower melt preserves structure, while the visual impact adds a level of polish that elevates the entire experience.
Final Thoughts
Barware is not about collecting tools for the sake of it, but about removing variables that stand between you and a well-made drink. Each piece has a purpose, and when that purpose is understood, the process becomes more intuitive and the results more consistent.
As you begin to build your bar, the difference becomes immediately noticeable. Balance is easier to achieve, dilution becomes controlled rather than accidental, and the overall experience feels more deliberate. The goal is not to replicate a professional bar, but to understand the mechanics behind what makes a drink work—and to give yourself the tools to execute it well.
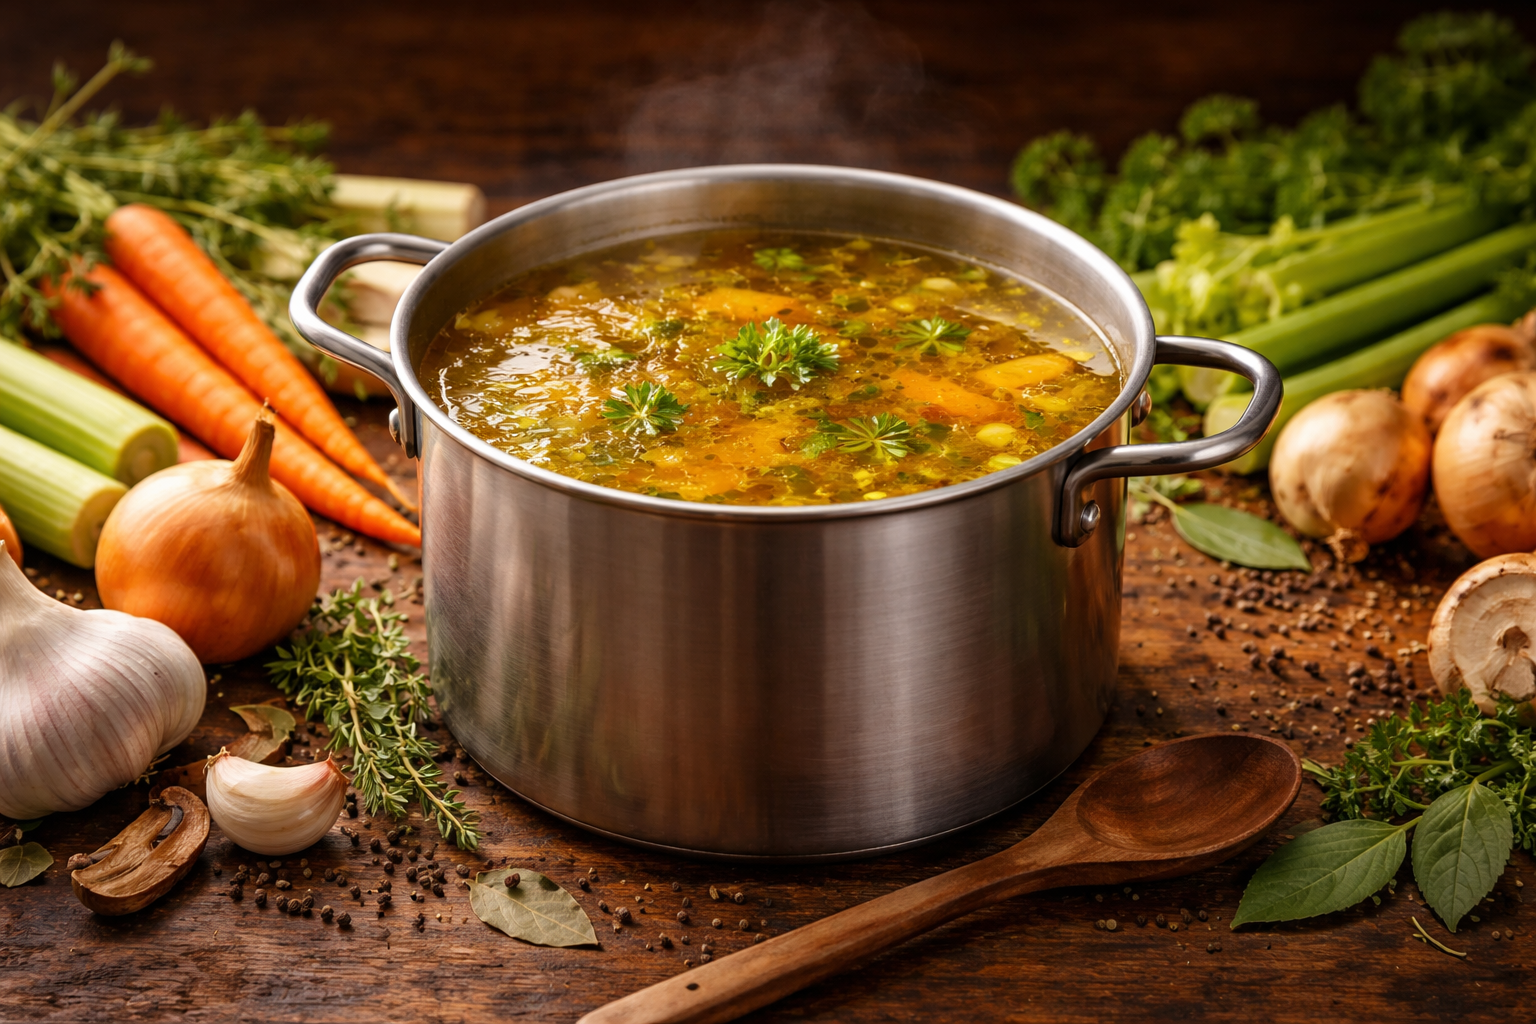
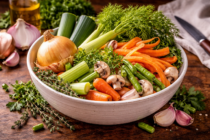
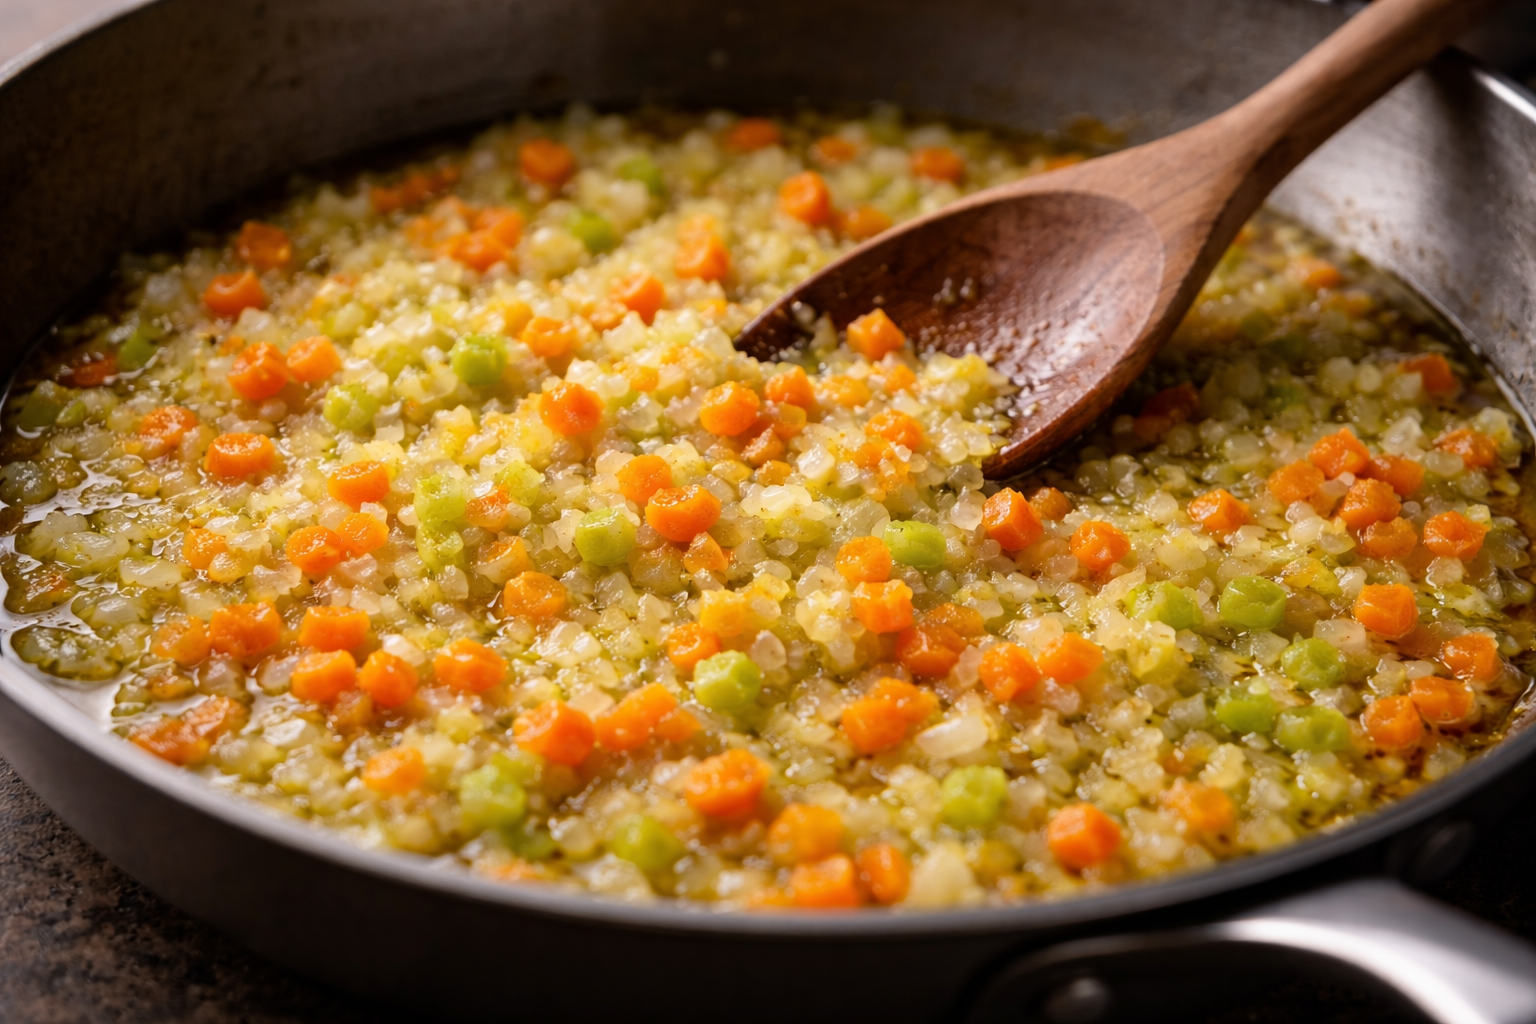
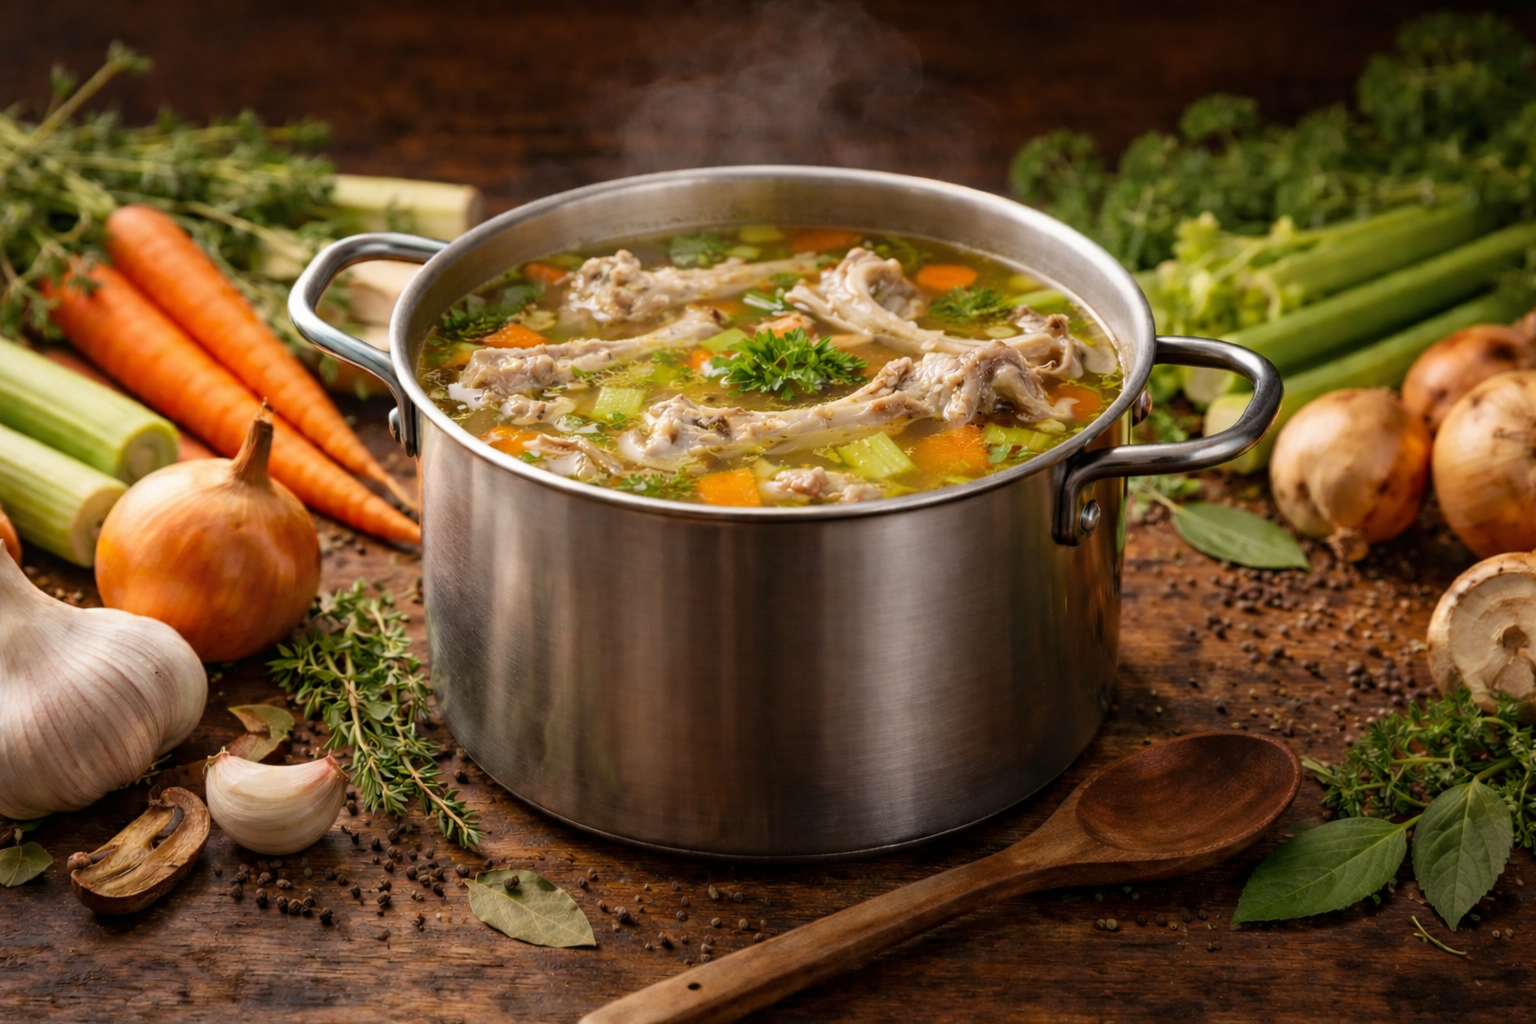
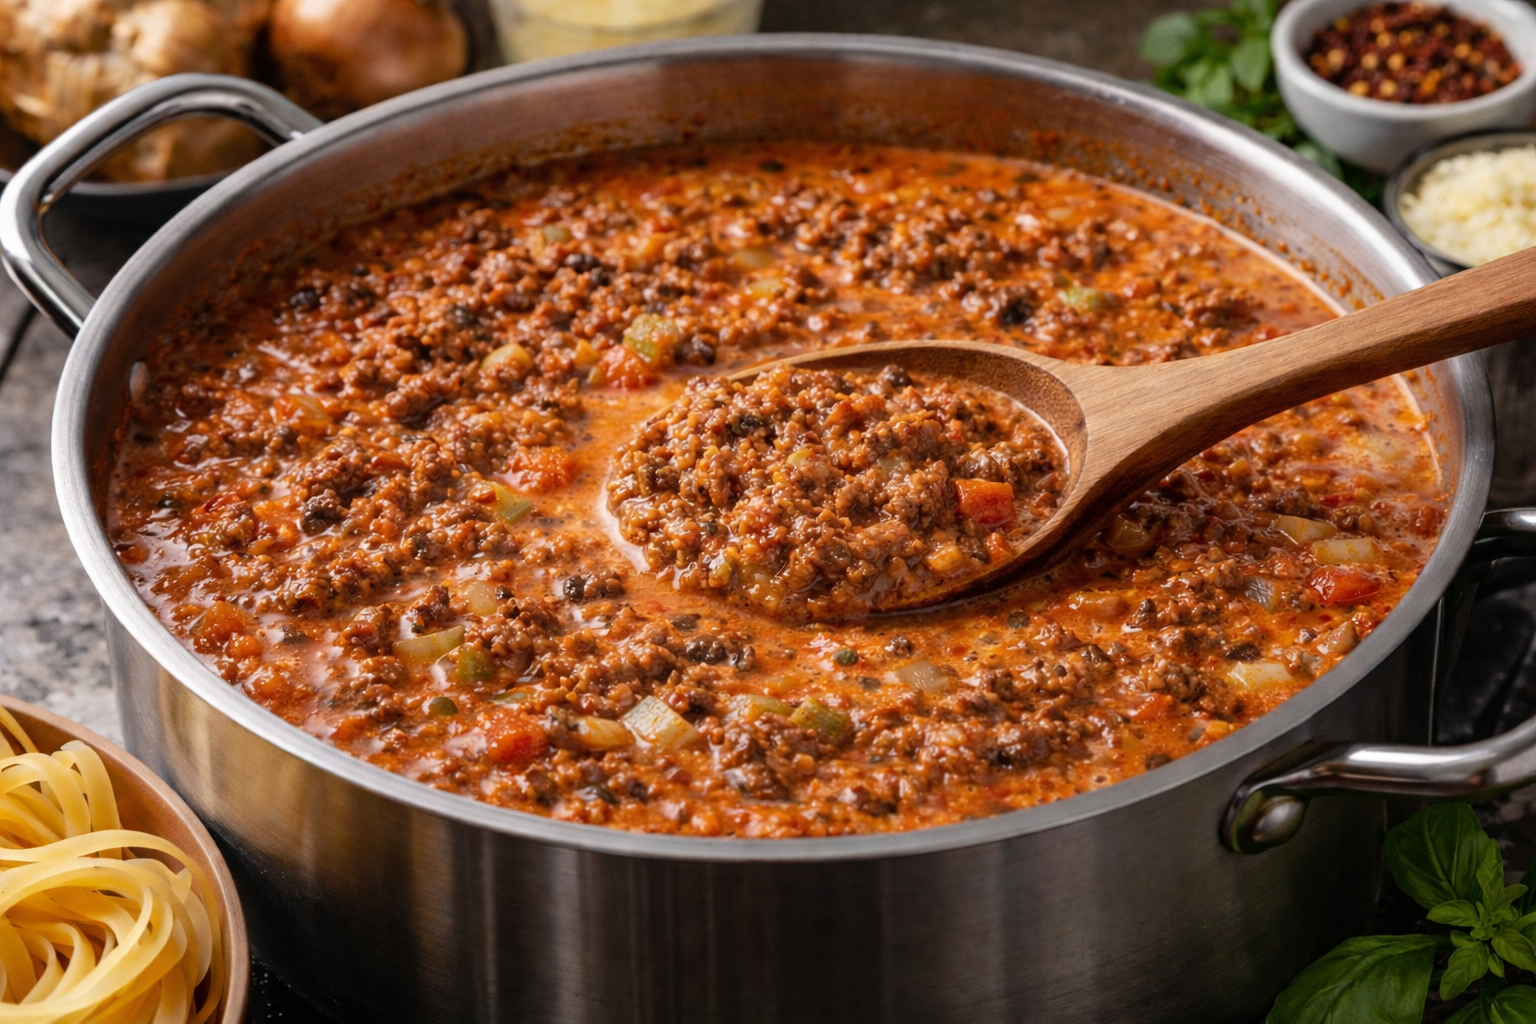
Vegetable broth is a study in extraction and balance—built not on bones or fat, but on the precise layering of aromatics, water content, and time. At its best, it delivers a clean, structured flavor profile with natural sweetness, vegetal depth, and a subtle umami backbone.
Vegetable broth is a study in extraction and balance—built not on bones or fat, but on the precise layering of aromatics, water content, and time. At its best, it delivers a clean, structured flavor profile: natural sweetness from alliums and carrots, vegetal depth from celery and leeks, and a subtle umami backbone often coaxed from mushrooms, tomato, or seaweed. The goal isn’t intensity for its own sake, but clarity—each component contributing without muddying the whole.
Technique matters. A gentle, controlled simmer preserves brightness and prevents bitterness, while careful ingredient selection avoids overly sulfuric or tannic notes (looking at you, overcooked brassicas). Properly made vegetable broth should taste full yet transparent, with a light body that supports rather than dominates.
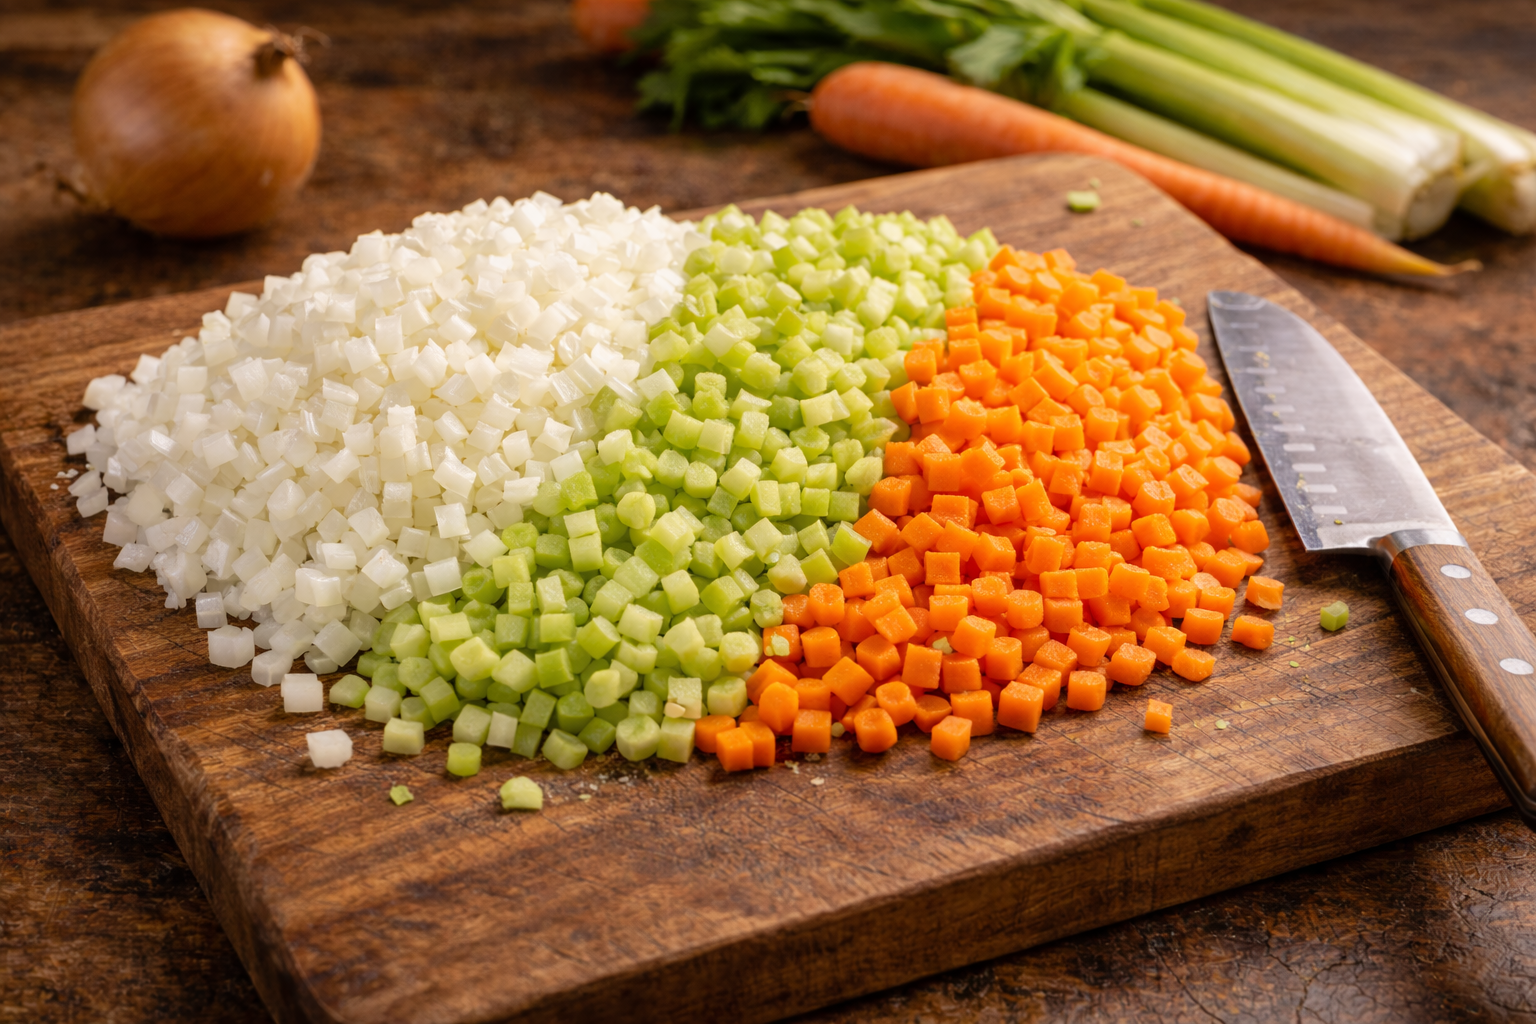
Building flavor before the simmer
Building flavor starts before the water ever hits the pot. Taking the time to sweat or lightly roast your mirepoix—onions, carrots, celery—coaxes out their natural sugars and deepens the overall profile of the broth. Sautéing keeps things clean and controlled, enhancing sweetness without introducing bitterness, while roasting adds a more caramelized, slightly darker complexity. Neither is required, but both shift the final result from simply “vegetal” to intentionally layered.
The freezer scrap advantage
Vegetable broth is as much about resourcefulness as it is technique. A well-managed freezer scrap bag can produce a broth just as nuanced as one made from pristine ingredients. Onion skins, carrot peels, celery ends and interior leaves, leek or fennel tops, mushroom stems, herb stems—these aren’t scraps, they’re concentrated flavor.
Not all scraps are equal—and that’s where the nuance comes in. Onion skins deepen color and add subtle sweetness. Mushroom stems bring body and umami. Leek tops contribute a softer, greener allium note, while carrot peels reinforce sweetness. Even small additions can shift the profile. The goal isn’t to throw everything in—it’s to build something intentional from what you already have. The key is curation. Avoid anything overly bitter or sulfuric: brassicas like broccoli, cauliflower, and cabbage can quickly dominate; starchy vegetables like potatoes will cloud both texture and flavor; and overly sweet scraps, like large amounts of bell pepper, can throw off balance.
TIP: If it’s going into your scrap bag, it needs to be properly washed—no exceptions. Dirt and grit don’t cook out; they settle in. I thoroughly wash and dry all of my fruits and vegetables, typically when I bring them home from the grocery store. Taking the time to rinse and dry vegetables before trimming ensures that what you’re saving is flavor, not contamination.
Timing is key
When ingredients go into the pot matters just as much as what goes in. Hardy aromatics—onions, carrots, celery—can simmer from the start, building the foundation. More delicate elements should be added later to preserve their integrity.
Fresh herbs and tender scraps like parsley stems or thyme are best added in the last 5-10 minutes or steeped in the broth as it cools. The same goes for umami boosters like nori or kombu: powerful in small amounts, but easily overwhelming if left too long. Think of them as accents, not the base.
Straining
Once your broth has finished simmering, the final step is refinement. Remove it from heat and use a spider strainer ladle (or slotted spoon) to lift out the larger solids, allowing the liquid to settle for at least 10 minutes before straining. This initial rest helps separate suspended particles and makes for a cleaner pass through your strainer.
Set a mesh strainer over a clean stockpot and pour the broth through, discarding what’s filtered out. Set filtered broth aside and wash both the mesh strainer and the stockpot you initially used for simmering the broth. Line the clean strainer with dampened cheesecloth and strain broth again into clean stockpot. Wetting the cloth beforehand is key—it prevents absorption and preserves your yield. This second pass isn’t always necessary, but it’s the difference between a good broth and one with professional-level clarity.
Storage
From there, cooling becomes just as important as cooking. Let the broth cool slightly at room temperature, then transfer to the refrigerator to chill completely. This not only preserves freshness but also stabilizes the flavor.
In the refrigerator, vegetable broth will keep for about 4–5 days. For longer storage, freezing is the better option—and where a little foresight pays off. Portioning matters. Silicone freezer trays (like Souper Cubes) allow you to freeze broth in consistent, usable amounts. Always chill the broth fully before portioning, then freeze until solid and transfer the cubes to airtight freezer bags. This frees up your trays and gives you a ready supply of broth that can be used exactly as needed—whether that’s a full quart for soup or a small cube to build a pan sauce. Well-stored, frozen broth will hold its integrity for 3–5 months without sacrificing clarity or balance.
Recipes that use this broth
Homemade Vegetable Broth
Vegetable broth is a study in extraction and balance—built not on bones or fat, but on the precise layering of aromatics, water content, and time. At its best, it delivers a clean, structured flavor profile with natural sweetness, vegetal depth, and a subtle umami backbone.
Add 2 medium onions, 3 large carrots, 4 stalks celery, 2 tops leek (or fennel), and 5 cloves garlic to stockpot and lightly sauté.
TIP: You can substitute the onion, carrots, and celery for 4 cups of my Mirepoix recipe.
Once ingredient are slightly tender, add seasonings (bay leaves, salt, and peppercorns) and 12 cups of filtered cold water and slowly bring to a boil over medium-high heat.
Reduce heat to low and simmer gently, covered, for 1 hour.
Remove from heat and add fresh herbs (parsley & thyme) to stockpot.
Let the herbs steep while the broth cools for at least 10 minutes, then use a spider strainer ladle (or slotted spoon) to remove the larger solids to a mixing bowl.
Place a mesh strainer over an empty stock pot (large enough to hold the quantity of broth being poured in) and strain and discard what is filtered by the strainer.
TIP: If the mesh strainer let through small particles, clean the original (now empty) stockpot and mesh strainer; place clean mesh strainer over the clean stockpot and line with 2-4 layers of dampened cheese cloth (wetting it first will prevent the cloth from absorbing the broth); run the broth through the cheesecloth layers for an additional filtering.
Broth will keep in refrigerator for 4-5 days, or you can freeze the broth and store in the freezer for 3-5 months.
SEE NOTES SECTION FOR FREEZER STORAGE TIPS
Notes
NUTRITION NOTE: The nutritional values are for the fresh recipe ingredients listed on the card, but if you are like me, I make my vegetable broth using vegetable scraps I keep in the freezer. Six to seven (6-7) loosely-packed cups of scraps will do the trick, so long as the scraps contain the bulk of ingredients listed on the recipe card.FREEZER STORAGE NOTE: The best way to freeze broth is by utilizing silicone freezer trays, such as Souper Cubes. Make sure broth is completely chilled in the refrigerator before pouring into trays. Freeze broth cubes completely then transfer to airtight freezer bags so that you can free up and reuse the trays for other things.
Vegetable broth isn’t about throwing everything into a pot and hoping for the best—it’s about understanding how vegetables behave over time, heat, and extraction. Some build clean, layered flavor. Others muddy it, overpower it, or break it entirely.
Building the Perfect Vegetable Broth
The Foundation: What Always Works
At the core of a well-balanced vegetable broth is a familiar structure—aromatics that build sweetness, depth, and body without overwhelming the final result. Onions, carrots, and celery form the backbone for a reason. They create balance: sweetness, earthiness, and a subtle bitterness that keeps everything in check. Leeks, shallots, and garlic expand on that foundation, adding softer, more nuanced allium notes.
From there, mushrooms introduce umami and body, while tomatoes (used with restraint) can add brightness and depth. These are your anchors—the ingredients that define the broth without competing for attention.
The Supporting Cast: Use with Intention
Some vegetables work—but only when used in moderation. Leafy greens, herbs, and softer vegetables should be treated as accents, not structure. Spinach, parsley stems, zucchini, green beans—these can round out the broth, adding subtle vegetal notes and a bit of freshness, but they lack the backbone needed to carry a stock on their own. Left unchecked, they begin to collapse into the background, creating a flavor that feels less defined—more “green” than structured.
Bell peppers are a perfect example of this balance. In small amounts, they contribute a gentle sweetness and a hint of brightness. But their flavor is distinct and persistent, and once it takes hold, it doesn’t let go. The result is a broth that tastes less like a foundation and more like a finished dish—something that limits its versatility rather than enhancing it.
Herbs follow the same logic. Parsley stems, thyme, and even softer herb scraps can bring lift and aromatic clarity, especially when added toward the end of cooking. But they’re not meant to steep indefinitely. Given too much time or quantity, they shift from enhancing to defining, and once herbs start leading the profile, everything else becomes secondary.
Even vegetables with higher water content—like zucchini or certain squash—can dilute more than they contribute if overused, softening the overall impact of the broth rather than building it. They have a place, but it’s a supporting one. This is where restraint becomes a technique. The goal isn’t to eliminate these ingredients—it’s to understand their role. Used thoughtfully, they add dimension and nuance. Used excessively, they blur the lines you’ve worked to build.
The Problem Vegetables: What to Avoid
Not everything belongs in a stockpot—and most mistakes come from ignoring that. It comes down to behavior in the pot. Some vegetables break down too aggressively, some release off-notes, others overwhelm. A good broth relies on control—steady extraction, clean flavor, and restraint. Then there are ingredients that push too hard. Turnips, strong bitter greens, excessive peppers—these don’t sit in the background, they take over the front. A broth should stay neutral and flexible; once a single ingredient dominates, its usefulness narrows fast.
Cruciferous vegetables—broccoli, cabbage, cauliflower, Brussels sprouts—don’t hold up to a long extraction. Given time and heat, they release sulfur compounds that turn harsh, bitter, and slightly metallic. What works in a quick cook becomes aggressive in a simmer, and once that edge shows up, it only intensifies. Starchy vegetables like potatoes and large amounts of squash create a different problem. They absorb flavor while releasing starch into the liquid, leaving the broth cloudy and dulled. Instead of building structure, they soften it—flattening the profile and muddying the finish.
The Scrap Bag: What Earns Its Place
Scraps are where vegetable broth becomes both practical and personal—but not all scraps are equal. The ones worth saving are the ones that still carry structure and flavor. What you’re collecting isn’t waste—it’s concentration. These are the parts that often hold just as much flavor as what made it onto the plate, sometimes more. Over time, a well-managed scrap bag becomes layered by default, giving you a broader, more developed base without having to reach for fresh ingredients every time.
That said, intention still applies. A scrap bag isn’t a catch-all—it’s a curated extension of your kitchen. The same rules still matter: balance, proportion, and restraint. Too many sweet scraps will flatten the broth. Too many green elements will muddy it. What goes in should still reflect the kind of broth you want to end up with. Onion skins bring color and a subtle depth that reads more complex than their simplicity suggests. Carrot peels and ends reinforce sweetness without overpowering. Celery leaves and root ends maintain that familiar aromatic backbone, while mushroom stems contribute body and umami that help round everything out. Leek tops offer a softer, greener allium note—less sharp than onion, but just as important in building balance.
And above all, it has to be clean. Scraps should come from vegetables that were properly washed before trimming—no dirt, no grit, no exceptions. That isn’t something you can fix later. Whatever goes into the bag is exactly what ends up in the pot, and from there, into everything you build from it. If you don’t want the flavor in your broth, leave it out of the bag.
Ingredient Check
Curious about how an ingredient would impact the flavor profile of a broth? Select from the list below to see my notes on each.
A problem was detected in the following Form. Submitting it could result in errors. Please contact the site administrator.
Conclusion
A good vegetable broth isn’t built on variety—it’s built on restraint. The goal isn’t to load the pot with everything available, but to build something clear, balanced, and intentional. Complexity doesn’t come from quantity; it comes from how well each ingredient is chosen and how it behaves over time. Every ingredient should earn its place. If it doesn’t contribute structure, depth, or clarity, it doesn’t belong in the pot. That mindset shifts broth from something passive into something deliberate—less about using what you have, and more about deciding what actually serves the end result.
It helps to think of vegetable broth less like a fixed recipe and more like a framework you refine over time. You start with a foundation, build with intention, and adjust as needed. That might mean pulling back on certain elements, holding others until later, or leaving something out entirely. Balance is what defines the final result. Too many sweet vegetables and the broth turns flat, almost syrupy in character. Too many greens and it leans muddy, losing definition. Too many strong or assertive elements and the entire profile tips into bitterness or imbalance. None of these happen all at once—they creep in gradually, which is why control matters from the start.
In the end, the difference between a broth that supports a dish and one that competes with it comes down to editing. Not what you add—but what you choose to leave out.
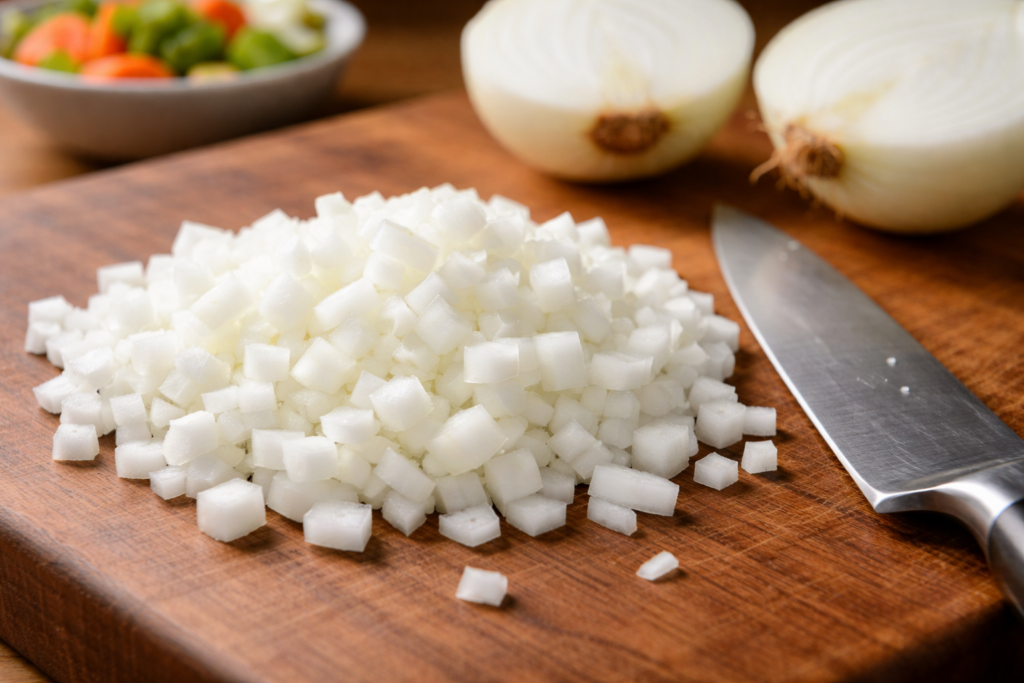
Dicing an onion is one of the first knife skills most people learn, but it’s also one of the most commonly rushed. The result is often uneven pieces, wasted product, or an unstable onion that makes the process harder than it needs to be.
A proper dice isn’t about speed. It’s about control, consistency, and using the structure of the onion to guide your cuts.
The Perfect Onion Dice
A foundational cut, done properly.
Dicing an onion is one of the first knife skills most people learn, but it’s also one of the most commonly rushed. The result is often uneven pieces, wasted product, or an unstable onion that makes the process harder than it needs to be. A proper dice isn’t about speed. It’s about control, consistency, and using the structure of the onion to guide your cuts.
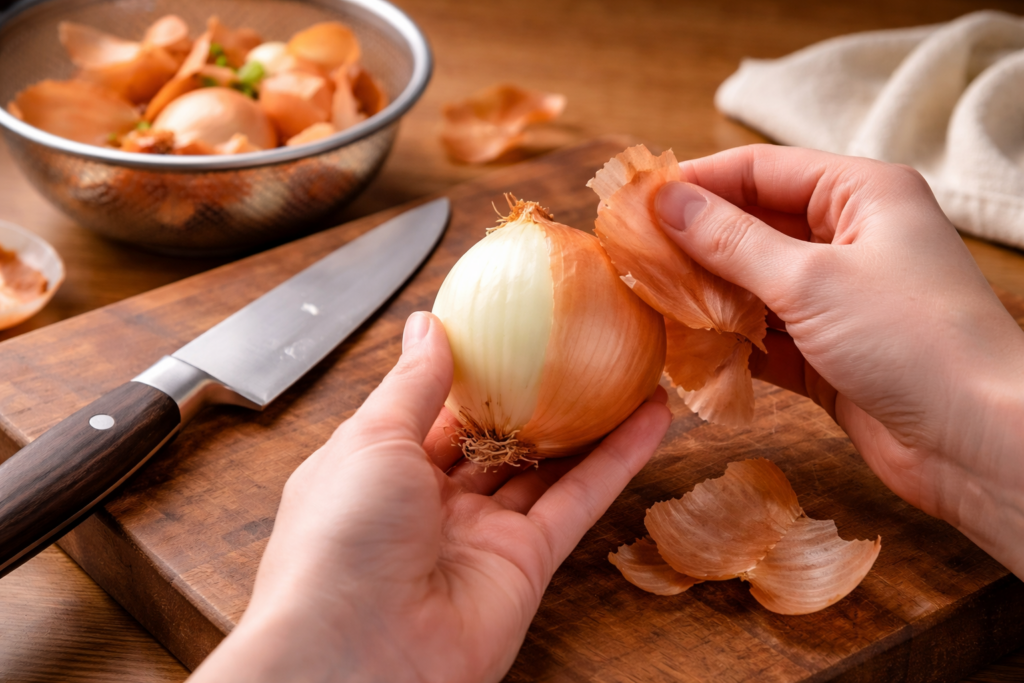
Step 1: Start Clean
Before making a single cut, remove the papery outer skin of the onion. Once peeled, give the whole onion a quick rinse under cold water to remove any residual skin or debris, then dry it thoroughly with a paper towel. Starting with a clean, dry surface makes the onion easier to handle and keeps your knife from slipping.
After peeling and drying, trim the stem end, then slice the onion in half from root to tip, leaving the root intact. The root holds the layers together and gives you control as you work. If the first outer layer beneath the skin feels dry or tough, it can be removed and discarded, as it doesn’t always soften well when cooked.
Place each half flat-side down on the cutting board to create a stable base.
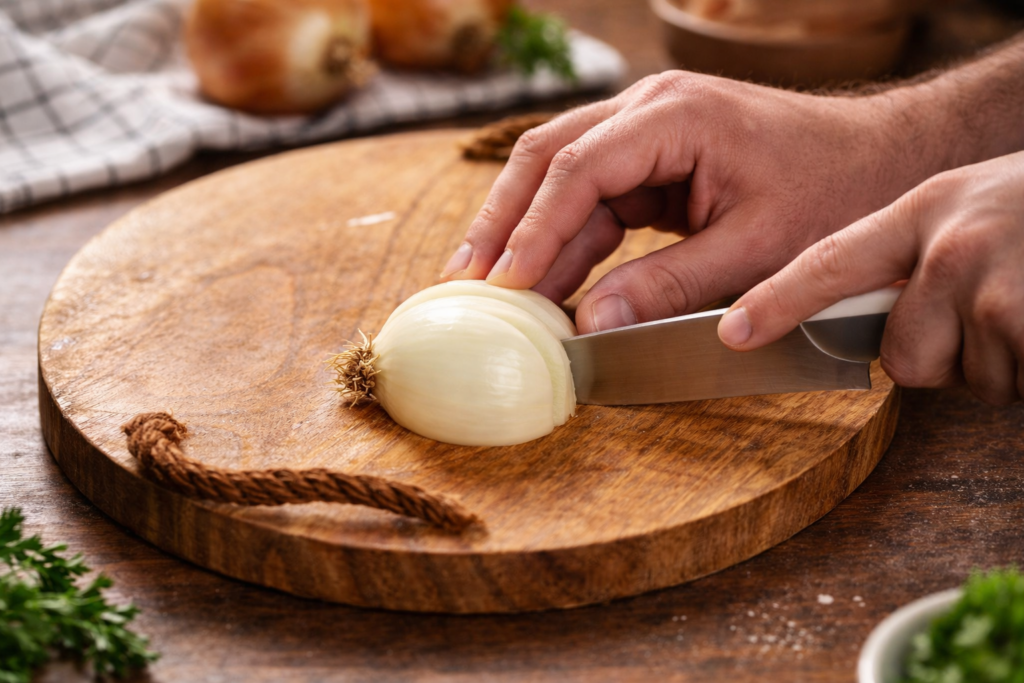
Step 2: Work with the Grain
An onion is naturally structured in lines that run from root to tip, and those lines are your guide. Make your first series of cuts vertically, following those natural lines. The spacing of these cuts determines the final size of your dice. For a finer dice, keep the cuts closer together; for a larger dice, give them more space.
Next, make one or two horizontal cuts parallel to the cutting board. This step creates the internal structure that allows the onion to fall into evenly sized pieces once you begin slicing downward. Keep your knife level and controlled as you work.
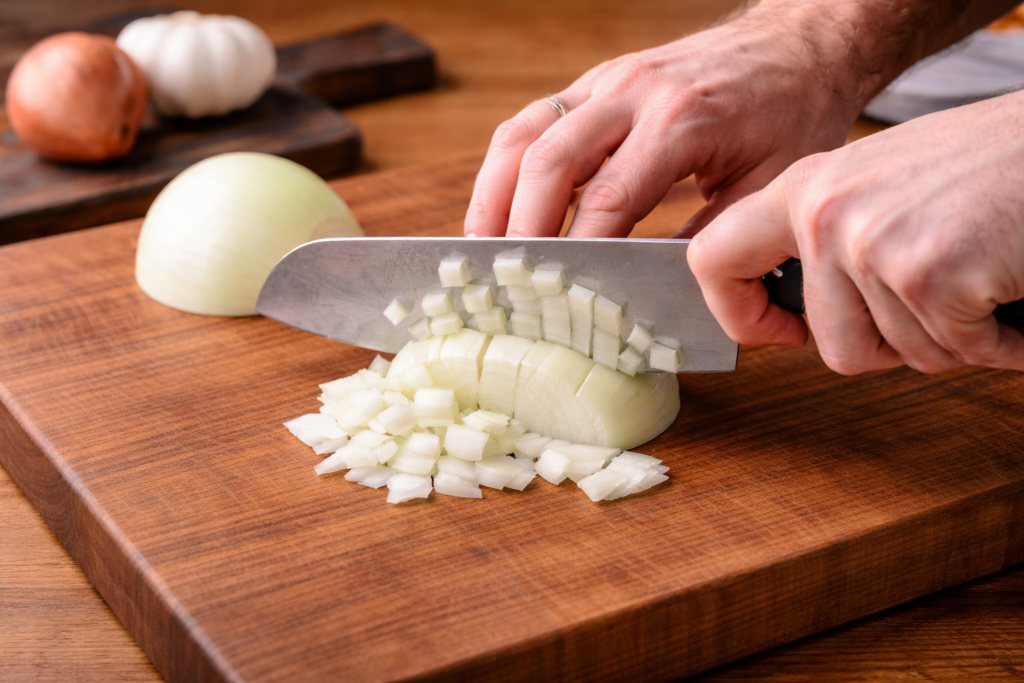
Step 3: Let the Knife Do the Work
With the structure in place, the final cuts are straightforward. Slice downward across the onion, perpendicular to your earlier cuts. As you move from front to back, the onion will separate naturally into a uniform dice. Keep your guiding hand in a claw position, letting your knuckles lead the blade while your fingertips stay tucked safely away. This helps maintain even spacing and gives you better control with each cut. As you approach the root end, you’ll notice the layers begin to hold together more tightly. Rather than forcing the knife through, stop and set that portion aside.
TIP: Instead of worrying about dicing the last inch or so near the root, simply trim it off and save it with your vegetable scraps for broth. Clean onion skins, celery stalks and inner leaves, tomato trimmings, well-washed potato peels (free of dirt and dark spots), parsnip and carrot tops and skins, along with fennel, leek, garlic, and shallot scraps can all be collected and stored in the freezer. Once you have enough, they can be used to make a deeply flavorful vegetable broth—turning what would have been waste into something useful. Check out my post on Building the Perfect Vegetable Broth.
Conclusion.
A proper dice should be uniform. Even pieces cook evenly, distribute flavor more consistently, and improve the overall texture of a dish. Speed will come naturally with repetition, but control is what matters—working steadily and deliberately will always produce better results than rushing.
This same method applies whether you’re building a base for a sauce, layering flavor into a soup, or finishing a dish with a finer garnish. Once the structure is understood, the technique scales easily without changing the fundamentals, making it one of the most useful skills to carry through everything else you cook.
Onions have been feeding people for thousands of years, long before written recipes existed. They’re one of the earliest cultivated crops, valued not just for their flavor, but for their ability to store well and travel. Ancient civilizations used them as both food and medicine, and they became a staple across cultures because they were reliable, accessible, and endlessly adaptable.
Onion
Layers of Flavor
Understanding onions isn’t just about knowing what they are. It’s about understanding how flavor is built from the very beginning. It’s easy to overlook because it’s always there. There are very few ingredients that show up as consistently—or matter as much—as the onion. It’s in the background of soups, stews, sauces, sautés, braises, and roasts. It’s often the first thing in the pan and rarely the star on the plate, but it’s doing more work than almost anything else in your kitchen. If your food ever feels flat, there’s a good chance the issue isn’t salt or spice—it’s how your onions were handled.
Onions don’t just shape flavor—they carry a quiet layer of nutritional value as well. They’re mostly water, but what’s left includes vitamin C, B6, folate, and potassium, along with antioxidant compounds like quercetin. None of it is overwhelming on its own, but onions show up often enough in cooking that they contribute more than they get credit for. What matters even more is the chemistry behind their flavor—because that’s what determines how they behave in a pan.
Onions also behave very differently depending on how you use them. Raw, they’re sharp, bright, and assertive, driven by sulfur compounds that create their bite. Cook them, and that edge softens as those compounds begin to break down, shifting the onion into something sweeter, rounder, and easier to integrate into a dish. That transition—from raw to cooked—is the foundation of how onions work.
A Brief History
Onions have been feeding people for thousands of years, long before written recipes existed. They’re one of the earliest cultivated crops, valued not just for their flavor, but for their ability to store well, travel easily, and grow in a wide range of climates. Long before refrigeration or modern supply chains, that kind of reliability mattered. Onions could be harvested, dried, and kept for months, making them a dependable source of flavor and sustenance when fresh ingredients were scarce.
Ancient civilizations didn’t just cook with onions—they relied on them. They were used as food, as medicine, and even as a form of currency in some cultures. Their layered structure and resilience made them symbolic in certain traditions, but more importantly, they were practical. They could stretch a meal, add depth to simple ingredients, and bring life to otherwise bland staples like grains and legumes.
As trade routes expanded and cultures intersected, onions traveled with them. They adapted to new regions, new soils, and new cuisines, becoming deeply embedded in the way people cooked around the world. Whether raw, cooked down, pickled, or dried, onions proved themselves again and again as an ingredient that could shift with context while still doing the same essential job—building flavor.
That legacy still holds today. You’ll find onions at the foundation of cuisines across the globe—not because of tradition alone, but because they work. They’re one of the few ingredients that can be both subtle and transformative, capable of supporting a dish quietly or shaping it entirely depending on how they’re used.
Types of Onions — And When to Use Them
Yellow Onions: This is your workhorse. Yellow onions strike the best balance between sweetness and sharpness, which makes them ideal for most cooked applications. They break down well, develop deep flavor over time, and are the backbone of soups, sauces, braises, and anything that starts with a pan. If a recipe just says “onion,” this is usually what it means.
White Onions: Cleaner, sharper, and a little more direct. White onions have a more pronounced bite and a slightly lighter flavor than yellow onions. They’re commonly used in Latin American and Southwestern cooking, especially in salsas, raw applications, and quick-cooked dishes where you still want that brightness to come through.
Red Onions: Sharper raw, milder when handled properly. Red onions are often used raw—in salads, salsas, and garnishes—because of their color and bite. When treated correctly, they can also be softened or pickled to bring out a more balanced, slightly sweet flavor. They’re not just for color. They’re for contrast.
All(ium) in the Family
Onions are part of a larger family known as alliums—alongside garlic, shallots, leeks, scallions (aka green onions), and chives. What they share is that sharp, pungent bite when raw and the ability to mellow, sweeten, and deepen when cooked. That transformation is driven by the same underlying chemistry—compounds that start out intense and aggressive, then soften and round out with heat.
Each brings its own balance. Garlic is more intense and direct. Shallots are softer and slightly sweet. Leeks are mild and more vegetal. Scallions and chives add freshness and bite, often used toward the end rather than as a base. They’re not interchangeable, but they are closely related. Once you understand onions, the rest of the allium family becomes easier to use—whether you’re building depth at the start or adding brightness at the finish.
How Flavor Develops
What you do with an onion matters just as much—if not more—as which one you choose. If you throw onions into a hot pan and rush the process, you’ll get sharpness, uneven cooking, and often bitterness from partial burning. Onions need time and control. Starting them over lower heat allows them to release moisture gradually while the sulfur compounds responsible for their raw bite begin to break down, softening their edge and setting the stage for sweetness to develop. Heat, timing, and intention change everything. That’s where the depth comes from—not speed, but patience.
There’s also a practical side to this. Raw onions retain more of their sharp compounds and a bit more of their vitamin C, which is why they taste brighter but more aggressive. Cooking trades that sharpness for sweetness and makes the onion easier to integrate—not just in flavor, but in how it sits in the dish.
There’s a difference between:
Sweating onions(gentle heat, no browning) This is about softening, not coloring. The onions release moisture, turn translucent, and the sharp sulfur compounds mellow without developing much sweetness. You’re not building flavor yet—you’re removing harshness. This is the foundation for soups, sauces, and dishes where you want a clean, subtle base that supports everything else.
Sautéing onions(moderate heat, light color) Here, you’re building more dimension. As heat increases, those same compounds continue to break down while natural sugars begin to develop, giving you light golden edges and a balance of sweetness and sharpness. The onions still hold some structure, making this ideal for quick-cooked dishes where they should be present but not dominant.
Caramelizing onions(low and slow, deep brown) This is where transformation fully takes hold. Over time, sugars concentrate and deepen, and the last of the onion’s sharpness disappears as those earlier compounds fully break down. What’s left is something entirely different—deeply golden, soft, rich, and almost jam-like. This isn’t something you rush—it’s something you commit to.
Each of these approaches creates a completely different result, even though the ingredient is the same. Once you understand how to control that transformation—what’s happening as moisture releases, compounds break down, and sugars develop—you’re not just cooking onions. You’re deciding how the entire dish is going to taste.
Global Foundations
Almost every cuisine has its own version of starting with onions.
French and Cajun cooking builds flavor with mirepoix—a mix of onions, carrots, and celery.
Italian cooking uses a similar base called soffritto.
Spanish and Latin cuisines also rely on sofrito, but their blend is often layered with garlic, green or red peppers, and herbs like culantro and cilantro.
South Asian cooking frequently starts with onions cooked down into deeply-spiced bases.
Middle Eastern and North African cuisines use onions as the backbone of stews, rice dishes, and braises.
Different ingredients, different techniques—but the same idea: Onions are where flavor begins.
Final Thoughts
Onions aren’t just another ingredient on a list. They’re the starting point for how a dish is built. They shape sweetness, depth, aroma, and balance. They carry other flavors, bridge ingredients, and give structure to something that would otherwise feel flat or disconnected. That’s why they show up everywhere—not by accident, but because they work. Quietly, consistently, and fundamentally. When you understand onions—how to choose them, cut them, and cook them—you’re not just improving one recipe. You’re improving everything you make.
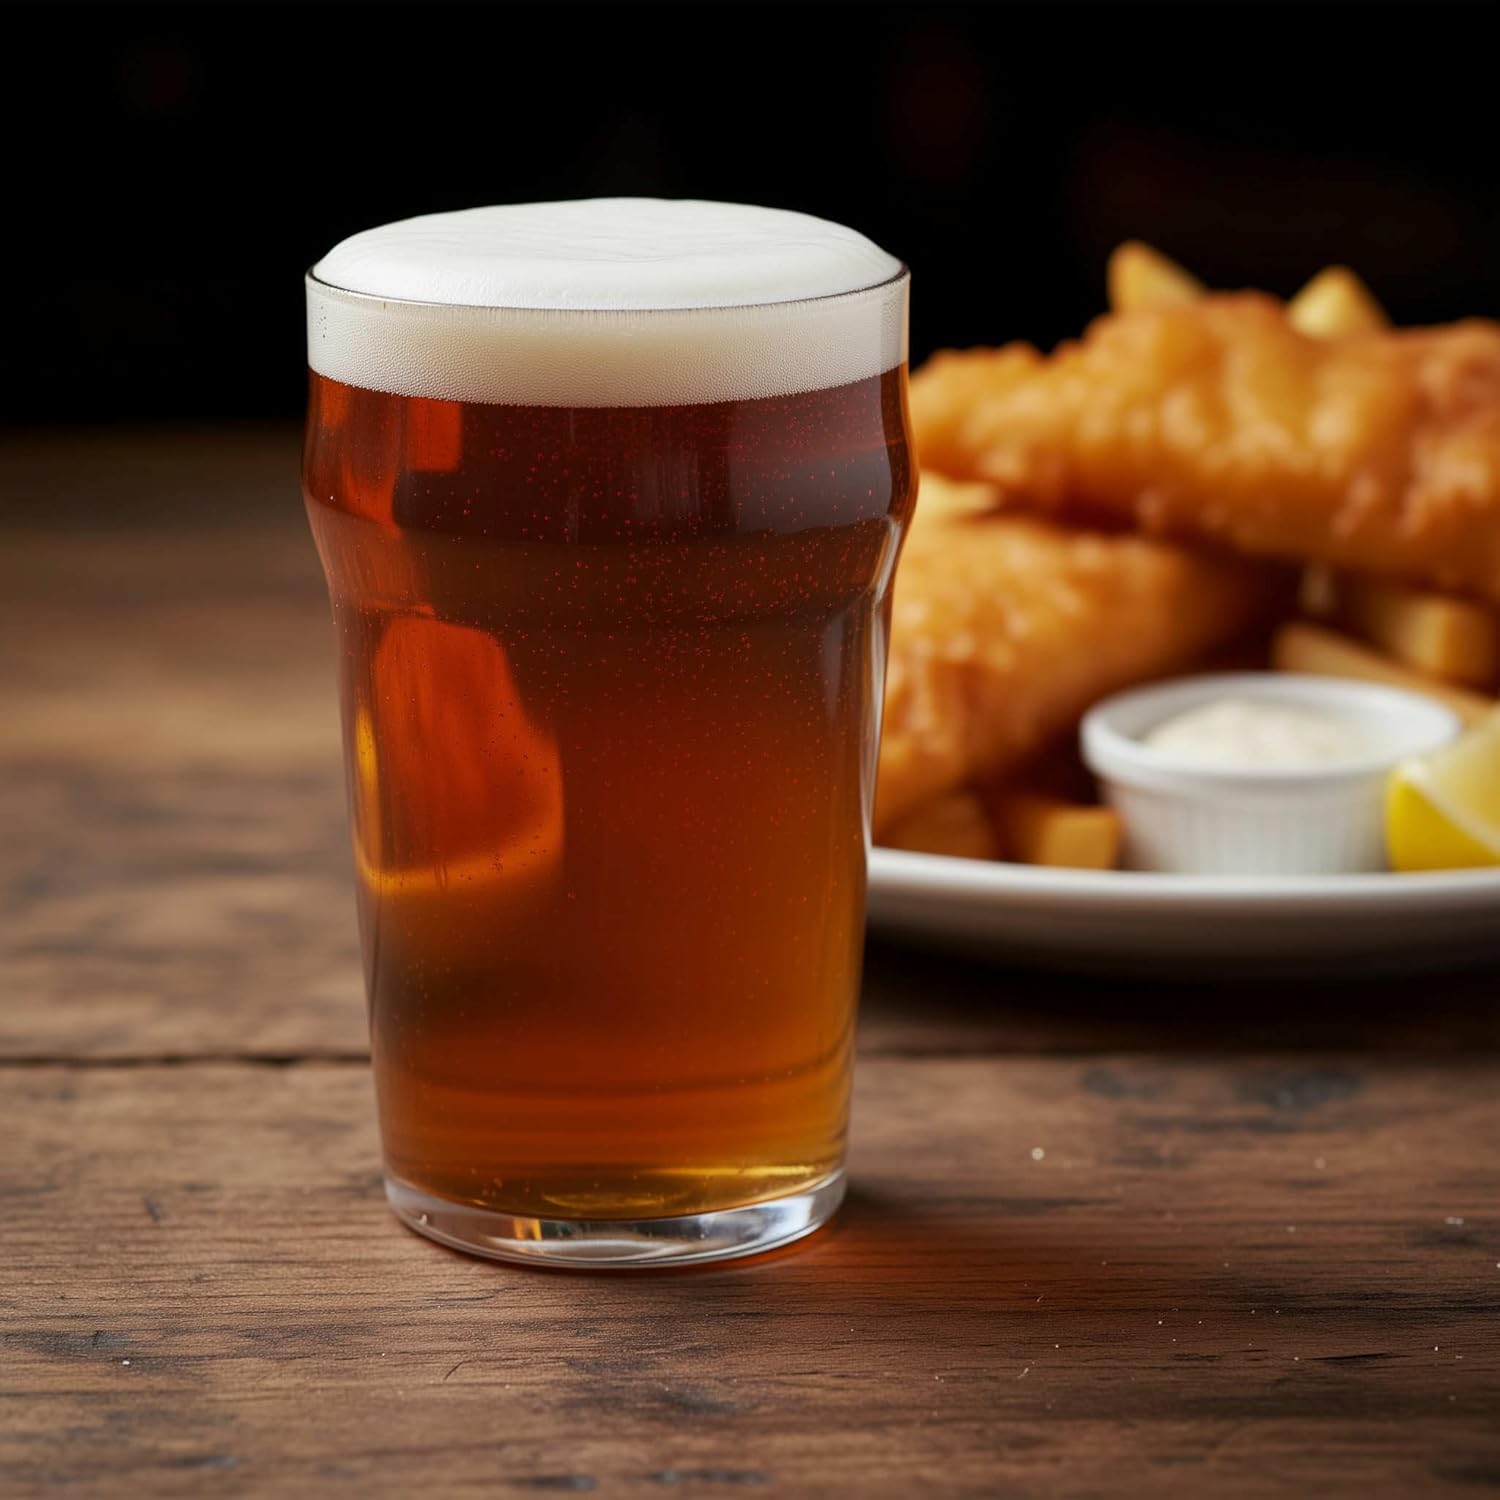
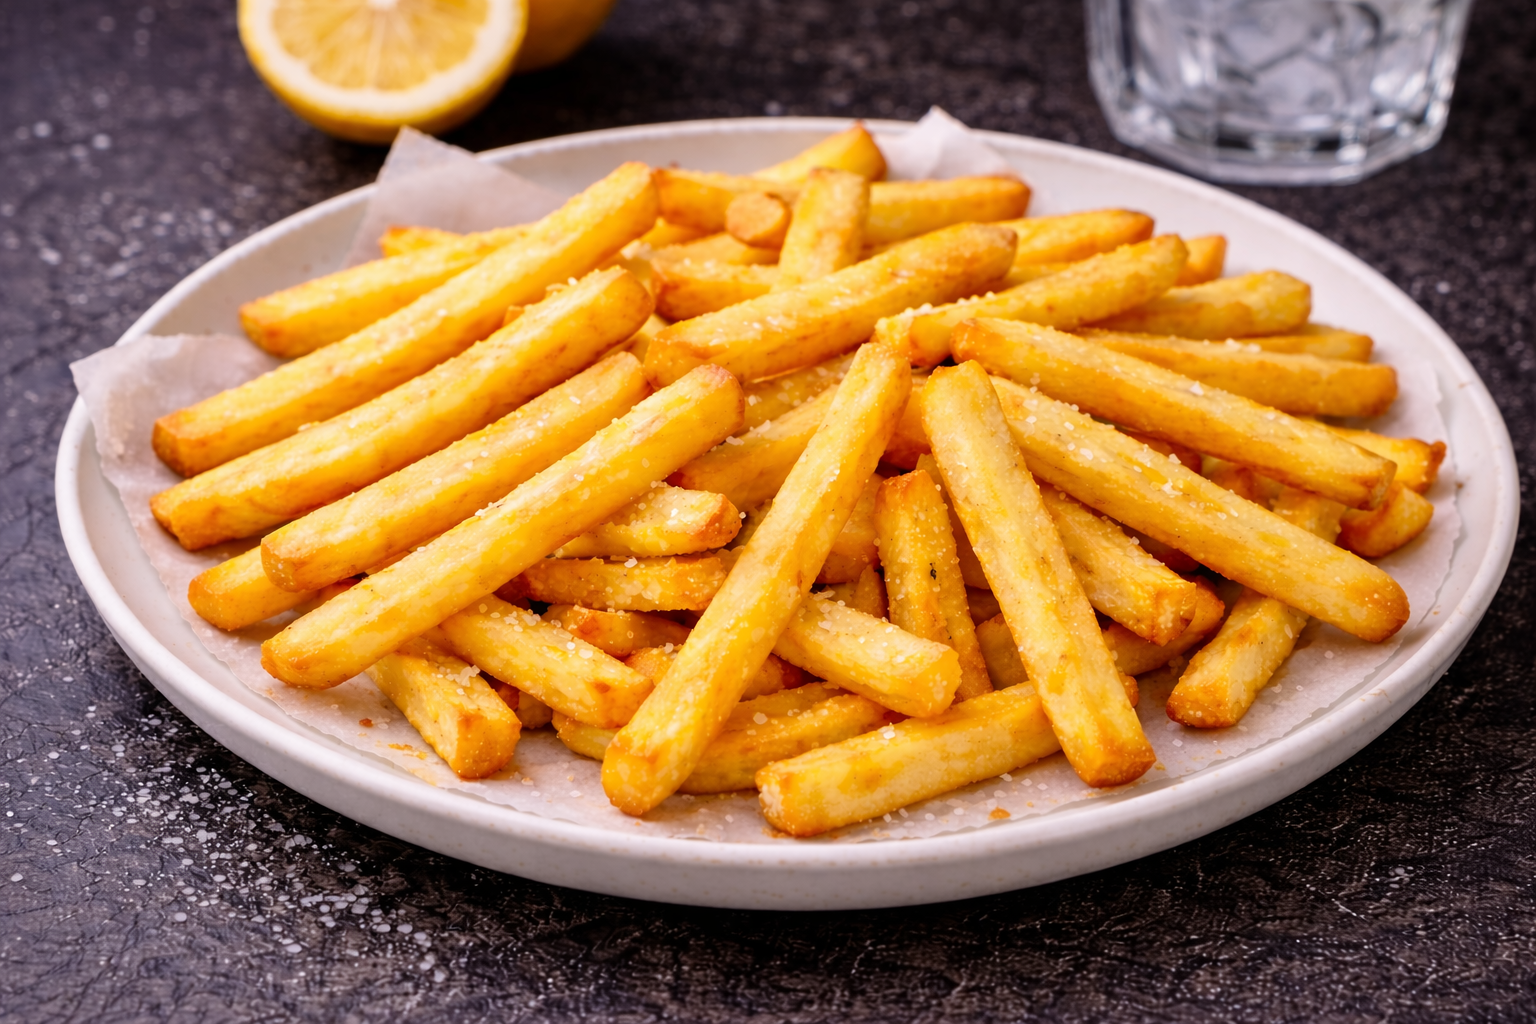
Classic hand-cut pommes frites made using the traditional double-fry method with a twist: a gentle vinegar blanch at a low temperature, an initial fry, a rest in the refrigerator, and a final fry. The technique produces fries that are beautifully crisp on the outside and a soft, fluffy inside.
Despite the name, French fries don’t originate in France. They trace back to Belgium, where potatoes were fried in fat as early as the late 1600s. The name likely came later, popularized by English speakers who associated the technique with French culinary terminology.
Whatever you call them, great fries aren’t accidental. The difference between limp and exceptional comes down to technique—how the potatoes are cut, treated, and cooked from start to finish. This method leans into those details to create fries that are crisp on the outside and soft, almost pillowy, on the inside.
Why the potato matters.
Not all potatoes behave the same when fried. For fries, a high-starch potato is the goal. Starchier varieties break down just enough during cooking to create that fluffy interior, while also allowing the exterior to crisp properly in hot oil.
Lower-starch potatoes tend to hold their structure too well, resulting in a firmer, less airy center and a less defined crust. Starting with the right potato sets the foundation for everything that follows.
The importance of blanching.
Handled carefully, this step sets up both the texture and the finish. Just like the Golden Girls wouldn’t have worked without Blanche, your fries won’t be as golden without this step. Instead of relying on a long soak alone, the potatoes are blanched in water with a small amount of vinegar. This step does more than just par-cook the fries—it actively improves their structure and color.
The vinegar introduces a gentle acidity that helps the exterior of the potatoes hold together, preventing them from breaking down or turning mushy during frying. At the same time, the hot water draws out excess surface sugars, which reduces premature browning in the oil and allows the fries to develop a more even, golden color later on.
Drying and the first fry.
After blanching, the potatoes are dried thoroughly before hitting the oil. Removing surface moisture is critical—any remaining water interferes with frying and prevents the exterior from setting properly.
The first fry is quick and intentional. It cooks the potatoes through without adding color, creating the soft interior that defines a great fry. At this stage, the fries are pale and delicate, but structurally prepared for what comes next.
Why the chill and second fry matter.
Once the first fry is complete, the fries are chilled before going back into the oil. This pause allows the interior to firm up slightly and the exterior to dry out further, which is essential for achieving that final crisp texture.
The second fry is where everything comes together. The hotter oil finishes the exterior, creating a golden, crisp shell while the inside remains tender. This two-step frying method is standard in professional kitchens for a reason—it consistently delivers fries with contrast, structure, and balance.
Salt is added only after this final fry, ensuring it adheres to the surface without interfering with the oil during cooking.
Simple, but not careless.
Hand-cut fries are a perfect example of how a simple dish can benefit from precision. Each step—cutting, blanching, drying, frying, and resting—builds toward a final result that feels intentional rather than incidental.
You’ll find the full method outlined below, from cutting the batons to the double fry that brings everything together. The process takes a little time, but most of it is hands-off, and the payoff is fries that are crisp, golden, and built the way they’re meant to be.
Hand Cut Pommes Frites
Classic hand-cut pommes frites made using the traditional double-fry method with a twist: a gentle vinegar blanch at a low temperature, an initial fry, a rest in the refrigerator, and a final fry. The technique produces fries that are beautifully crisp on the outside and a soft, fluffy inside.
Wash and peel potatoes, making sure to re-rinse each potato after peeling, drying each with a paper towel, and setting aside on butcher block for next step.
Cut
Using your chef's knife, cut potatoes into ¼"(6mm) batons.
Place cut batons into a bowl of lightly-salted water to prevent browning as you cut all the potatoes. Though the cut batons soak here, I veer from the traditional longer soak method and opt for blanching (see below).
Rinse
Carefully transfer cut batons into a strainer or colander and rinse thoroughly under running water for about 30 seconds.
Vinegar Blanch
Carefully transfer rinsed batons into a 6-quart stockpot and add 1 tbsp salt, 2 quarts water, and 2 tbsp white vinegar to the pot. Bring pot to a boil over high heat, immediately reducing heat to low once it reaches a boil. Cook for 10 minutes, then carefully transfer batons back into colander using a spider strainer or slotted spoon.
TIP: DO NOTdump stock pot into colander! Blanching has softened the batons and they will break.
Sheet-Pan Dry
Line two baking sheets with paper towels.
Carefully spread the batons evenly on lined baking sheets and leave to dry for at least 5 minutes.
Carefully lift paper towel with dried batons from baking sheet and place onn counter.
Re-line baking sheets with fresh paper towels.
Frying - Round One
Heat 1 quart canola (or peanut) oil to 400℉ in wok (or fry pan) over medium-high heat.
TIP: After 2-3 minutes of burner being on, place a toothpick in the oil. You know the oil is ready (hot enough) when bubbles form around the toothpick.
Using a spiderweb or slotted spoon, lower potato batons in small batches and cook for 1 minute, moving them around once or twice while they cook. Remove from oil and place cooked fries onto freshly-lined baking sheet.
TIP: DO NOT salt the fries when they come out of the oil during the first round of frying. Salt breaks down the fat in the oil and also reduces the smoking point, so if you salt them during this round, you will be adding tons of salt to the oil during round two of frying and your fries will not cook properly.
Repeat with small batches until all fries are cooked.
Chill
Place fries to chill in refrigerator to chill for a minimum of 30 minute
TIP: If you have to prep other parts of your meal, this is the perfect time to do it. Save Round Two of frying for the final step in your meal prep so your fries are piping hot when served.
Frying - Round Two
Line a large bowl with paper towels.
Reheat the canola (or peanut) oil to 400℉ in wok (or fry pan) over medium-high heat.
Fry half the fries for 4 minutes, moving them around once or twice, until golden and crispy, transferring cooked fried to the lined bowl.
Repeat with second half, then sprinkle with salt (or preferred seasoning). Gently toss to coat the fries with seasoning and serve!